WordPress Plug-in Development using TDD, Docker and WpUnitTestCase
Table Of Contents
If you landed in this article is because you already are aware that testing your projects is important.
Also, you might already be aware that testing in WordPress is hard, very hard, since it has hundreds upon hundreds of functions that you need to Mock to make your code work.
Finally, you might also be ware that setting up testing in a project that uses a databases is something that can be complex for the amount of non portable configuration it involves.
Well, you are in the right place, because here I’m going to show you how to configure testing in you WordPress plug-in using nothing but docker so you can distribute your environment with your team or move it to a new machine easily.
Pre-requisites
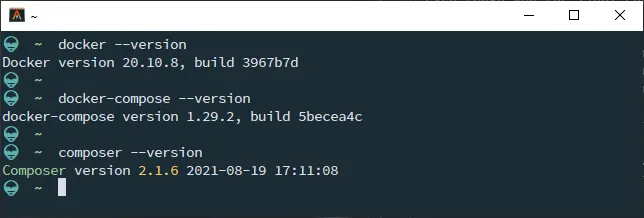
Even though you the final environment is pretty portable, you still need to install a couple of pieces of software, being the more obvious Docker
Optionally, you can install composer in your development machine. This is optional since we are going to install composer in our Docker container, but having a local instance will speed up your development process. Specially if you want to execute phpcs or phpcbf (wich we won’t touch in this article) against your code.
Before we continue, make sure you have access to the docker-compose command. Unless you have a very old version of Docker, you must have access to it.
Create a plugin
For this example we’re going to test a very simple WordPress plugin. And the beauty of our current approach, is that you can create this plug-in wherever you want. You don’t need a WordPress installation nor a database or an Apache server.
So create an empty directory…
mkdir wordpress-tdd-plugin
cd $_
git init
touch .gitignore
git add .
git commit -m "First commit"
git branch -m main
And then create the plug-in file itself.
We are going to do a very simple plug-in that provides the tdd-shortcode shortcode making sure that it uses some native WordPress functions. For that we just need to create the file wordpress-tdd-pluging.php in our directory with the following content:
<?php
/**
 * Plugin Name:       WordPress TDD Plugin
 * Plugin URI:        https://marioyepes.com
 * Description:       Example plugin on how to use TDD in WordPress
 * Version:           1.0.0
 * Requires at least: 4.0
 * Requires PHP:      7.2
 * Author:            Mario Yepes
 * Author URI:        https://marioyepes.com
 * License:           GPL v2 or later
 * License URI:       https://www.gnu.org/licenses/gpl-2.0.html
 * Update URI:        https://example.com/my-plugin/
 * Text Domain:       wp-tdd
 * Domain Path:       /languages
 */

function create_shorcode_tdd_plugin( $atts, $content = '' ) {

        $default_font  = get_option( 'tdd_font', 'Arial, Helvetica, sans-serif');
        $default_color = get_option( 'tdd_color', '');
        $atts          = shortcode_atts(array(
                'font' => $default_font,
                'color' => $default_color,
                'weight' => 'normal'
        ), $atts);

        return '<div style="font-family: ' . $atts['font'] .  '; color: ' . $atts['color'] .
                '; font-weight: ' .  $atts['weight'] . '">' . $content . '</div>';
}

add_shortcode( 'tdd-shortcode', 'create_shorcode_tdd_plugin' );
Right from the start you can see that this plug-in is going to be somewhat difficult to test since it uses the get_option and add_shortcode WordPress functions. But that’s something we’re going to solve in the following steps.
Creating the Application Server
And by Application Server I mean the Docker Container that will run Apache and PHP (not MySQL). And for that we’ll create our first Docker image using the following Dockerfile
# Dockerfile
FROM wordpress

ARG PLUGIN_NAME=wordpres-tdd-plugin

# Setup the OS
RUN apt-get -qq update ; apt-get -y install unzip curl sudo subversion mariadb-client \
        && apt-get autoclean \
        && chsh -s /bin/bash www-data

# Install wp-cli
RUN curl https://raw.githubusercontent.com/wp-cli/builds/gh-pages/phar/wp-cli.phar > /usr/local/bin/wp-cli.phar \
        && echo "#!/bin/bash" > /usr/local/bin/wp-cli \
        && echo "su www-data -c \"/usr/local/bin/wp-cli.phar --path=/var/www/html \$*\"" >> /usr/local/bin/wp-cli \
        && chmod 755 /usr/local/bin/wp-cli* \
        && echo "*** wp-cli command installed"

# Install composer
RUN php -r "copy('https://getcomposer.org/installer', 'composer-setup.php');" \
        && php composer-setup.php \
        && php -r "unlink('composer-setup.php');" \
        && mv composer.phar /usr/local/bin/ \
        && echo "#!/bin/bash" > /usr/local/bin/composer \
        && echo "su www-data -c \"/usr/local/bin/composer.phar --working-dir=/var/www/html/wp-content/plugins/${PLUGIN_NAME} \$*\"" >> /usr/local/bin/composer \
        && chmod ugo+x /usr/local/bin/composer \
        && echo "*** composer command installed"
This will create a “Virtual Machine” (Is not a virtual machine but it helps to think of it as one) based in the official Docker WordPress image with 3 modifications:
- First we add some packages to the underlying OS:
unzip,curl,sudo,subversion,mariadb-client - Then we install
wp-cliand create a script that executes it as thewww-datauser and is aware of our WordPress installation path - Finally we install
composerand create a script that runs it as thewww-dataand is aware of the path of our plug-in
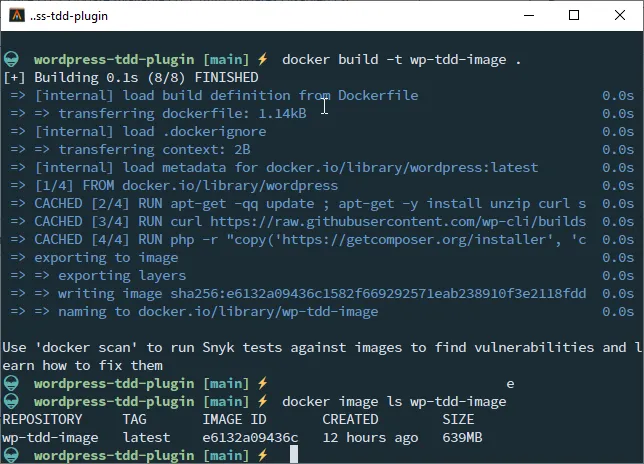
To convert this file to something we can run, we need to create an image. This is achieved with the following command:
docker build -t wp-tdd-image .
docker images # to verify it's creation
Note that I’m building the image with the
wp-tdd-imagetag.
This creates the Docker Image, but it doesn’t run it. For that we need to execute it:
docker run --rm -p 8080:80 wp-tdd-image
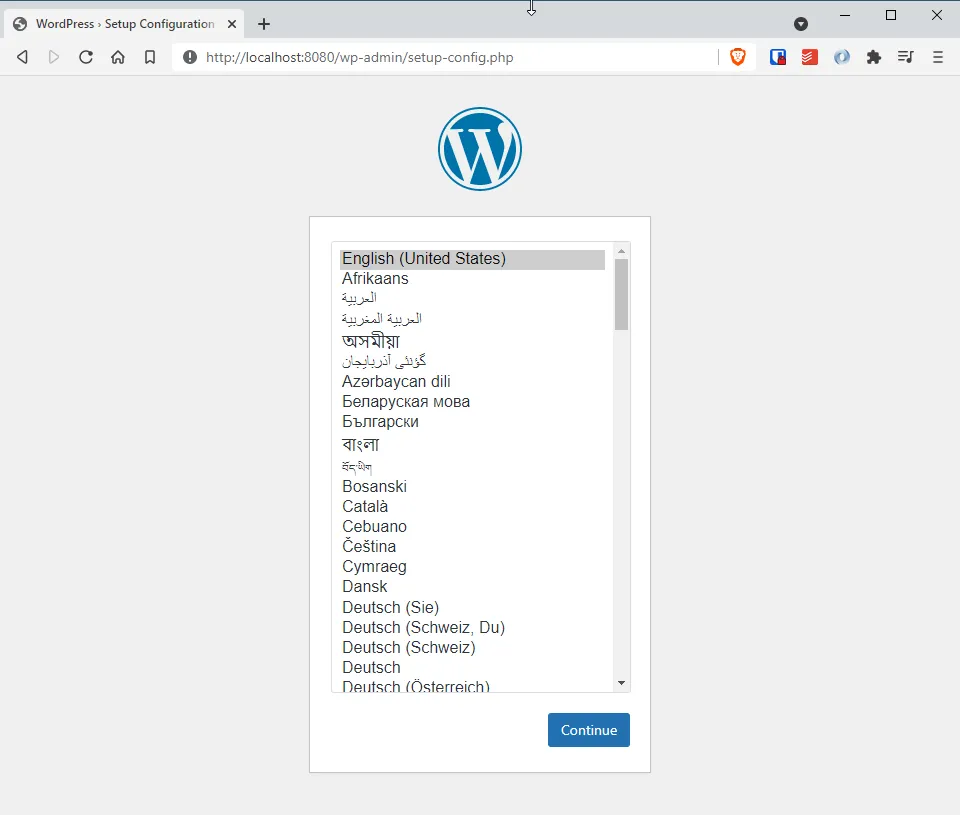
And to verify that is actually running, visit http://localhost:8080. Do not run the installer. It will fail since we still haven’t provided a database.
Now that we know that the Dockerfile works, we can remove the image with
docker image rmi wp-tdd-image
Adding a database
Instead of adding a database to our current image (aka current virtual machine), we’re going to use an already created image. But for that to work we have to use docker-compose which requires the new file docker-compose.yml:
# docker-compose.yml
version: "3"

services:
  # MySQL database
  db:
    image: mariadb
    restart: unless-stopped
    container_name: tdd-plugin-db
    environment:
      MYSQL_ROOT_PASSWORD: root
      MYSQL_DATABASE: wordpress
      MYSQL_USER: wordpress
      MYSQL_PASSWORD: wordpress
    volumes:
      - db-data:/var/lib/mysql

  # Wordpress
  wp:
    build:
      context: .
      dockerfile: Dockerfile
    restart: unless-stopped
    container_name: tdd-plugin-app
    environment:
      WORDPRESS_DB_HOST: tdd-plugin-db
      WORDPRESS_DB_USER: wordpress
      WORDPRESS_DB_PASSWORD: wordpress
      WORDPRESS_DB_NAME: wordpress
      WORDPRESS_DEBUG: 1
    volumes:
      - wp-data:/var/www/html
      - ./:/var/www/html/wp-content/plugins/wordpress-tdd-plugin
    ports:
      - 8080:80
    depends_on:
      - db

# Make network name pretty
networks:
  default:
    name: tdd-plugin-network

# Persist DB and WordPress data across containers
volumes:
  db-data:
  wp-data:
Let’s explain a little this docker-compose.yml. First the part of the MySQL image:
- I’m using the
mariadbimage since is more lightweight that MySQL and is binary compatible. - The name of the database host will be
tdd-plugin-db - I’m using
wordpressas the username, db name and password - The password for the MySQL root user is
root - I’m persisting the MySQL datafiles so the remain the same between containers
Now, for the WordPress image, I’m telling docker-compose to use the Dockerfile and:
- Use “wordpress” as the username, password and database name
- Connect to the host
tdd-plugin-dbfor the database - Persist the data in
/var/www/htmlbetween containers - Share the local directory with the container with the path
/var/www/html/wp-content/plugins/wordpress-tdd-plugin - Run in port
8080
Finally, let’s install WordPress by starting this environment a visiting http://localhost:8080 to get the WordPress install wizard
docker-compose up
# Open your browser and go to http://localhost:8080
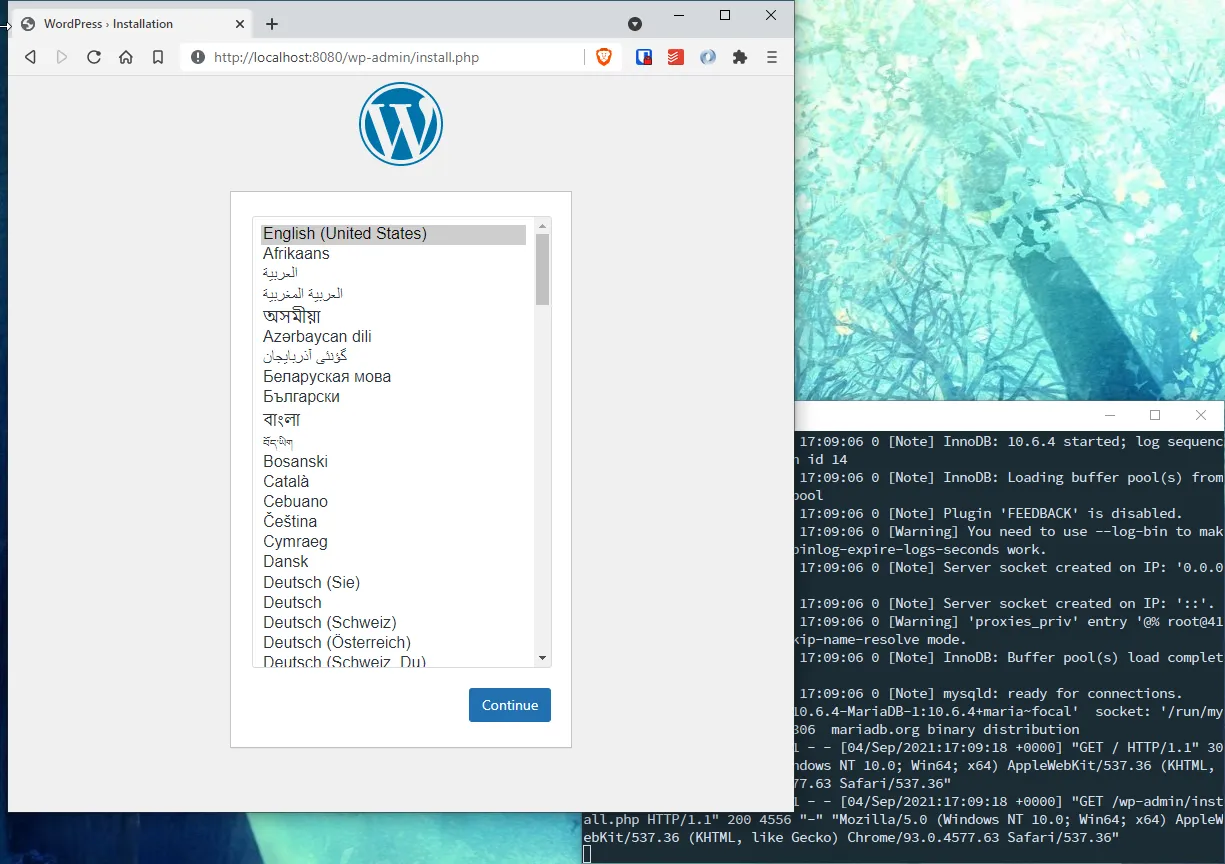
Now you can install WordPress and verify that the plug-in is present and valid by visiting your http://localhost:8080/wp-admin/plugins.php page:
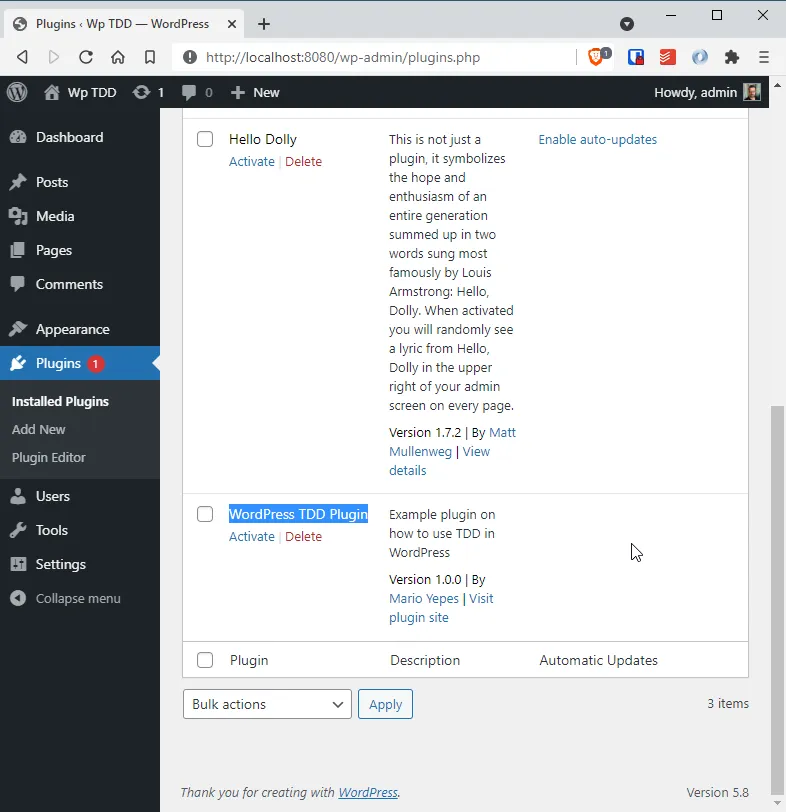
This is why I love Docker… It saves me the trouble of installing those tools in my machine. Also, it guards me from running into compatibility issues since every development environment is completely isolated from any other project you have.
Setting up testing
This is the challenging part. Not because is hard, but because it has a couple of tricks.
If you read carefully the Dockerfile we used to setup wordpress, you might have noticed that we installed wp-cli and composer inside the image. The reason for that is so we can:
- Scaffold the testing for our plugin
- Execute the tests
So, open another terminal (since the docker-compose is using the one you previously had) and execute the following:
docker-compose exec wp wp-cli scaffold plugin-tests wordpress-tdd-plugin
wordpres-tdd-pluginis the name of our current plug-in
This command is supposed to scaffold, or initialize, the testing files in your plug-in directory. The docker-compose exec wp part of the command is to have it be executed inside the current running container.
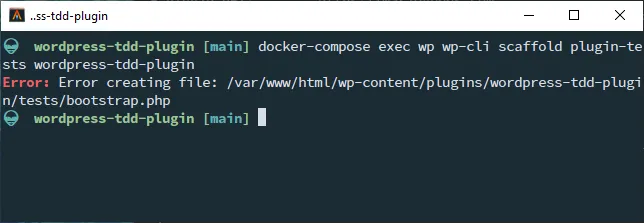
It fails… The reason being that the Docker container is trying to execute the command as the www-data user and your local machine either does not have that user, or that users exists but doesn’t have write access to your directory.
To solve this issue, we have to do our first trick:
- Create the
bin/andtests/directory inside your plug-in directory, with global write and execute permissions - Create the
.tavis.yml,.phpcs.xml.distandphpunit.xml.distfiles with global write permissions.
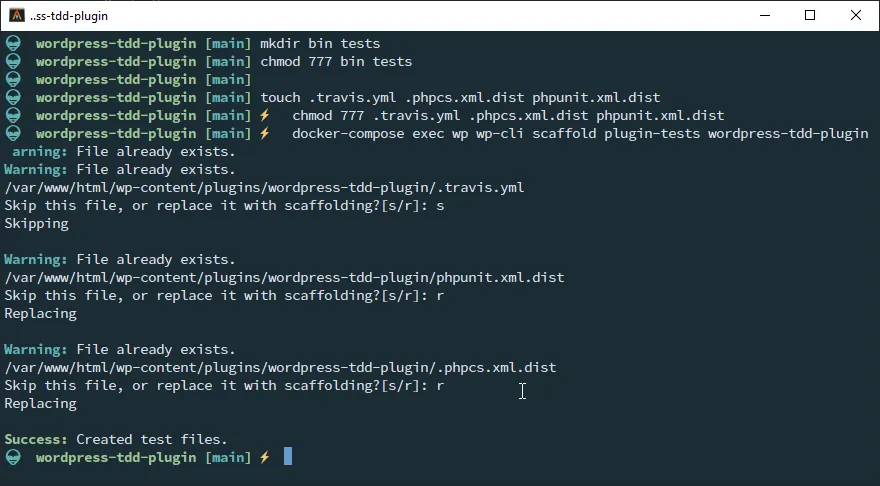
This time it works! And now we should have the following structure:
$ tree .
.
├── Dockerfile
├── bin
│   └── install-wp-tests.sh
├── docker-compose.yml
├── phpunit.xml.dist
├── tests
│   ├── bootstrap.php
│   └── test-sample.php
└── wordpress-tdd-plugin.php

2 directories, 7 files
We still don’t have tests, or even WordPress mock functions. But at least we have the means to create them.
So, What did we do????
What the docker-compose exec wp wp-cli scaffold plugin-tests wordpress-tdd-plugin command does is:
docker-compose exec wptells docker to execute what comes next inside the already runningwpdocker containerwp-cli scaffold-tests wordpress-tdd-plugininstructswp-clito create the testing files for the pluginwordpress-tdd-pluginplugin- The
bin/install-wp-tests.shscript is designed to create the testing environment for our plugin - The
tests/test-sample.phpis our first test
Upgrade the WordPress image
Believe it or not, we are not ready to start testing!
We have all the required files in place, but we still have to create a WordPress Testing Environment in our docker container. And for that we need to update our Dockerfile:
# Dockerfile
FROM wordpress

ARG PLUGIN_NAME=wordpres-tdd-plugin

# Setup the OS
RUN apt-get -qq update ; apt-get -y install unzip curl sudo subversion mariadb-client \
        && apt-get autoclean \
        && chsh -s /bin/bash www-data

# Install wp-cli
RUN curl https://raw.githubusercontent.com/wp-cli/builds/gh-pages/phar/wp-cli.phar > /usr/local/bin/wp-cli.phar \
        && echo "#!/bin/bash" > /usr/local/bin/wp-cli \
        && echo "su www-data -c \"/usr/local/bin/wp-cli.phar --path=/var/www/html \$*\"" >> /usr/local/bin/wp-cli \
        && chmod 755 /usr/local/bin/wp-cli* \
        && echo "*** wp-cli command installed"

# Install composer
RUN php -r "copy('https://getcomposer.org/installer', 'composer-setup.php');" \
        && php composer-setup.php \
        && php -r "unlink('composer-setup.php');" \
        && mv composer.phar /usr/local/bin/ \
        && echo "#!/bin/bash" > /usr/local/bin/composer \
        && echo "su www-data -c \"/usr/local/bin/composer.phar --working-dir=/var/www/html/wp-content/plugins/${PLUGIN_NAME} \$*\"" >> /usr/local/bin/composer \
        && chmod ugo+x /usr/local/bin/composer \
        && echo "*** composer command installed"

# Create testing environment
COPY --chmod=755 bin/install-wp-tests.sh /usr/local/bin/
RUN echo "#!/bin/bash" > /usr/local/bin/install-wp-tests \
        && echo "su www-data -c \"install-wp-tests.sh \${WORDPRESS_DB_NAME}_test root root \${WORDPRESS_DB_HOST} latest\"" >> /usr/local/bin/install-wp-tests \
        && chmod ugo+x /usr/local/bin/install-wp-test* \
        && su www-data -c "/usr/local/bin/install-wp-tests.sh ${WORDPRESS_DB_NAME}_test root root '' latest true" \
        && echo "*** install-wp-tests installed"
The changes are at the bottom, and we’re basically telling the wp image to copy the bin/install-wp-tests.sh files inside the container and execute that command upon container creation.
So, stop the containers by typing Ctrl-c in the terminal, and the rebuild the wp image with:
# Ctr-C on the terminal where docker is running
docker-compose build wp
docker-compose up
Install the WordPress test files and PHPUnit
In the last step we added the install-wp-tests command to our container. Now we have to execute it so it re-creates the WordPress testing files but with access to our database:
docker-compose exec wp install-wp-tests
What this does is to create a “mock” WordPress inside the container in the path /tmp/wordpress. This will enable us to make tests without the need to mock get_option and add_shortcode, or any other WordPress function, ourselves.
Then we need to install PHPUnit in our plug-in directory but using the same trick of creating empty files:
touch composer.json composer.lock
mkdir vendor
chmod 777 vendor composer.json composer.lock
docker-compose exec wp composer require phpunit/phpunit=^7
docker-compose exec wp install-wp-tests
- The first 2 commands creates some empty files and an empty directory
- Then, with
chmodwe make those files and directory writeable by anyone - Next we install the PHPUnit package using the
composercommand inside our container - Finally we create the Mock (testing) WordPress environment
Notice that we are using PHPUnit version 7 since that is the current version that WordPress supports.
Executing the sample-tests.php
We’re almost done with the setup. We just need to add a new scripts in our composer.json file so we can run our tests easily:
{
  "require": {
    "phpunit/phpunit": "^7"
  },
  "scripts": {
    "phpunit": "phpunit"
  }
}
And edit the phpunit.xml.dist file, enabling the sample test:
<?xml version="1.0"?>
<phpunit
    bootstrap="tests/bootstrap.php"
    backupGlobals="false"
    colors="true"
    convertErrorsToExceptions="true"
    convertNoticesToExceptions="true"
    convertWarningsToExceptions="true"
    >
    <testsuites>
            <testsuite name="sample">
                    <directory prefix="test-" suffix=".php">./tests/</directory>
                    <!-- <exclude>./tests/test-samplejG.php</exclude> -->
            </testsuite>
    </testsuites>
</phpunit>
Finally, execute the tests trough docker-compose:
docker-compose exec wp composer phpunit
And we’re done with the setup. Now let’s actually verify that we can test our plugin
Our first custom test
At the beginning of this article, we created a simple plug-in with a custom function that we wanted to test. We’re finally ready to verify that function by creating a test.
So create the tests/test-tdd-shortcode.php file with a custom test:
The name of the file has to start with
test-
<?php
/**
 * Class TddTest
 *
 * @package Wordpress_Tdd_Plugin
 */

/**
 * Wordpress TDD plugin tests
 */
class TddTest extends WP_UnitTestCase {

    /**
     * Test shortcode output
     */
    public function test_tdd_shortcode() {
        add_option('tdd_font', 'monospaced');
        add_option('tdd_color', 'red');

        $actual = create_shorcode_tdd_plugin(array(), 'hola');
        $expected = '<div style="font-family: monospaced; color: red; font-weight: normal">hola</div>';

        $this->assertEquals($actual, $expected);
        $this->assertTrue(false); // Just to verify phpunit
    }
}
Notice that we introduced an error. The last line of the function is a false assertion that will help us to verify that the tests are actually being run.
Les verify that by executing
docker-compose exec wp composer phpunit
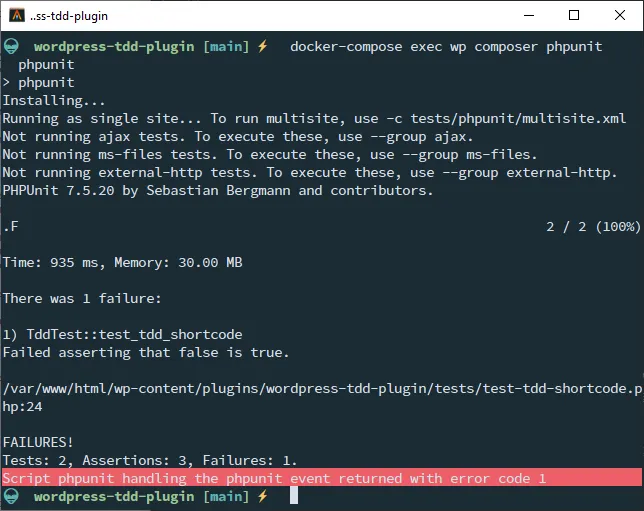
And even tough that last assertion fails, we are certain that our tests are being run.
Also notice that we used the add_option function. That’s a WordPress function. So we are certain that our tests are using the WordPress test suite.
Reference
We’re done for this article. But if you want to dig deeper into WordPress testing I recommend reading the following blog posts
- An Introduction To Automated Testing Of WordPress Plugins With PHPUnit. It’s a great introduction to WordPress testing.
- Automated API Testing For Your WordPress Site With Codeception. A little more advanced
- WP-CLI documentation for scaffolding test files
- WordPress official documentation on Plugin Integration
- Unit Testing Wordpress Plugins with PHPUnit. It doesn’t focus on the setup but the testing itself
And if you want to take a look at the generated files for this article, you can visit the GitHub repo