Vim setup for Web Development - Php, JavaScript, (S)CSS, JXS, WordPress, Python
Table Of Contents
If you’ve read some of my blog posts, you can see that PHP and WordPress are a big part of my day to day… But I love vim.
I say “but” because there is a problem: Even though PHP is still one of the most popular languages around, the tooling is not up to par with the likes of JavaScript, TypeScript or Python. At least not when it comes to open tools like Visual Studio or (NEO)VIM.
So if you want a decent PHP editor that does everything, you better be prepared to spend some dough… or read this article where I’ll teach you how to setup your (Neo)Vim to work much like and IDE like Visual Studio or PhpStorm.
We’ll be setting up:
- Plugins
- Error detection
- Auto complete
- Adding closing brackets/keys/quotes automaticalle
- And pretty colors of course.
Disclaimer
This article is not for Vim beginners. I assume that you know where your .vimrc or init.vim file resides. Also how to use (Neo)Vim plugin managers and how to save and quit from Vim.
Install required software
Since we’re going to be starting from scratch, I’m only going to assume that you have access to the terminal in your Linux or Mac.
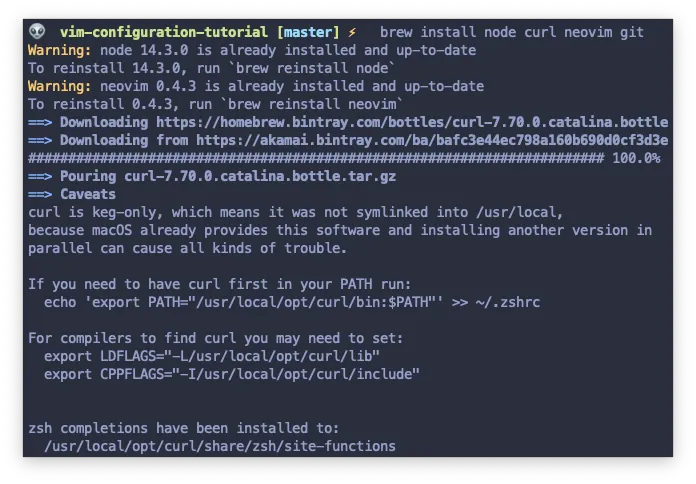
So Just install the following pieces of software
- NeoVim or Vim 8
- Node 10
- git
- curl
You might be wandering why do I need NodeJS? Well, that’s going to be our secret souce for this configuration. But lets not get ahead of ourselves lets first focus on setting up a simple developmet environment for our new configuration.
Also, I’m using brew in MacOS to speed up my installation. But you can install it in the traditional way.
Finally, if you are in Mac, I’ve experienced the best results when using iTerm2 and Alacirtty
Basic Vim configuration
Vim is powerful, very very powerful, there is no doubt about that. But the fact is that after installation, vim it’s kind of a dumb editor and makes no asumptions. It doesn’t have any code highlighting, nor any file management. And the help is kind of hard to reach. But there is a reason for that. Vim expects that you configure it to make it you own.
So, to configure vim you have to create a configuration file in you home directory that can be ~/.vimrc if you are using Vim or ~/.config/nvim/init.vim if you are using NeoVim.
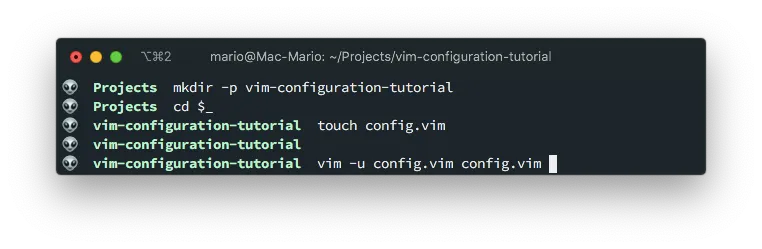
But just to be sure that we’re not making any mistakes, and also that this configuration file works for both Vim 8 and NeoVim we’re going to use the temporary file config.vim in a custom directory:
And here is the trick: We’re going to instruct vim to use that file as a configuration file and edit it by using the command vim -u config.vim config.vim
Here is another trick. You can start Vim without a config file but in nocompatible mode by issuing
vim -u NONE -N
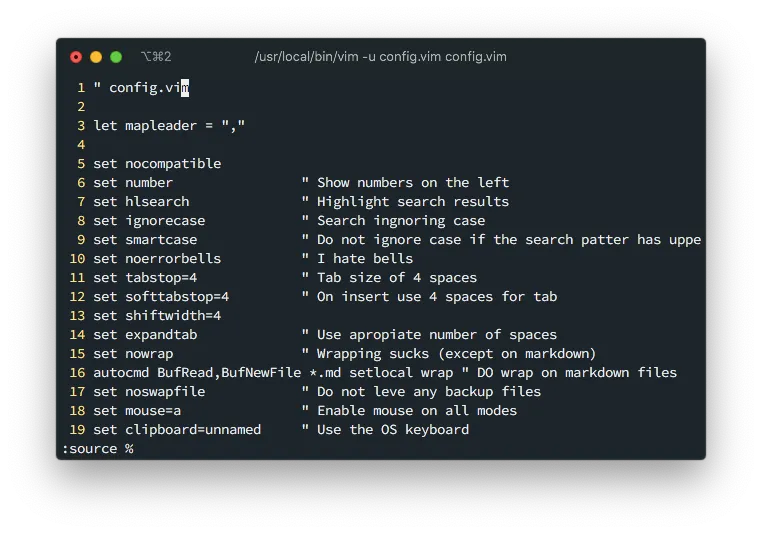
Now, lets open this file with with our trick and add the following directives:
" config.vim

let mapleader = ","

set nocompatible
set number                " Show numbers on the left
set hlsearch              " Highlight search results
set ignorecase            " Search ingnoring case
set smartcase             " Do not ignore case if the search patter has uppercase
set noerrorbells          " I hate bells
set belloff=esc
set tabstop=4             " Tab size of 4 spaces
set softtabstop=4         " On insert use 4 spaces for tab
set shiftwidth=4
set expandtab             " Use apropiate number of spaces
set nowrap                " Wrapping sucks (except on markdown)
autocmd BufRead,BufNewFile *.md,*.txt setlocal wrap " DO wrap on markdown files
set noswapfile            " Do not leve any backup files
set mouse=a               " Enable mouse on all modes
set clipboard=unnamed,unnamedplus     " Use the OS clipboard
set showmatch
set termguicolors
set splitright splitbelow
set list lcs=tab:\¦\      "(here is a space)
let &t_SI = "\e[6 q"      " Make cursor a line in insert
let &t_EI = "\e[2 q"      " Make cursor a line in insert

" Keep VisualMode after indent with > or <
vmap < <gv
vmap > >gv
"
" Move Visual blocks with J an K
vnoremap J :m '>+1<CR>gv=gv
vnoremap K :m '<-2<CR>gv=gv

" Autocomand to remember las editing position
augroup vimrc-remember-cursor-position
  autocmd!
  autocmd BufReadPost * if line("'\"") > 1 && line("'\"") <= line("$") | exe "normal! g`\"" | endif
augroup END
You can read the comments if you want to know exactly what I’m doing here. But the summary is that I’m making sure of 2 things:
- That
vim(Vim 8) andnvim(Neovim) work almost exactly the same - That the editor will behave more like an IDE which is the hole reason for this post
Notice that I said almost and not exactly the same. And the reason for that is that there are plugins that will help us achieve that similarity and I don’t what to repeat directives.
Now, here is the second trick. Save and re-source the current file to make the new configuration take effect
- First save with
:w - The re-source the current file with
:source %

And you’ll get something like this:
We’re still a long way to go, but we made some good progress.
Install a Plugin Manager
One thing that I didn’t mention before, is that vim's config file is actually written in vimscript, which is a complete programming language. So we could make vim behave like an IDE by adding functions and directives in this file. The problem is that it would take too long to do it and we would en up with a configuration file with a size that could be measured in Megs. That’s why we’ll be using plugins.
In our case, we’re going to use the vim-plug plugin manager to take care of downloading installing and configuring the plugins we’re going to use.
So add the following to the config.vim file at the end:
" Install vim-plug for vim and neovim
if empty(glob('~/.vim/autoload/plug.vim'))
silent !curl -fLo ~/.vim/autoload/plug.vim --create-dirs https://raw.githubusercontent.com/junegunn/vim-plug/master/plug.vim
autocmd VimEnter * PlugInstall --sync | source $MYVIMRC
endif
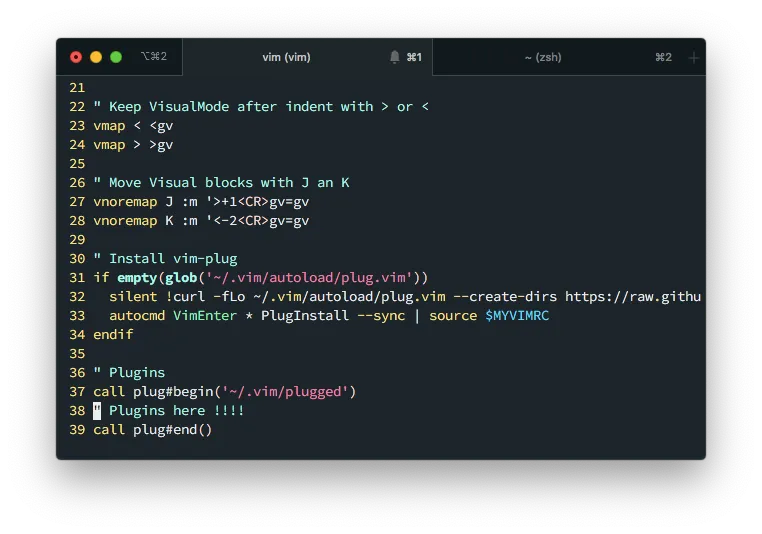
" Plugins
call plug#begin('~/.vim/plugged')
" Plugins here !!!!
call plug#end()
Now, save and re-source this file with :w and then :source % to make the changes take effect.
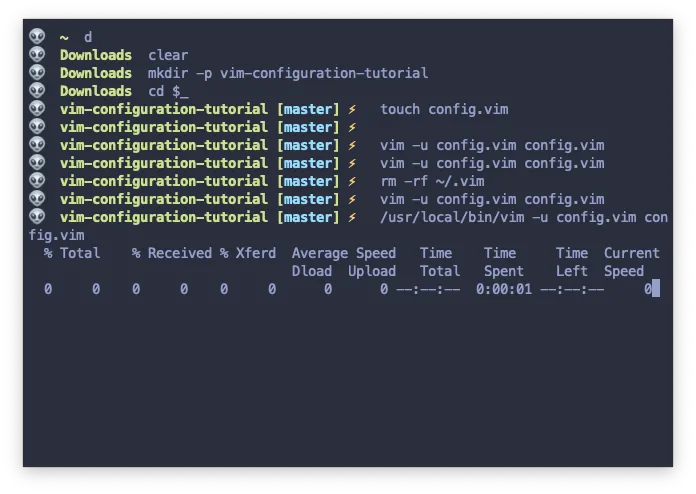
Did you get that “download progress”??? That’s what this new directives do. Download the vim-plug plugin manager into ./.vim/autoload/plug.vim file.
At this point, its better to exit vim and re-open it with vim -u config.vim config.vim since there are some directives that only take effect at start up.
We should have some syntax highlight now:
Our first plugin
Remember that I said that the configuration we added was to make vim and nvim almost exactly the same?
We’ll the reason for not making the exactly the same at that point, was because there is a plugin that will help us with that.
The plugin is called tpope/vim-sensible and what it does is that configures our vim editor with some “sensible” defaults.
To install the plugin lets make the following change at the end of the config.vim file:
" config.vim
" ...
call plug#begin('~/.vim/plugged')
Plug 'tpope/vim-sensible'         " Sensible defaults
call plug#end()
We just added our first plugin! but we still need to install it.
This are the steps to install and activate our new plugin:
- Save the file with
:w - Execute
:source %to re-source - Execute
:PlugInstallto install the new plugin - Close the Install Progress Buffer with
:bd
The PluginInstall command is courtesy of the vim-plug plugin manager, and what it does it that downloads and install any uninstalled plugin.
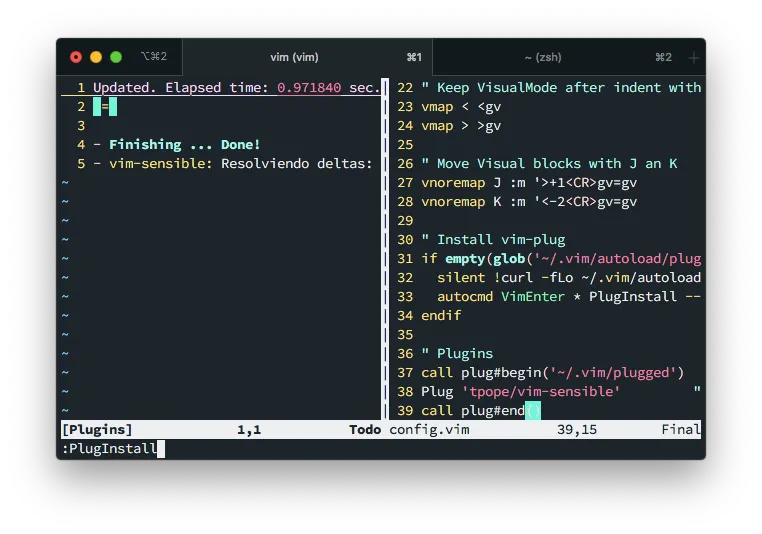
And notice the change… Now we have an Status Bar at the bottom!!!.
That plugin adds some additional functionality, that can be reviewed by looking ant the short source code including new shorthand commands and some behavioral changes that makes our vim more usable.
Themes
What is an IDE without out some pretty colors??? 😅
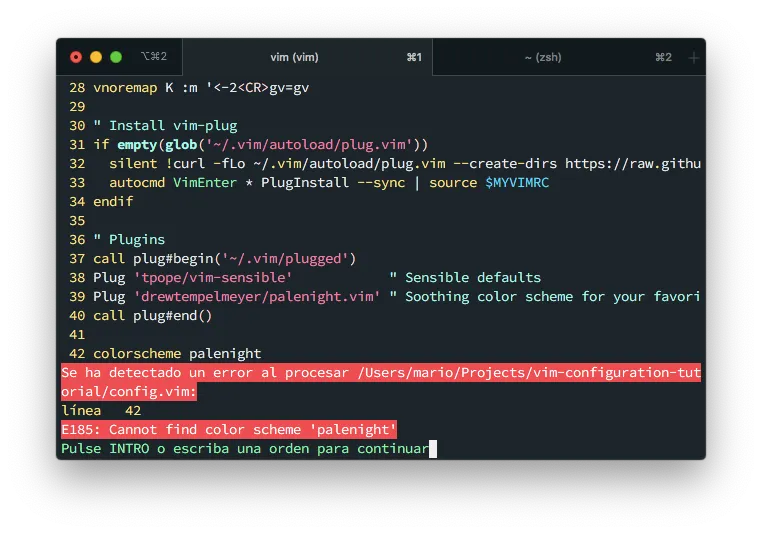
In vim themes are also plugins. So we are going to add one new plugin: drewtempelmeyer/palenight.vim.
To install it, make the following changes on config.vim in the plugins section:
" config.vim
"...
call plug#begin('~/.vim/plugged')
Plug 'tpope/vim-sensible'            " Sensible defaults
Plug 'drewtempelmeyer/palenight.vim' " Soothing color scheme for your favorite [best] text editor
call plug#end()

colorscheme palenight " Activate the theme
Again:
- Save the file with
:w - Re-source it with
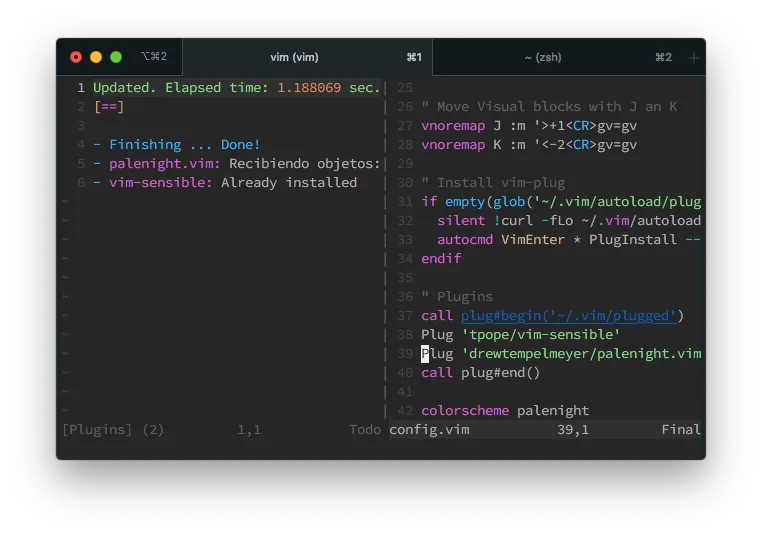
:source %- Here you are going to get an error saying that the theme is not installed. Which is true.
- Install the plugins with
:PlugInstall - Close the install buffer with
:q - Re-source (for the second time) the config with
:source %
And you’ll see a new set of colors:
Palenight is a great color scheme but in case you want to take a look to som other cool options, This are the themes that I use the most:
And before you say something… yes, Palenight theme is also included in the Material Theme. Its just that in my terminal the stand alone Palenight looks better.
Also, there is the plugin flazz/vim-colorschemes which includes about 300 additional color themes.
Fix italic issue
Material and Gruvbox have options to enable italics and true color that can have issues with Vim8 (I haven’t had any issues with NeoVim).
Most of this issues are related to the terminal and not so much with the editor.
The only solution that worked for me, was to create the file xterm-256color-italic.terminfo with the contents:
xterm-256color-italic|xterm with 256 colors and italic,
  sitm=\E[3m, ritm=\E[23m,
  use=xterm-256color,
Then source it with the tic command:
tic -c xterm-256color-italic.terminfo
Also, I needed to create an alias for vim so every time I executed vim it first instructed the terminal to use the new terminfo:
alias vim="TERM=xterm-256color-italic vim"
But as I said, with NeoVim I haven’t had any issues.
File management
One essential part of an IDE, it’s file management… preferably by using some kind of sidebar that shows the project’s files. And to complement that, it would be nice to have some kind of fuzzy file opener that lets you open a file just by typing part of the name. Much like Cmd-P in Visual Studio Code.
It turns out that there are also plugins for that!.
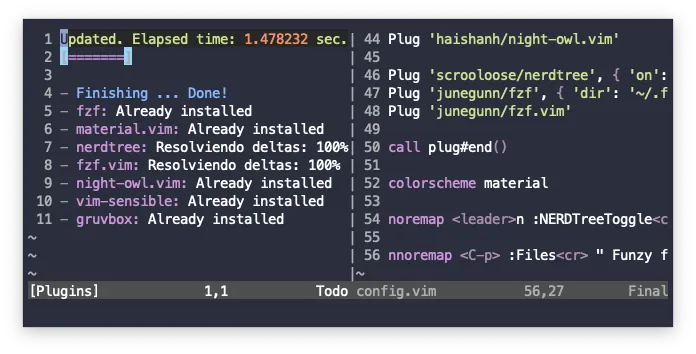
We’ll install NERDTree for file exploring and fzf for fuzzy file finding (think Cmd-p open file):
So lets add the following lines to the config.vim file:
" config.vim
" ...
call plug#begin('~/.vim/plugged')
Plug 'tpope/vim-sensible' " Sensible defaults
Plug 'drewtempelmeyer/palenight.vim' " Soothing color scheme for your favorite [best] text editor
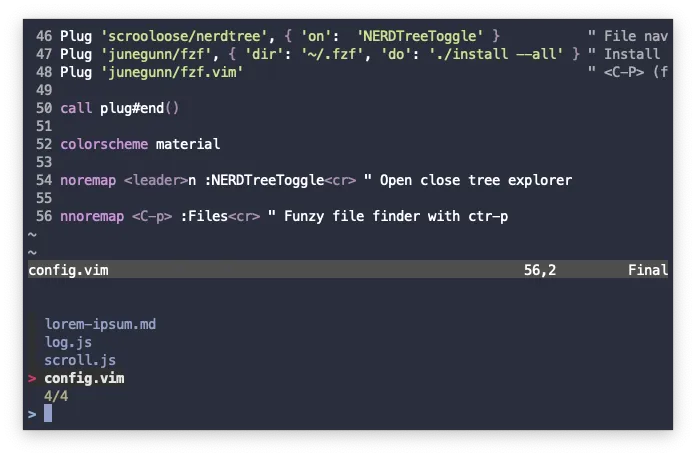
Plug 'scrooloose/nerdtree', { 'on': 'NERDTreeToggle' } " File navigator
Plug 'junegunn/fzf', { 'do': { -> fzf#install() } } " Install fuzzy finder binary
Plug 'junegunn/fzf.vim' " Enable fuzzy finder in Vim
call plug#end()
colorscheme palenight " Activate the Palenight theme
" Use Ctrl-k Ctrl-k to open a sidebar with the list of files
map <C-k><C-k> :NERDTreeToggle<cr>
" Use Ctrl-P to open the fuzzy file opener
nnoremap <C-p> :Files<cr>
The reason that fzf requires 2 plugins is because the first installs the fzf binary in our file system, and the second adds commands that allows us to use it easily inside Vim.
Again, save the file with :w, re-source the file with :source % and install the plugins with :PlugInstall. Finally re-source again to enable the new plugins in our current vim instance.
Now, when you type Ctrl-k and then Ctrl-k you’ll get a tree view of the files of the current directory.

And when you type Ctrl-P you’ll get a file finder at the bottom of the terminal, where you find files by just typing part of the name:
Both NERDTree and FZF are pretty configurable. I encourage you to read this article for additional options for NERDTree
The FZF GitHub Page its pretty good. But you might want to take a look at this blog post for additional information on how also fuzzy find inside files using RipGrep.
Tabs vs Spaces, Line Feed vs Carriage Return (Editor Config)
Now, if you are working in a team, is probable that your developers are using different code editors and different OSs. This leads to “conflicts” on how to format the files in your project.
To solve that, I use a .editorconfig file in my projects.
What this does is that it configures your editor to use spaces or tabs… Also to use CRLF or just LF for line endings.
To make that work on vim, you have to use another plugin, the editorconfig plugin.
So just add the following line int the PLugins section of your config.vim file and thats it:
Plug 'editorconfig/editorconfig-vim' " Tab/Space trough projects
To check if things are working create the following .editorconfig in your directory
# This file is for unifying the coding style for different editors and IDEs
# editorconfig.org

# WordPress Coding Standards
# https://make.wordpress.org/core/handbook/coding-standards/

root = true

[*]
end_of_line = crlf
insert_final_newline = true
trim_trailing_whitespace = true
indent_style = tab
indent_size = 8
And in vim use the command set list lcs=trail:·,tab:»· so tabs and spaces are visible on the current buffer.
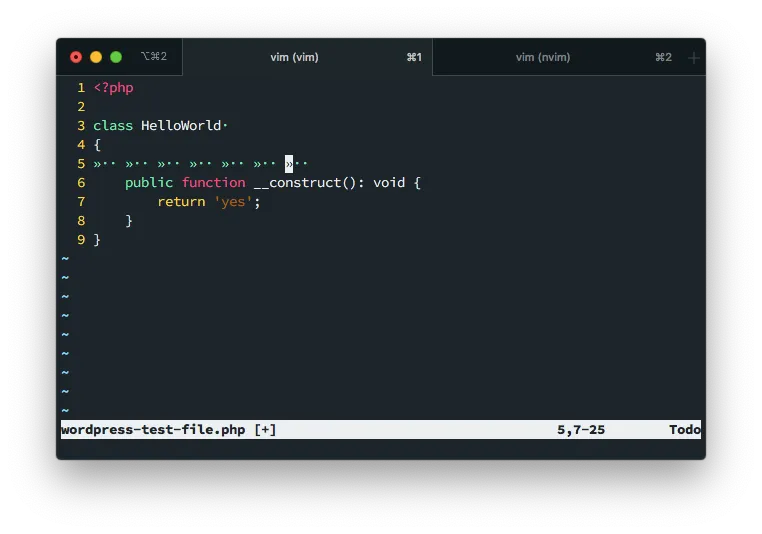
And as you can see, in this buffer we are using tabs even tough we configured Vim from the start to use spaces.
IntelliSense
Now the most interesting part, Code Completion and Intellisense.
The project Conquer of Completion (or CoC) it’s a very big Vim plugin that brings Language Server Protocol over to Vim.
If you are not familiar with LSP, then let me explain.
Upon the development of Visual Studio Code, Microsoft decided to extract the language analysis and completition functions of their IDE in it’s own “server”. That way, multiple projects (like vim) could use and contribute to development of code analysis.
Even tough the LSP server is an standard more than an application, the only useful implementation of it is written in node, and that’s why we need Node JS installed on our machine. To use the code competition offered by CoC.
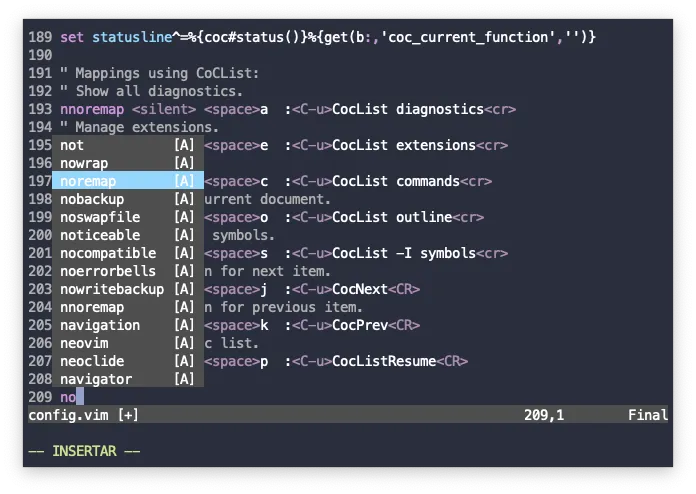
So, to enable CoC on vim we need to add the following line to the plugins section in our config.vim file:
" config.vim
call plug#begin('~/.vim/plugged')
" ...
Plug 'neoclide/coc.nvim', {'branch': 'release'} " Intelisense
call plug#end()
But wait!!! we’re not finished. The CoC plugins has a big set of commands that are not configured by default and that you need to setup by yourself.
Instead of showing you here what additional configuration you should add to de config.vim file. I think its better you head over to the CoC configuration documentation and Copy & Paste what’s there.
As the GitHub page says. That’s an “example” configuration. But I always use whats there without any changes.
So add the CoC configuration at the end of config.vim file. Then write the changes with :w, then :source % so it recognizes the new plugin. Then then :PlugInstall to install it and finally :source % again to have Intellisense.
And test the Intellisense just by typing something:
Cool, isn’t it?
CoC extensions
CoC by itself is very capable, but it does just auto suggest competition for only a small set of languages. Which is pretty normal since there number of available programming languages its very big.
Fortunately, CoC supports extensions that add support to additional languages (intellisense for additional languages) and also extensions that adds additional behavior like markdown linting and even discord connections.
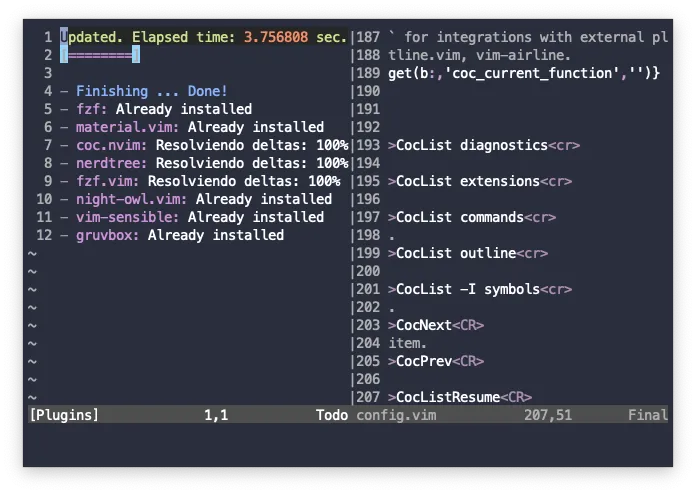
You install CoC extensions by By using the :CocInstall <extension-name> command inside vim.
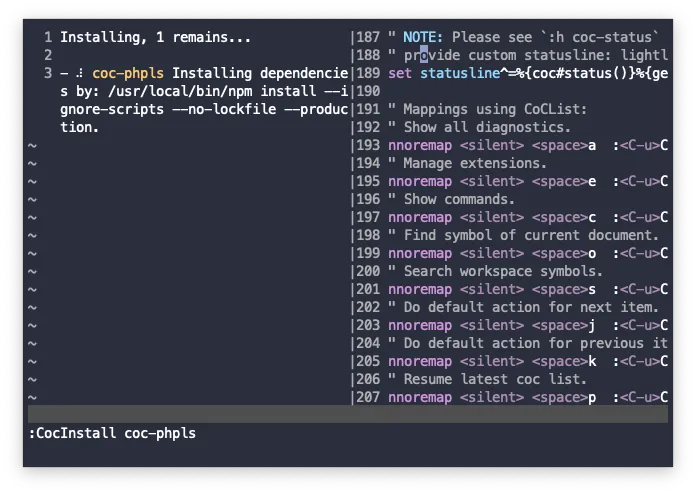
Here I’m installing the coc-phpls extension by issuing inside vim the command
:CocInstall coc-phpls
And now I to have PHP code completition!.
To have CoC install extensions automatically you have to set up the coc_global_extensions variable inside the config.vim file, with a list of CoC extensions you want to install at start up time.
So lets add some extensions by adding the following directive to your config.vim file and restarting vim:
let g:coc_global_extensions = [
    \ 'coc-tsserver',
    \ 'coc-json',
    \ 'coc-html',
    \ 'coc-css',
    \ 'coc-phpls',
    \ 'coc-python',
	\ 'coc-diagnostic'
    \]
This will install the tsserver (for javascript), json, html, css, php and python extensions. Also will install a diagnostic extension that can take care of linting and formating using external tools.
If you require support for additional languages, just take a look at the available list of extensions
CoC Diagnostics (Linting)
CoC not only provides autocompletion. It also provides linting and formatting out the box.
But there are ocations where external tools work better. We need then to instruct CoC to use one of those external tools in some languages.
That’s why we added the coc-diagnostic extension on the list extensions to
install on the previous step. We just have to configure it to specify which languages will use external tools
CoC uses and additional json configuration file that can be accesed by executing inside vim :CocConfig.
In that file I’m going to add the following content:
{
  "diagnostic-languageserver.filetypes": {
    "php": ["phpcs"]
  },
  "diagnostic-languageserver.linters": {
    "phpcs": {
      "command": "./vendor/bin/phpcs",
      "debounce": 300,
      "rootPatterns": ["composer.json", "composer.lock", "vendor", ".git"],
      "args": ["--report=emacs", "-s", "-"],
      "offsetLine": 0,
      "offsetColumn": 0,
      "sourceName": "phpcs",
      "formatLines": 1,
      "formatPattern": [
        "^.*:(\\d+):(\\d+):\\s+(.*)\\s+-\\s+(.*)(\\r|\\n)*$",
        {
          "line": 1,
          "column": 2,
          "message": 4,
          "security": 3
        }
      ],
      "securities": {
        "error": "error",
        "warning": "warning"
      }
    }
  },
  "diagnostic-languageserver.formatFiletypes": {
    "php": "phpcbf"
  },
  "diagnostic-languageserver.formatters": {
    "phpcbf": {
      "command": "./vendor/bin/phpcbf",
      "rootPatterns": ["composer.json", "composer.lock", "vendor", ".git"],
      "args": ["%file"],
      "isStdout": false,
      "doesWriteToFile": true
    }
  }
}
I know its kind of confusing. The short explanation is that I’m doing 2 things:
- I’m telling CoC which languages will use external tools for formating and linting (phpcs and phpcbf in my case)
- Then I configure the command that has to be executed for each formatter and each sniffer
Syntax highlighting
Vim has pretty decent syntax highlighting out of the box. But with hundreds of possible languages there is room for improvement. For instance, take the following jsx file.
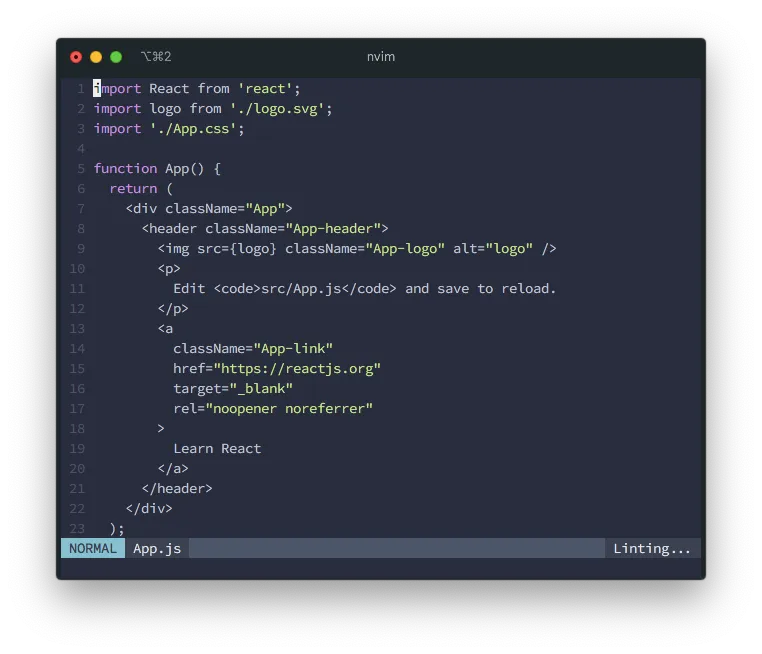
Can you see that none of the import parameters is highlighted?
That’s where the Vim Poliglot comes into play. What vim-poliglot does is that loads the language syntax highlighting commands when you load a file. So it doesn’t slows down the editor in no sensible way.
To install it you have to follow the same procedure. Add the plugin in config.vim and save, source, :PlugInstall and source again.
" config.vim
call plug#begin('~/.vim/plugged')
" ...
Plug 'sheerun/vim-polyglot'
call plug#end()
To make it run, you don’t have to do anything else. Since the set syntax on and set filetype on directives in our config.vim takes care of everything.
Now, take a look at the same file after vim-poliglot is installed.
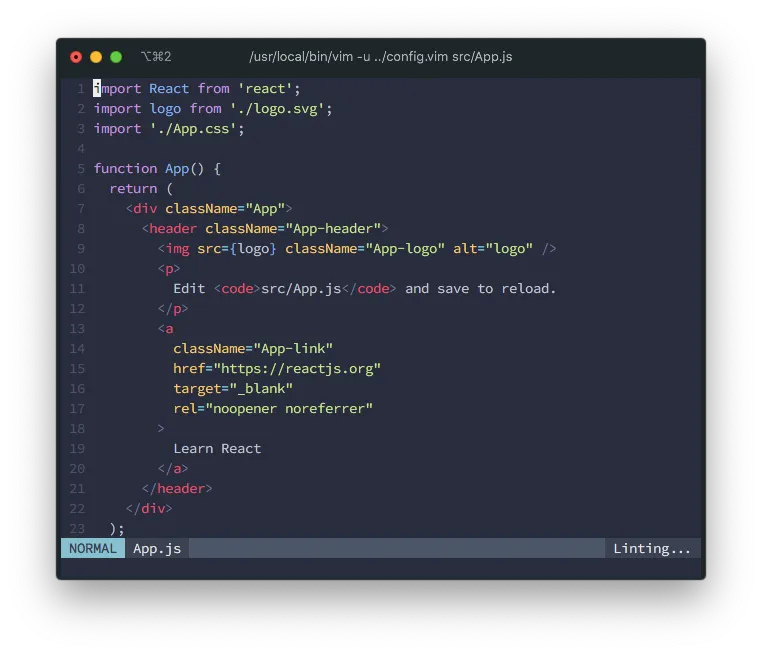
Pretty… right?
For a list of available languages, you can visit the GitHub page. I find it hard that your language of choice is not there.
Install your configuration file
Up until now we’ve been using a “temporary” config file (that’s why we used the vim -u config.vim config.vim command) so its easier to modify and keep as a separate project. But now that we have all the settings that we want we can install it so it get auto loaded by Vim8 and Neo vim
Vim
To have this file be read every time you start Vim, you just have to copy it to your home directory with the name .vimrc
cp config.vim ~/.vimrc
NeoVim
For Neo Vim we are going to use a little trick (looks like we’re full of trick here !!!) Lest instruct NeoVim to use Vim’s file.
Create the ~/.config/nvim/ directory and in the file ~/.config/nvim/init.vim add the following content:
set runtimepath^=~/.vim runtimepath+=~/.vim/after
let &packpath=&runtimepath
source ~/.vimrc
By adding this to init.vim you are telling NeoVim to look for configuration settings int ~/.vimrc and use the ~/.vim/autoload directory for plugin storage.
And we’re done.
Final thougts
I’ve created Git repo for testing my .vimrc file in GitHub. You can take a look there to the final result.
Also, if you want to browse my current .vimrc file, you can browse it in my dotfiles repo