Use Gulp and Webpack together for you asset bundling needs
Table Of Contents
There is a GitHub Repo with the files of this article.
I love Webpack! It allows me to bundle scripts in just one file. And if you pair it with babel you can use next generation javascript syntax and still make your scripts compatible with older browsers.
The fact of the matter is that if you are going to create a full stack javascript project, you HAVE TO use webpack…
But there is a problem… Webpack is not design for task automation, even tough it can do them.
For tasks automation, I still think there is no better tool than gulp. Specially when we want to compile SASS files, create zip archives, or deploy code on remote servers.
So here, I’m going to show you have to use gulp with webpack for task automation with the following tasks:
- One tasks to compile SASS files into CSS files
- One tasks to compile .js files with webpack
I’m not going to cover how to do complex things like deployment or clean up since I just want to show you how to make this 2 tools work together.
Project setup
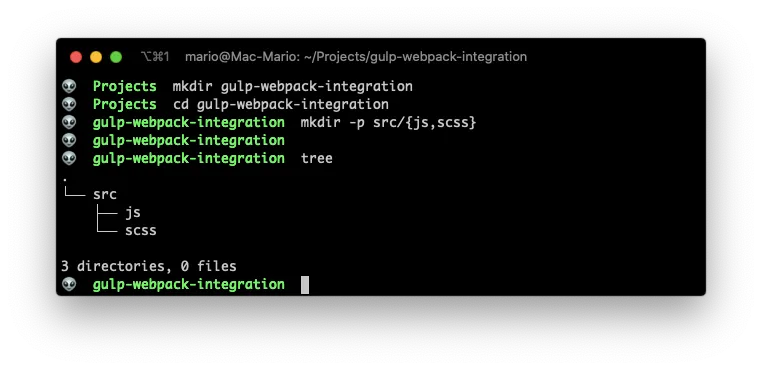
First lets create a project directory with some sub directories:
mkdir gulp-webpack-integration
cd gulp-webpack-integration
mkdir -p src/{js,scss}
tree
You should have then the following structure:
.
└── src
    ├── js
    └── scss

3 directories, 0 files
Now lets create some test CSS and JS files so we have something to test with:
Create src/scss/main.scss with the following contents:
// src/scss/main.scss

$background-color: #4b16ff;
$foreground-color: #ffffff;

body {
  background-color: $background-color;
  color: $foreground-color;
}
Now create src/js/hola-mundo.js With the following contents:
// src/js/hola-mundo.js

export default HolaMundo = (name) => {
  console.log(`Hello ${name} from hola-mundo.js`);
};
And finally create src/js/main.js with
// src/js/main.js

import HolaMundo from "./hola-mundo.js";

HolaMundo("Mario");
As you can see, this are very basic files, but enough for testing our setup.
Now that we have our test files, we can start the configuration. This are the steps we are going to follow:
- Start npm’s package.json file
- Install and configure
gulp - Install and configure a sass compiler
- Install and configure
webpack - Install
babeland configure it with webpack - Configure webpack in gulp
Create package.json
So lets create our npm’s package.json file by issuing:
npm init -y
This will create a very basic file:
{
  "name": "gulp-webpack-integration",
  "version": "1.0.0",
  "description": "",
  "main": "index.js",
  "scripts": {
    "test": "echo \"Error: no test specified\" && exit 1"
  },
  "keywords": [],
  "author": "",
  "license": "ISC"
}
That was easy… Lets continue by installing and configuring Gulp.
Install Gulp
Now install gulp as a dev dependency by executing:
npm install --save-dev gulp
And create a gulpfile.js with just this code:
// gulpfile.js

const gulp = require("gulp");
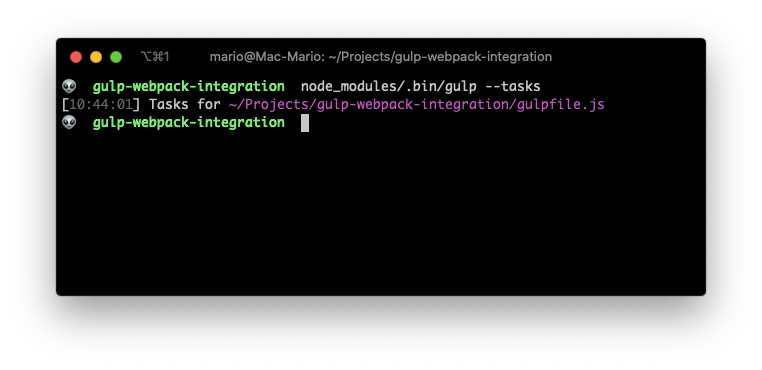
Just for testing: execute node_modules/.bin/gulp --tasks to find out if all is good.
Install and configure a sass compiler
For compiling scss files, we’re going to use node-sass.
But we also need the package gulp-sass to make that bridge between the gulp and the compiler. So execute the following to install both packages.
npm install --save-dev gulp-sass node-sass
Now that we have installed both packages, make the following changes to gulpfile.js adding a task to compile scss files into css:
// gulpfile.js

const gulp = require("gulp");
const sass = require("gulp-sass");

sass.compiler = require("node-sass");

function styles() {
  return gulp.src("src/scss/*.scss").pipe(sass()).pipe(gulp.dest("css/"));
}

exports.build = styles;
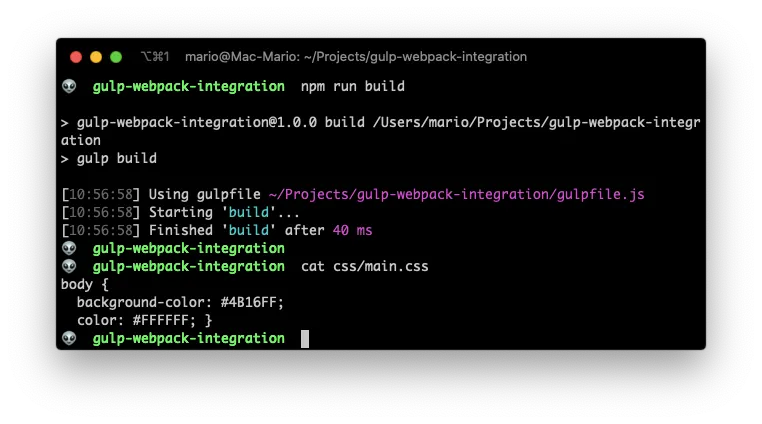
And finally (for this step) change package.json to access this new task with just npm run build by creating a new script entry:
// package.json
{
  "name": "gulp-webpack-integration",
  "version": "1.0.0",
  "description": "",
  "main": "index.js",
  "scripts": {
    "build": "gulp build"
  },
  "keywords": [],
  "author": "",
  "license": "ISC",
  "devDependencies": {
    "gulp": "^4.0.2",
    "gulp-sass": "^4.0.2",
    "node-sass": "^4.13.0"
  }
}
With this 3 steps you can now compile scss files and have them stored in the css/ directory:
Install and configure Webpack
This step can be kind of cumbersome since there are a lot of sub-steps required, but is well worth it.
First lest install webpack with npm:
npm install --save-dev webpack webpack-cli
Then create a basic webpack.config.js file to instruct webpack where are the js files and where to store the output:
// webpack.config.js

const path = require("path");

module.exports = {
  entry: {
    main: "./src/js/main.js",
  },
  output: {
    filename: "[name].min.js",
    path: path.resolve(__dirname, "js"),
  },
};
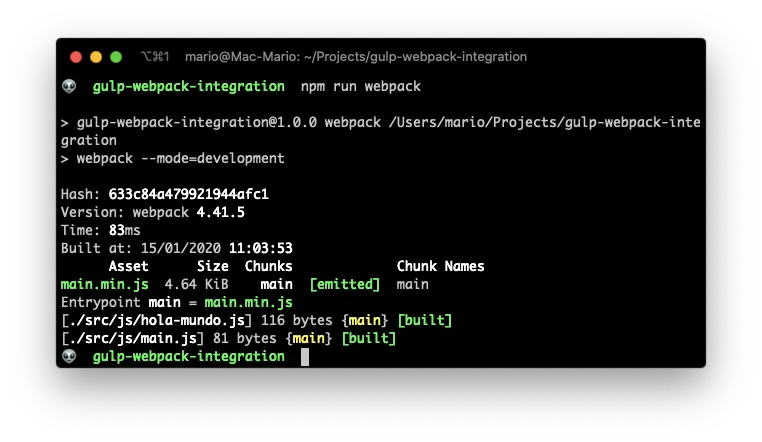
This will instruct webpack to compile the file src/js/main.js into js/main.min.js.
And finally, change the package.json to add a script that executes webpack in development mode for us:
// package.json
{
  ...
  "scripts": {
    "build": "gulp build",
    "webpack": "webpack --mode=development"
  },
  ...
}
Now you can compile scripts with webpack…
But we’re not done yet with webpack. We need to instruct webpack to convert the compiled javascript into something that old browsers can understand.
Adding babel to webpack
As always, it all starts with some packages installation. We have to install Webpack’s babel-loader and all the Babel required files for converting code.
npm install --save-dev babel-loader @babel/core @babel/cli @babel/preset-env
Then, we have to modify webpack.config.js so any js file is converted to old javascript versions after compiling:
// webpack.config.js

const path = require("path");

module.exports = {
  entry: {
    main: "./src/js/main.js",
  },
  output: {
    filename: "[name].min.js",
    path: path.resolve(__dirname, "js"),
  },
  module: {
    rules: [
      {
        test: /\.js$/,
        exclude: /node_modules/,
        loader: "babel-loader",
        options: {
          presets: ["@babel/preset-env"],
        },
      },
    ],
  },
};
The output of npm run webpack should’t change, since we just told it to convert old format javascript. But we also should not get any errors.
Configure webpack in Gulp
We’re almost finished!
We just need to add a task in gulpfile.js that instructs gulp to calls webpack for compiling javascript files.
So again, open up the terminal and execute the following command to install the bridge between gulp and webpack:
npm install --save-dev webpack-stream
Then make the following changes to the gulpfile.js
// gulpfile.js

const gulp = require("gulp");
const sass = require("gulp-sass");
const webpack = require("webpack-stream");

sass.compiler = require("node-sass");

function styles() {
  return gulp.src("src/scss/*.scss").pipe(sass()).pipe(gulp.dest("css/"));
}

function scripts() {
  return gulp
    .src(".")
    .pipe(webpack(require("./webpack.config.js")))
    .pipe(gulp.dest("js/"));
}

exports.build = gulp.parallel(styles, scripts);
And test it out:
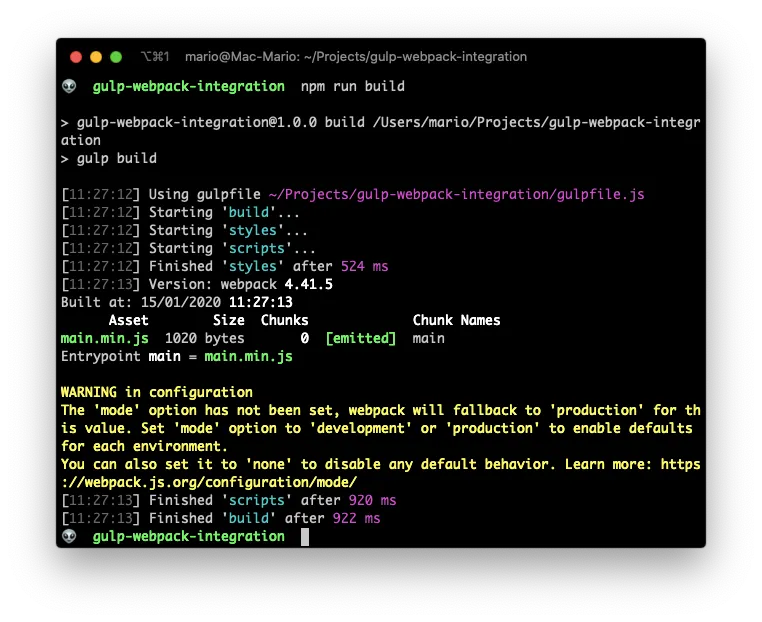
Awesome… We’re done
Some cleanup
If you looked closely on the previous image, you can see that webpack is complaining about not having a “mode” seated up. And its right! (you can read about what that means here).
So lets fix that by adding a node env variable the script build on the file package.json. And also adding a new script called dev:
// package.json
{
  ...
  "scripts": {
    "build": "NODE_ENV=production gulp build",
    "dev": "gulp build",
    "webpack": "webpack --mode=development"
  },
  ...
}
Next we need to modify webpack.config.js to be aware of this new variable:
// webpack.config.js

const path = require("path");

module.exports = {
  entry: {
    main: "./src/js/main.js",
  },
  output: {
    filename: "[name].min.js",
    path: path.resolve(__dirname, "js"),
  },
  module: {
    rules: [
      {
        test: /\.js$/,
        exclude: /node_modules/,
        loader: "babel-loader",
        options: {
          presets: ["@babel/preset-env"],
        },
      },
    ],
  },
  mode: process.env.NODE_ENV == "production" ? "production" : "development",
};
And verify that there aren’t any complaints.
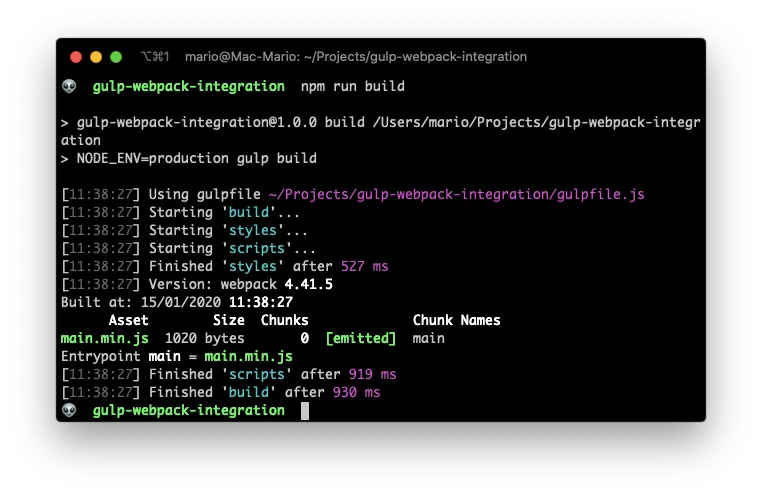
Perfect.
Missing steps
So here I showed you how to make gulp and webpack play nice together. What is missing from this article is how to configure a watch task for automatic compiling of js and sass files.
The short answer is… There is no difference!. You create watch tasks in gulp (not in webpack) as you’ve always have.