Develop for AWS S3, DynamoDB, RDS and API Gateway locally using Serverless
Table Of Contents
I’ve already said that Serverless its taking over even tough we don’t know what serverles is. And I’ve also said that one of the most popular AWS services is AWS Lambda.
If you don’t know what AWS Lambda is, I recommend you read my article on how to setup a Lambda function where I explain on detail on what it is and why you should learn it.
But the very small summary of AWS Lambda is: AWS Lambda is a service where you can publish your Java, Go, PowerShell, Node.js, C#, Python or Ruby projects without the need of creating a Virtual Machine with the required services, since that part has already been done for you by Amazon.
So Lambda takes away the burden of installing, configuring and tuning a bunch o services for your application. But introduces a new series of problems like How do I develop for AWS Lambda knowing that all the services are not in my computer.
This is specially problematic if your solution requires the usage of services like S3 and DynamoDb that are proprietary of Amazon.
Luckily the open source community, and Amazon itself, has come to the rescue by creating mockup services and alternatives that can be installed in you machine and allows you develop like you are in the AWS console.
What are we going to do
The idea behind this tutorial is to create an skeleton project that you can use to start developing your own Lambda functions with S3, API Gateway and DynamoDb offline equivalents. And using JavaScript as your development language.
Is important to note that the final product is not suited for deployment on AWS since I’m only focused on set up local development. But you can add directives on serverless.yml so you can deploy afterwards
Also, you can modify the resulting project so it works on different languages fairly easy.
Requirements and initial setup
In order for this to work yo should have installed
The first extra requirements that you might not have aleady installed are the aws command, and the serverless command. So lets start by installing the first one using brew. and the second one using npm.
brew install awscli
npm install -g serverless
The first line will install the aws command that is required for testing s3 uploads and the second command will make the serverless command globally available (hence the -g flag).
There are other ways to install the
awscommand by using Python’s pip, but they are prone to errors and might get out of sync if you have multiple Python interpreters like I do.
Creating the project
Right. By now we should have all the required tools installed on the computer. Now lets create a node project and then lets make it so it supports serverles.
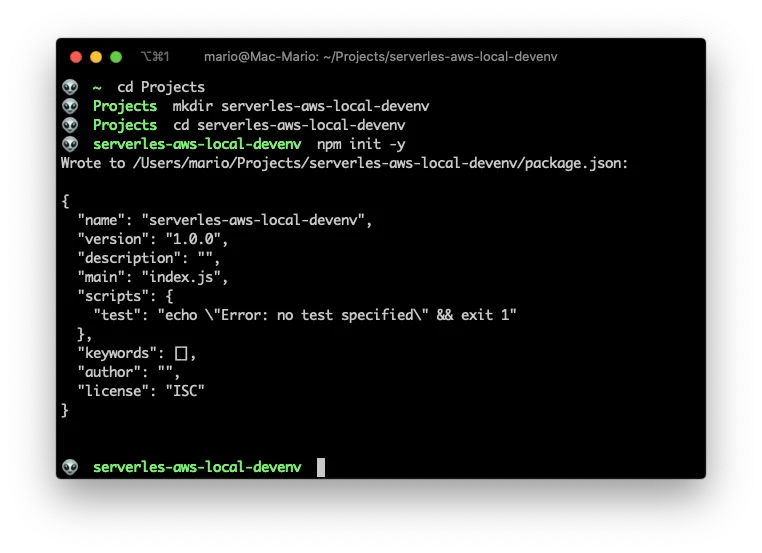
The node project creation is achieved by issuing npm init -y in a terminal:
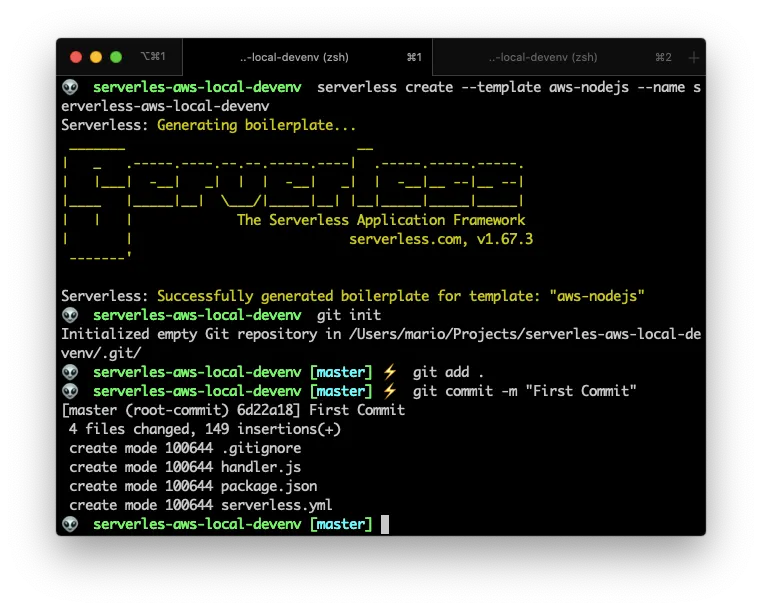
Now that we have the initial project created, lets make this a serverless project with the serverless create command like so:
All of this can be achieved with the following commands
cd Projects # Or where you store your projects
mkdir serverles-aws-local-devenv
cd serverles-aws-local-devenv
npm init -y
serverless create --template aws-nodejs --name serverless-aws-local-devenv
git init
git add .
git commit -m "First Commit"
And you’ll end up with the following structure:
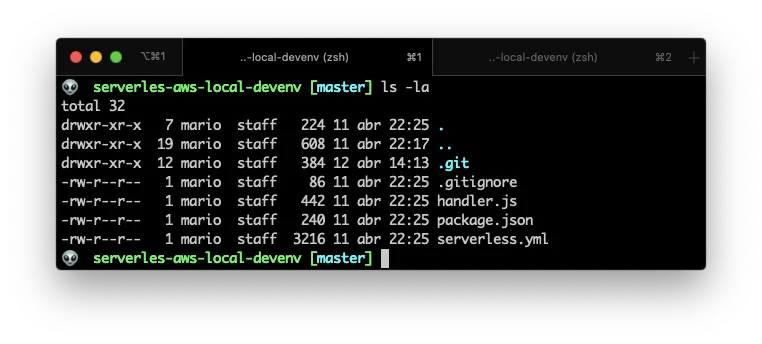
From the last screenshot you can see that npm init created the pacakge.json and package-lock.json files. And the serverless create command created the handler.js, serverless.yml and gitignore files.
The new command here should be the line that says
serverless create --template aws-nodejs --name serverless-aws-local-devenv
This instructs serverless to create a new project that supports node in AWS Lambda. And the project name will be serverless-aws-local.
Cleanup and streamline
Now I’m going to cleanup and move things around a little.
This are very personal preferences on how I develop, so you might not agree with this part, but in order to make things easier for large developments I’ll do the following:
- Remove all the comments from the
serverless.ymlfile - Move the
handler.jsfile tolambdas/handler.js
After the serverless.yml is cleaned up, you’ll end up with:
# serverless.yml
service: serverless-aws-local-devenv

provider:
  name: aws
  runtime: nodejs12.x

functions:
  hello:
    handler: lambdas/handler.hello
If you look closely, you’ll see that on line 10 I changed the handler for the function hello so it points to the right location.
And if I invoke locally the hello function, I should get the regular 200 response on the terminal.

So far so good. Everything is working and we’re ready to add files and configurations.
Install the “offline” package for api calls
As I said before, I’m going to focus on the offline part of Serverless development. So lets start by adding a package that allows us to emulate the API Gateway but locally:
npm install serverless-offline --save-dev
The cool part of serverless-offline is that you don’t have to do anything different from regular serverless development!. That is, creating a event and add a path.
serverless-offline will take care of this events and make local endpoints for them.
So, to make it work we need to make 2 changes:
- Create an
eventssection inside ourhellofunction, adding a URL path for the execution - Create a
pluginssection and add the newly installed plugin
# serverless.yml
service: serverless-aws-local-devenv

provider:
  name: aws
  runtime: nodejs12.x

functions:
  hello:
    handler: lambdas/handler.hello
    events:
      - http: # Double indent the next line!
          method: get
          path: hello/{name}

plugins:
  - serverless-offline
Also, I changed the lambda/handler.js function so it recognizes the URL parameter:
// lambdas/handler.js
"use strict";

module.exports.hello = async (event) => {
  const name = event.pathParameters.name;
  return {
    statusCode: 200,
    body: JSON.stringify(
      {
        message: `Hola ${name}... It works !!!`,
      },
      null,
      2,
    ),
  };
};
This should create a local URL that responds to get parameters (line 12 of serveless.yml file) and make this url print out the name of the visitor (line 12 of lambdas/handler.js file).
Next, lets start the local server by executing:
serverless offline start
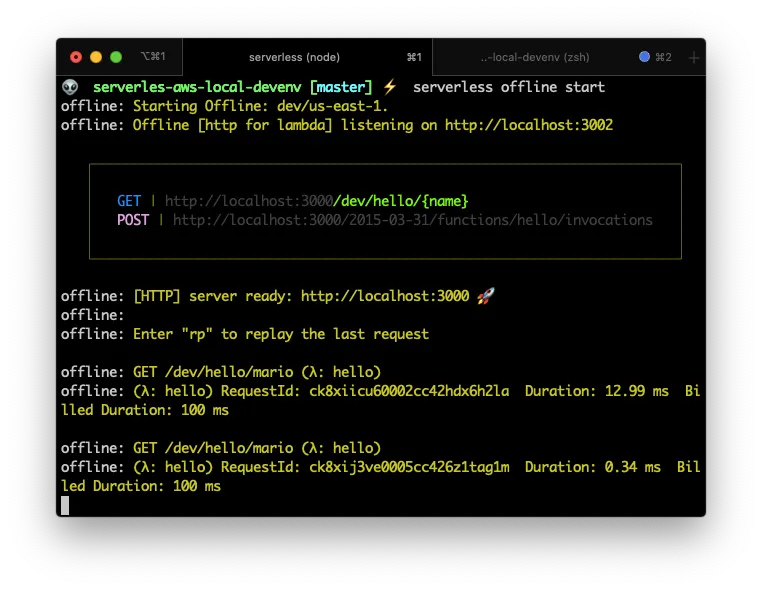
And lets test it by providing the URL http://localhost:3000/ that is in the terminal, with the path /dev/hello/mario yepes and see what does it outputs.
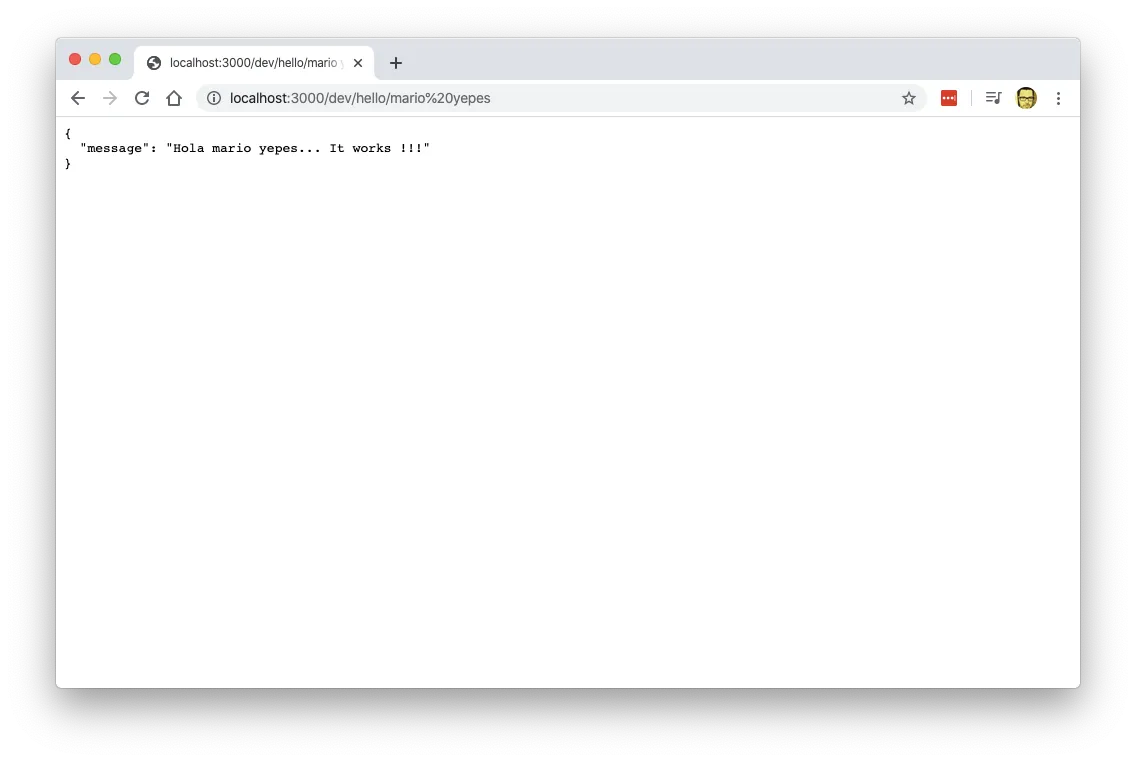
And it works!!!.
S3 offline
Now that we’ve created and endpoint for our handler.hello function. Lets create a local s3 equivalent.
And as always, lets start by installing a new npm package. In this case its the serverless-s3-local which emulates a local S3 Bucket.
npm install serverless-s3-local --save-dev
Then we have to modify our serverless.yml file to:
- Create a S3 resource
- Register the newly installed plugin
- Configure the plugin with a
customsection for the S3 parameters - Create a resource of type
AWS::S3::Bucket
# serverless.yml
service: serverless-aws-local-devenv

provider:
  name: aws
  runtime: nodejs12.x

functions:
  hello:
    handler: lambdas/handler.hello
    events:
      - http: # Double indent the next line!
          method: get
          path: hello/{name}

plugins:
  - serverless-s3-local # needs to be before serverless-offline
  - serverless-offline

custom:
  s3:
    port: 8000
    directory: ./s3-data/

resources:
  Resources:
    S3Bucket:
      Type: AWS::S3::Bucket
      Properties:
        BucketName: local-s3-bucket
Here we did 3 changes
- We added the
serverless-s3-localplugin - Then we created a
customvariables section, passing 2 variables for s3 the port of the s3 bucket and the local directory path where the files will get stored - A resources section where I specify the name of the local bucket
Then comes the tricky part… We have to configure our machine so the aws command passes a key and a secret to upload files. This is done by using the aws configure command like so:
aws configure --profile s3local
And use the following values when asked:
- Key:
S3RVER - Secret:
S3RVER - Region:
local
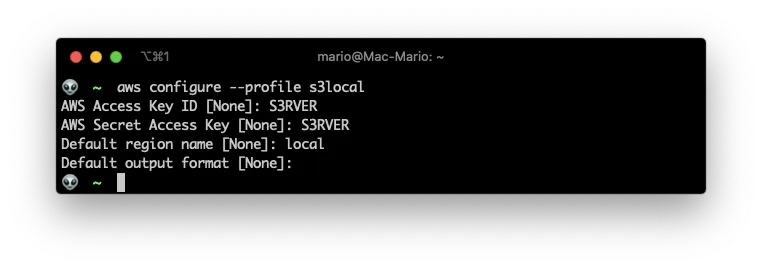
With this command I created the s3local profile with key S3RVER and secret S3RVER. The reason for that specific Key and Secret can be found in the Serverless S3 Local documentation, you’ll notice that those are the default key and secret values.
Now, execute serverless offline start command… And then create and upload a file:

In another terminal execute the aws s3api put-object command

If you look at the end of the first image, you can see that a file was “uploaded”.
And if you list the dist/ folder contents, you can see that there are new files:
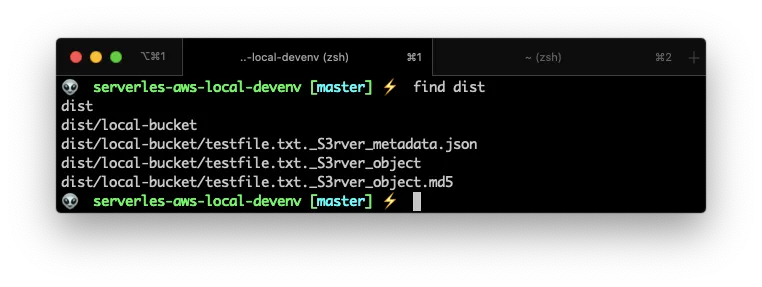
We have a local S3 Bucket!.
Local DynamoDB
Dynamo DB is one of the most used AWS services.
In a few words, DynamoDB is a NoSQL database that handles millions of unstructured records very fast and very efficiently. If you’ve worked with MongoDB, Casandra, CoutchDB or another NoSQL database, you’ll feel right at home here.
To have a local DynamoDB for your serverless development, you need to install the serverless-dynamodb-loca plugin AND and a Java Development Kit.
This last part may come as a surprise, but that’s the fact. !You need a Java Runtime Engine to have a local DynamoDB database!.
Install Java
Ok, so. If you don’t have it. Install JRE.
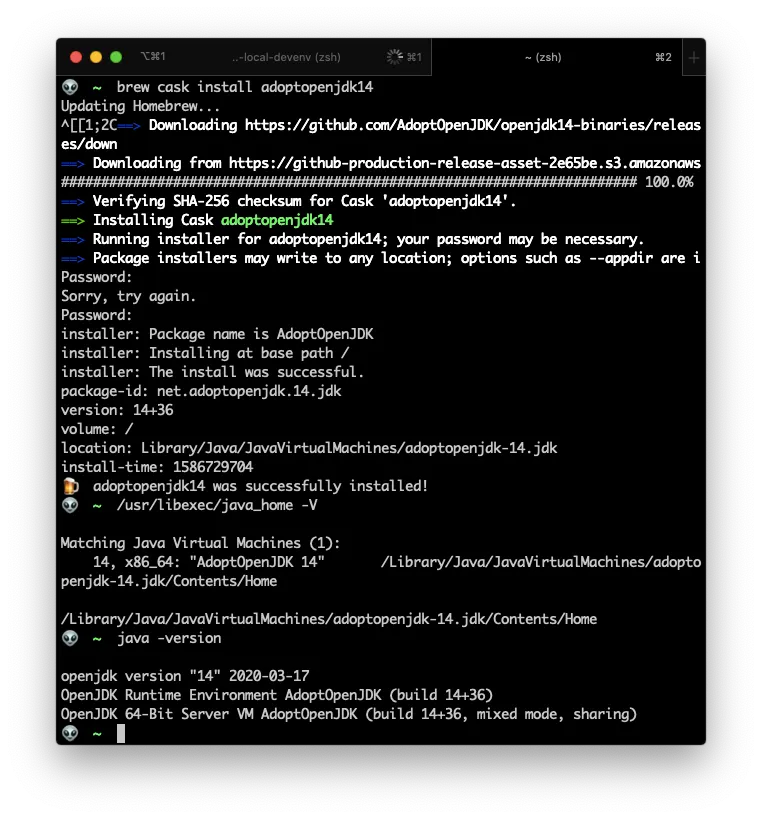
You can follow the excellent tutorial on https://mkyong.com/java/how-to-install-java-on-mac-osx/. But the gist of it is:
brew tap adoptopenjdk/openjdk
brew search jdk
brew cask install adoptopenjdk14
/usr/libexec/java_home -V
java -version
The version of the JDK might change, that’s why you should execute
brew search jdkfirst
Install DynamoDB Local plugin
Now that you have a Java Runtime Environment installed, you can go ahead and install serverless-dynamodb-local using the good ‘ol npm.
npm install serverless-dynamodb-local --save-dev
serverless dynamodb install
echo .dynamodb >> .gitignore
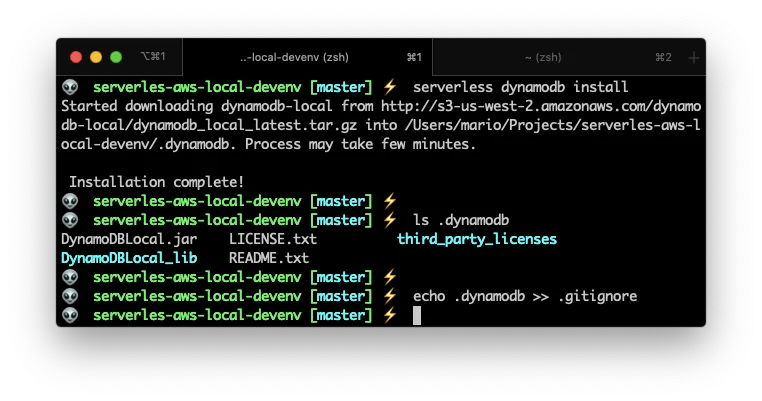
If you noticed, you have to issue the serverless dynamodb install command. This creates the local database in your .dynamodb sub-dir.
Configure the resource
The next step is to create a resource in your serverless.yml very similarly as we did in the S3 Bucket installation:
# serverless.yml
. . .
plugins:
  - serverless-s3-local
  - serverless-dynamodb-local
  - serverless-offline # Needs to be the last one

custom:
  s3:
    port: 8000
    directory: ./dist/
  dynamodb:
    stages:
      - dev
    start:
      port: 9000
      inMemory: true
      migrate: true
      seed: true
    seed:
      domain:
        sources:
          - table: UsersTable
            sources: [./seeds/users-table.json]

resources:
  Resources:
    S3Bucket:
      Type: AWS::S3::Bucket
      Properties:
        BucketName: local-bucket
    DynamoDbTable:
      Type: AWS::DynamoDB::Table
      Properties:
        TableName: UsersTable
        AttributeDefinitions:
          - AttributeName: email
            AttributeType: S
        KeySchema:
          - AttributeName: email
            KeyType: HASH
        BillingMode: PAY_PER_REQUEST
Let me explain the changes:
- First I added a new plugin called
serverless-dynamodb-local - Second, I created the
dynamodbsection in thecustomvariables to configure the database. - Third, I created a new resource in the
resourcessection that specified the name of the local DynamoDB table (calledUsersTable) and the name of the key field (in this case is calledemail)
The DynamoDB Local resource needs the
customvariables in order to work!
Create the seeds
To make our life easier, I created a seeds file. This file is a .json file that will be use to populate the UsersTable with some initial content.
[
  {
    "email": "[email protected]",
    "names": "Mario Yepes",
    "nationality": "Colombian"
  },
  {
    "email": "[email protected]",
    "names": "Consuelo Cifuentes",
    "nationality": "Colombian"
  }
]
This way, on the next step, we’ll have content to review that our configuration works.
AWS Shell review
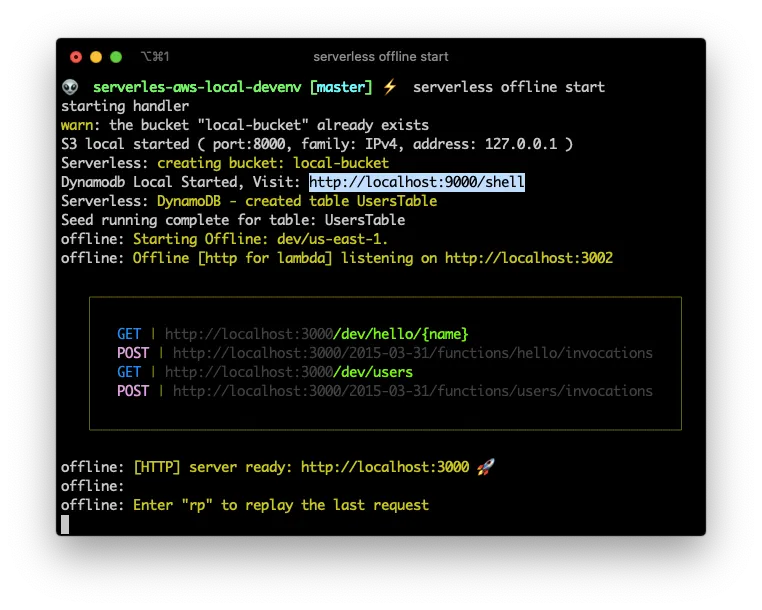
Now that we have the DynamoDB resource created and with some initial content, execute serverless offline start and head to https://localhost:9000/shell and verify that you have access to the DynamoDB Shell:
And execute a query in the DynamoDB Shell to verifies that our database was seeded in
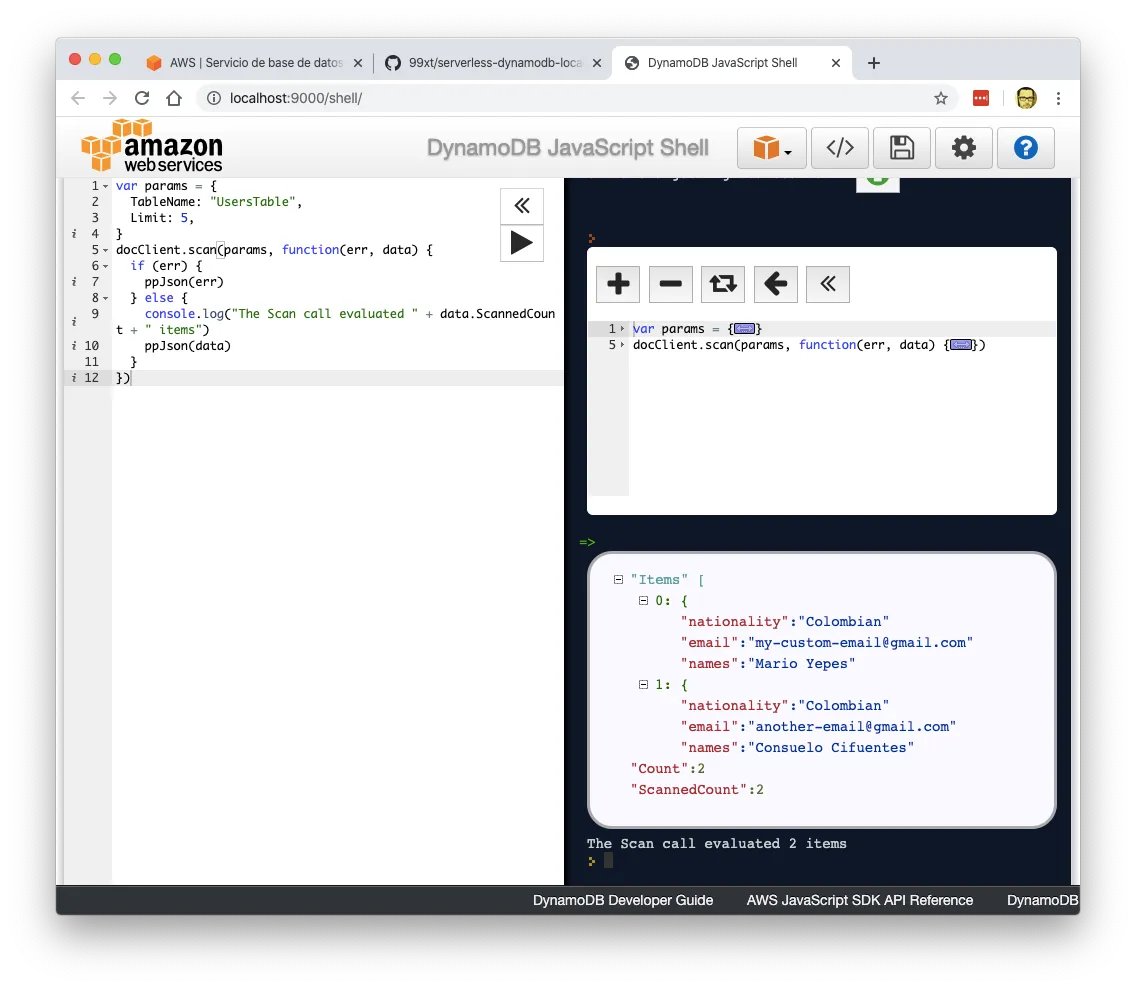
This is the query I used:
var params = {
  TableName: "UsersTable",
  Limit: 5,
};

docClient.scan(params, function (err, data) {
  if (err) {
    ppJson(err);
  } else {
    console.log("The Scan call evaluated " + data.ScannedCount + " items");
    ppJson(data);
  }
});
Use the AWS SDK
Now, this is the final DynamoDB step. Lets create a new lambda to verify that we can access this data.
First install the aw-sdk by executing the all to familiar npm install command:
npm install aws-sdk --save-dev
Then, update the serverless.yml adding a new function.
# serverless.yml
. . .
functions:
  hello:
    handler: lambdas/handler.hello
    events:
      - http: # Double indent the next line!
          method: get
          path: hello/{name}
  users:
    handler: lambdas/users.index
    events:
      - http:
          method: get
          path: users

plugins:
  - serverless-s3-local
  - serverless-dynamodb-local
  - serverless-offline # Needs to be the last one
. . .
I called the new function users and it points to the function index in the file lambdas/users.js. So lets create that file with the following content:
// lambdas/users.js

const AWS = require("aws-sdk");

AWS.config.update({
  region: "local",
  endpoint: "http://localhost:9000",
  accessKeyId: "S3RVER",
  secretAccessKey: "S3RVER",
});
const docClient = new AWS.DynamoDB.DocumentClient();

const response = {
  statusCode: 200,
  body: "",
};

module.exports.index = async (event) => {
  console.log("Scanning UsersTable in DynamoDB.");
  const params = {
    TableName: "UsersTable",
  };

  try {
    const result = await docClient.scan(params).promise();
    response.statusCode = 200;
    response.body = JSON.stringify(result, null, 2);
  } catch (err) {
    response.statusCode = 500;
    response.body = JSON.stringify(err, null, 2);
    console.error(err);
  }

  return response;
};
The important thing in that new file is the config section, where I indicate the AWS library to use the configuration of a local DynamoDB
AWS.config.update({
  region: "local",
  endpoint: "http://localhost:9000",
  accessKeyId: "S3RVER",
  secretAccessKey: "S3RVER",
});
On production you should omit (or make conditional 😉) that section and allow AWS Lambda to use the defaults.
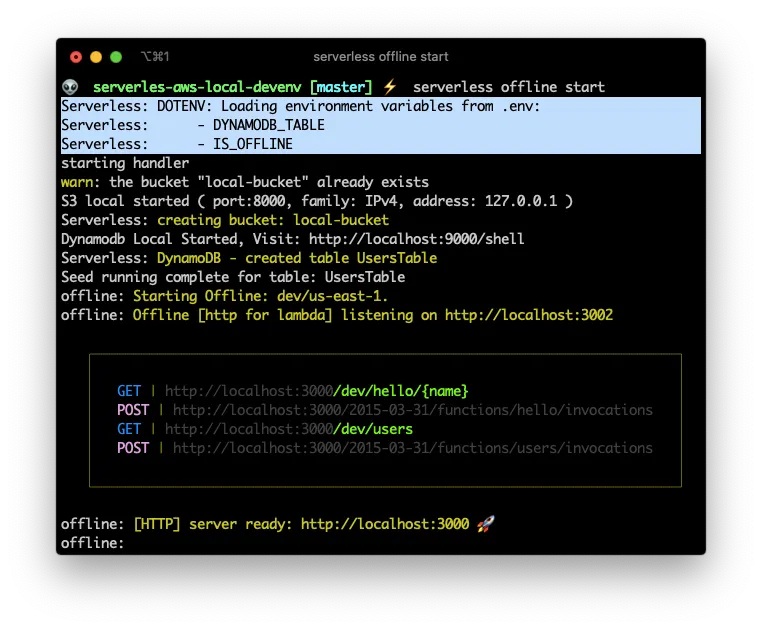
Now that the configuration is done, and the file complete, lets issue the serverless offline start command to start the DynamoDB database.
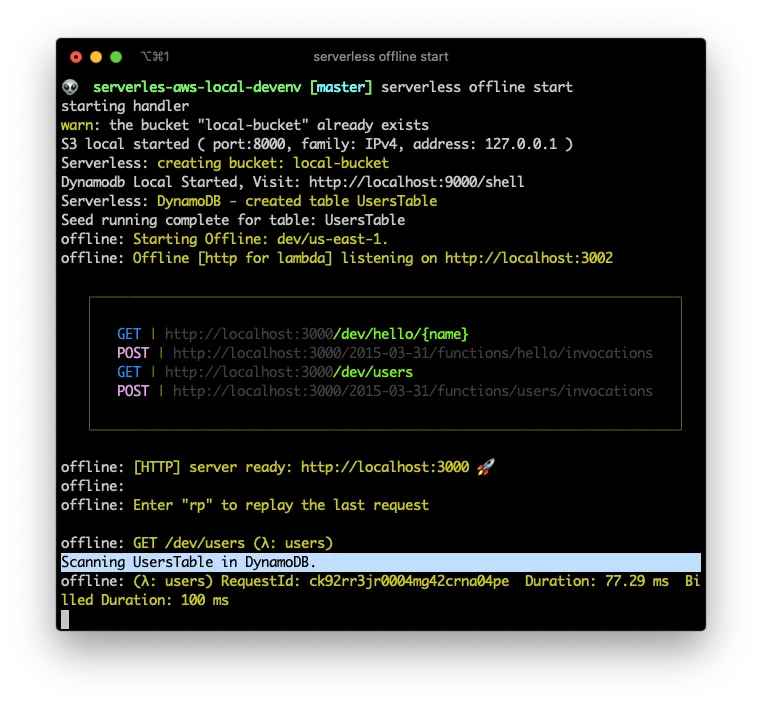
As you can see, there is a new endpoint in http://localhost:3000/dev/users (The higlited line is AFTER I make the next request). And if I make a request to that enpoint I receive a valid json response:
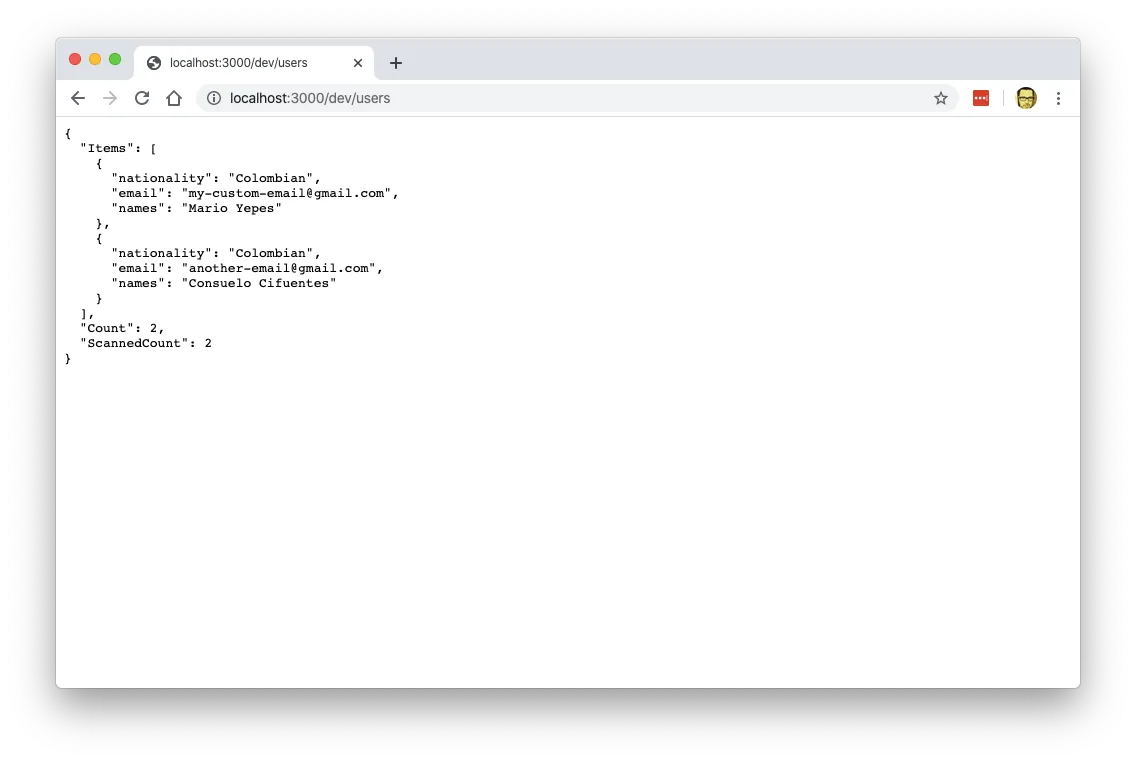
Awesome. We have a working local DynamoDB database with endpoints that actually work.
Using a local .env file for variables
We’re almost finished!.
The last step to have a complete local development environment is to have a way to inject environment variables to our functions, since that’s the prefered way to configured deployed lambdas in AWS.
For that I need to use the serverless-dotenv-plugin package:
npm install serverless-dotenv-plugin --save-dev
And then I have to update the serverless.yml file to use some environment variables for things like naming the DynamoDB Table and a custom variable to specify that we’re using a local environment:
# serverless.yml
. . .
plugins:
  - serverless-dotenv-plugin
  - serverless-s3-local
  - serverless-dynamodb-local
  - serverless-offline # Needs to be the last one
. . .
custom:
. . .
    seed:
      domain:
        sources:
          - table: ${env:DYNAMODB_TABLE}
            sources: [./seeds/users-table.json]

resources:
  Resources:
    S3Bucket:
      Type: AWS::S3::Bucket
      Properties:
        BucketName: local-bucket
    DynamoDbTable:
      Type: AWS::DynamoDB::Table
      Properties:
        TableName: ${env:DYNAMODB_TABLE}
        AttributeDefinitions:
          - AttributeName: email
            AttributeType: S
. . .
Then update the lambdas/users.js file make the local configuration conditional:
// lambdas/users.js

const AWS = require("aws-sdk");

if (process.env.IS_OFFLINE) {
  AWS.config.update({
    region: "local",
    endpoint: "http://localhost:9000",
    accessKeyId: "S3RVER",
    secretAccessKey: "S3RVER",
  });
}
. . .
And to wrap it all up, lets create a .env file, with those 2 variables:
# DynamoDB Table Name
DYNAMODB_TABLE = UsersTable

# Specify that we're using a local environment
IS_OFFLINE = true
If you start your environment again, you can see a section where it shows which environment variables its reading for the .env file:
Deploying to AWS and wrapping up
To deploy the created resources to AWS yo initially have to do 2 things:
- Configure the variables that are on the
.envfile on the Lambda Console - Select a region for deployment in
serverless.yml
After that your you can deploy your lambda functions, your Dynamo table and you api endpoints by issuing serverless deploy
You can get a copy of the final project in GitHub and use it as the starting point of your own project.