Simple Mac OS setup for flutter development
So I’ve been following The Net Ninja’s excellent Flutter tutorial, but one thing that he misses is how to install Flutter in your Mac for iOS development. And most of all, how to use the iOS simulator to preview your application in a virtual iPhone.
So I decided to create this short (in words not in length since is loaded with images) article on how to set up your mac for Flutter iOS development in the simplest way possible. I’m also going to go trough Android installation but without too much detail, since most of the steps are going over installation wizards inside Android Studio.
Before I begin, let me give you a good news and a bad one:
The good news is that all the software we’re going to install is free… The bad one is that all the software is HUGE… so most of the time you’ll be expending it in downloading apps from the Internet.
TOC
- Install Xcode
- Install Flutter
- Setup Xcode
- Create a Flutter test app
- Install Android Studio
- Configure a Android Virtual Device or AVD
- Install an Android SDK
- Setup the Android SDK Path
- Visual Studio Code
Install Xcode
In case you don’t know, Xcode is the official Apple tool to develop for Mac and iOS.
So, if you want to develop iOS applications you can’t get around installing Xcode.
So open the App Store app in your mac, search for Xcode, and click on download.
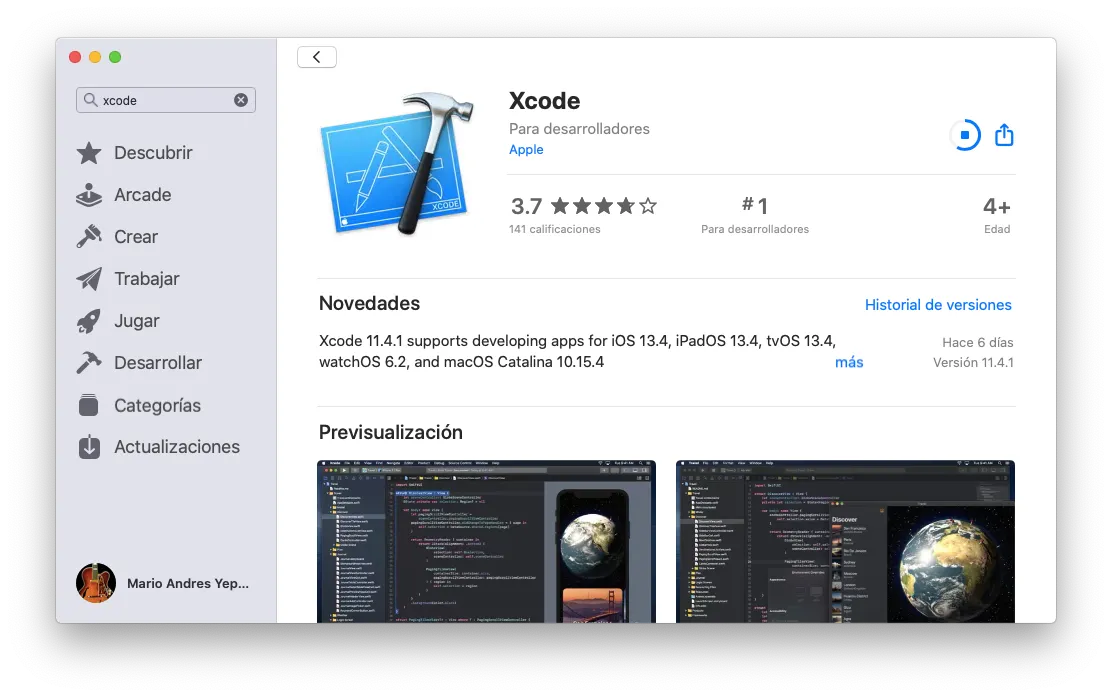
The Xcode is a big download (about 2 Gigs) and a long installation depending on your computer, so in the meantime we can install the flutter SDK.
Install Flutter
The flutter development environment is distributed as source code directly from github… which is great since there is no need to download special apps, IDEs, tools, etc.
The added bonus of using git, is that the upgrade process, when new versions of flutter come out, is more straight forward.
But before we do that. You have to select a place in your hard drive where you want to store the flutter repo. In my case I selected ~/Projects/flutter/. This means that the file ~/Projects/flutter/bin/flutter is going to be my main tool to create new flutter projects, run apps inside a simulators and compile apps for distribution.
The steps to install Flutter are then:
- Go to the parent dir where you want to install flutter. (Mine is going to be
~/Projects). - Clone the
stablebranch of the git repo - Add the
$FLUTTER_HOME/binto your path$FLUTTER_HOMEis the dir where the flutter repo got stored, in my case~/Projects/flutter/ - Execute
flutter doctorto make sure everything works
cd ~/Projects
git clone https://github.com/flutter/flutter.git -b stable
echo 'PATH="$PATH:`pwp`/flutter/bin' >> ~/.zshrc # Or ~/.bachrc
source ~/.zshrc
flutter doctor
If you look closely to the shell commands, you can see that I added the directory ~/Projects/flutter/bin to my $PATH by modifying the ~/.zshrc file (If where using bash then it would have been ~/.bashrc). That’s so I don’t have to provide the absolute path to the flutter binary every time I need to execute it. That’s why I can execute flutter doctor without providing any paths.
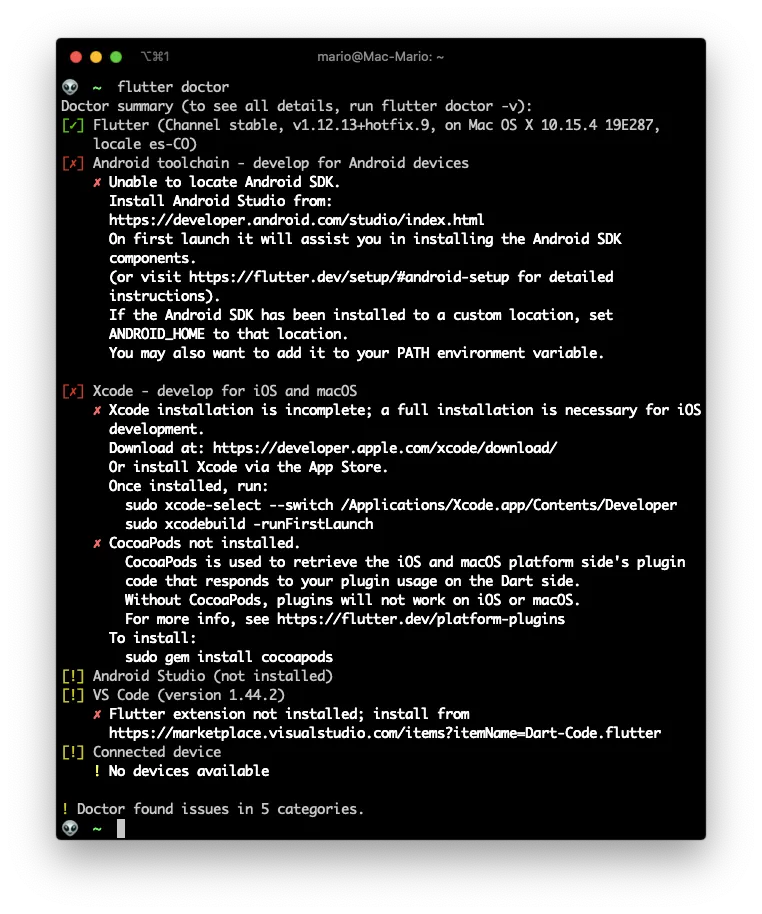
As you an see from the image, the flutter commands works, but its giving us some warnings. So lets mover forward with the Xcode installation to make some of them go away.
Setup Xcode
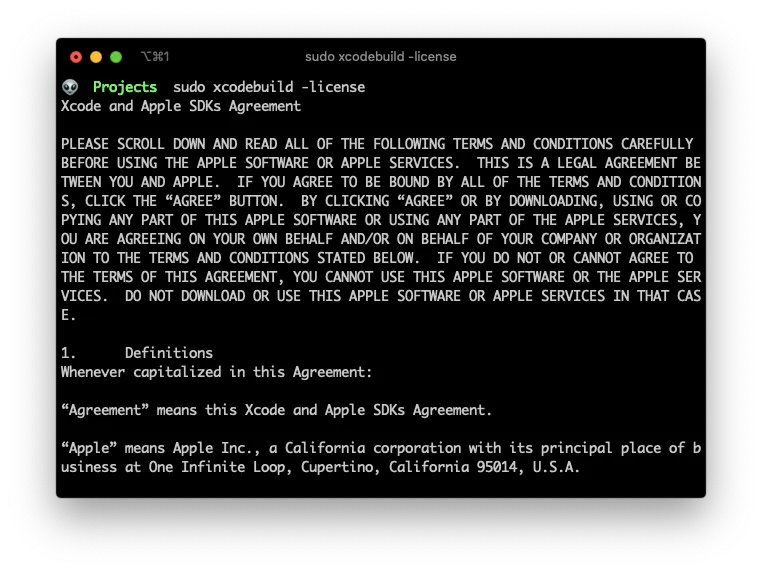
After Xcode installs, we need to prepare it for development (any type of Mac and iOS development). Se we need to execute the following commands:
sudo xcode-select --switch /Applications/Xcode.app/Contents/Developer
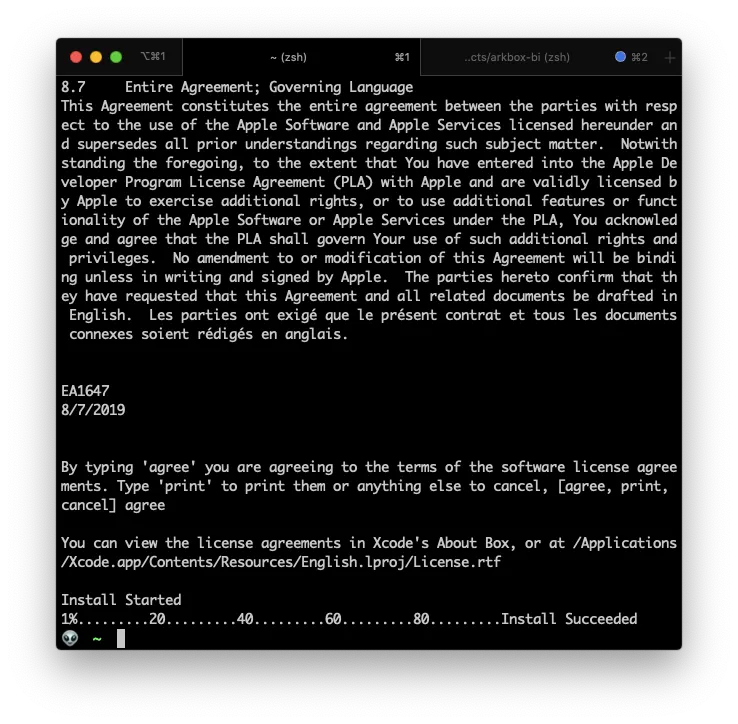
sudo xcodebuild -license # Space to the en and then "agree"
sudo xcodebuild -runFirstLaunchThis commands are just to select the main tools I need for development, to accept the user’s end agreement and run Xcode for the first time so it finish its setup.
And we’re done with Xcode. You don’t have to open it again if you don’t want to ever.
Create a Flutter test app
To completely verify that Xcode and flutter work, we’ll create a simple Flutter app, and run it in the iOS simulator that comes with Xcode.
Creating a flutter test app, could’t be easier. Just type flutter create with the name of an app, and that’s it.
cd ~/Projects # Your pojects folder
flutter create testapp
cd testapp
open -a Simulator
flutter run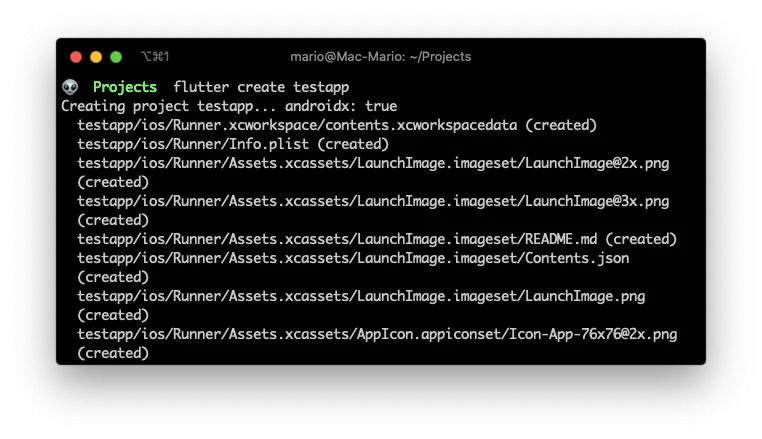
To view your app in the iOS simulator, you first need to open the simulator using open -a Simulator and the executing flutter run so the test app installs itself in the virtual device and then runs inside it.
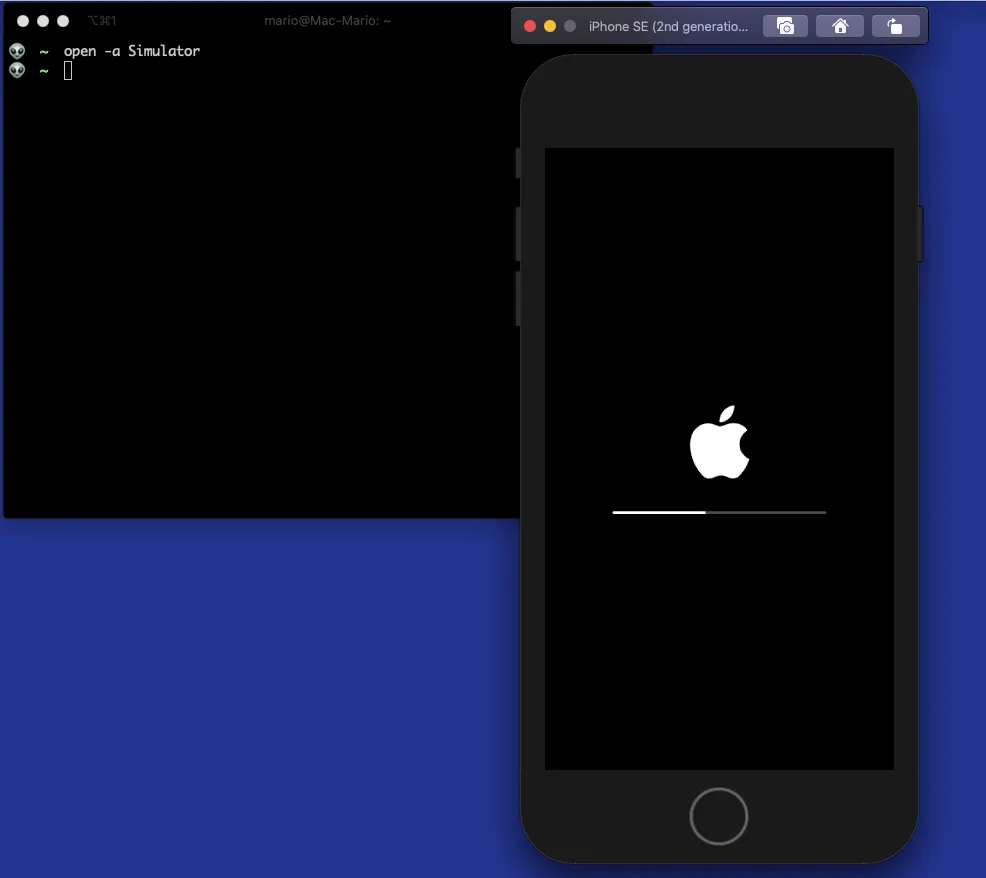
And we have an app inside our simulator…
You could stop here if you are just starting or are not interested on developing for Android. But if you are, follow along on how to install Android Studio so you can create Android apps
Install Android Studio
To develop Android Apps, you need the complete Android Studio IDE. And to run Android Studio, you need a Java Development Kit.
In my case, I installed JDK 14 since it was the latest at the time of this writing.
brew tap adoptopenjdk/openjdk
brew search jdk # Look for the latest version
brew cask install adoptopenjdk14
/usr/libexec/java_home -V
java -version
And then install Android Studio using brew again:
brew cask install android-studio
open -a "Android Studio"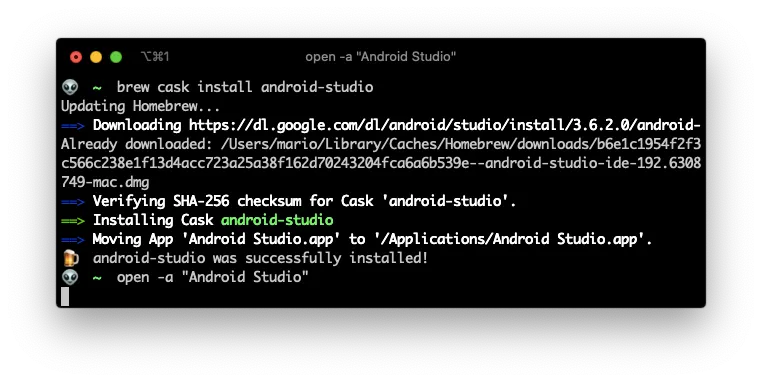
This can take a loooong time, since Android Studio it’s even bigger that Xcode.
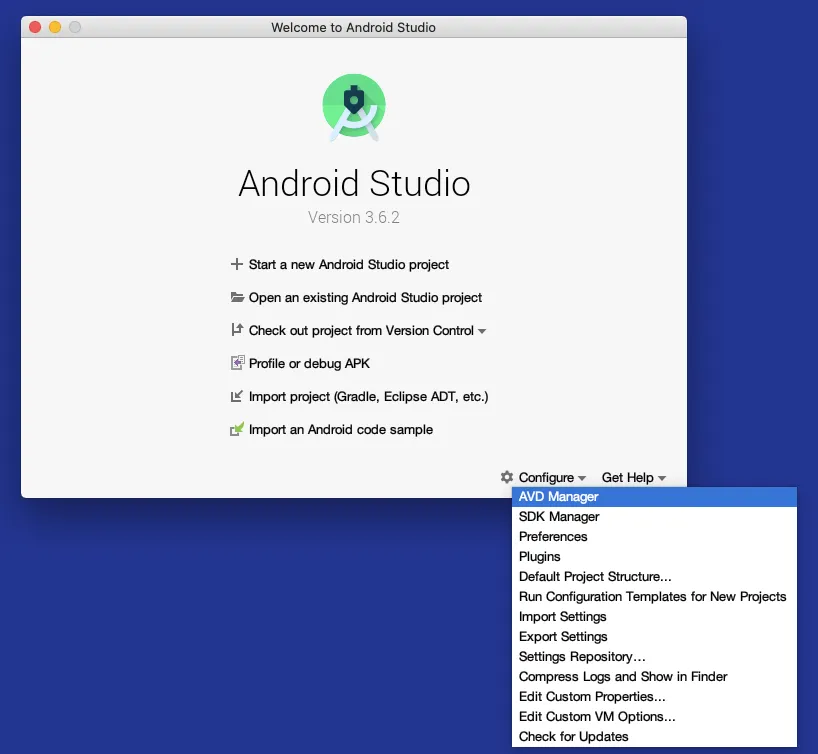
Configure a Android Virtual Device or AVD
With Android studio installed, you need to create an AVD or simulator to test your apps.
This is not as straight forward as with the iOS one, since there are a lot of options when creating your simulator for Android:
- The actual hardware you want to emulate
- Which version of Android to run inside the virtual device
- The dimensions of the device
- The development kit to use for the Android version.
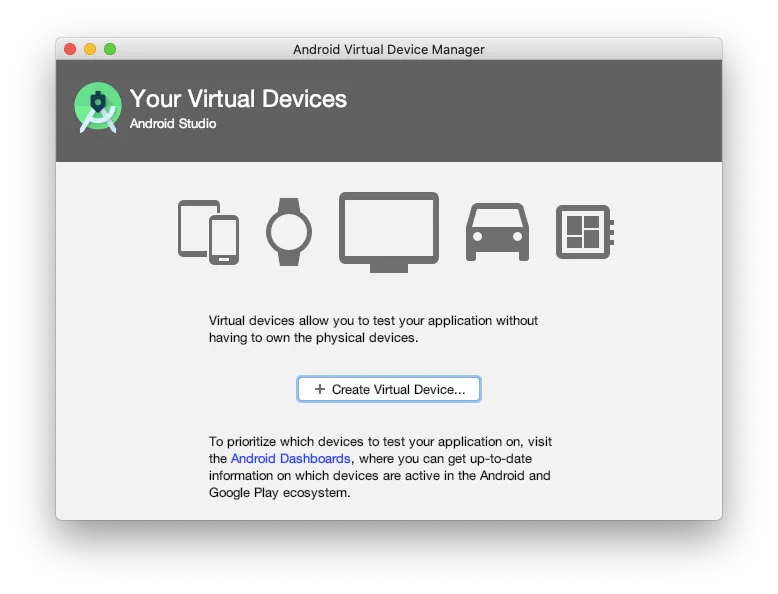
So fire up Android Studio if you haven’t already, and in the greetings window, select Configure > AVD Manager.
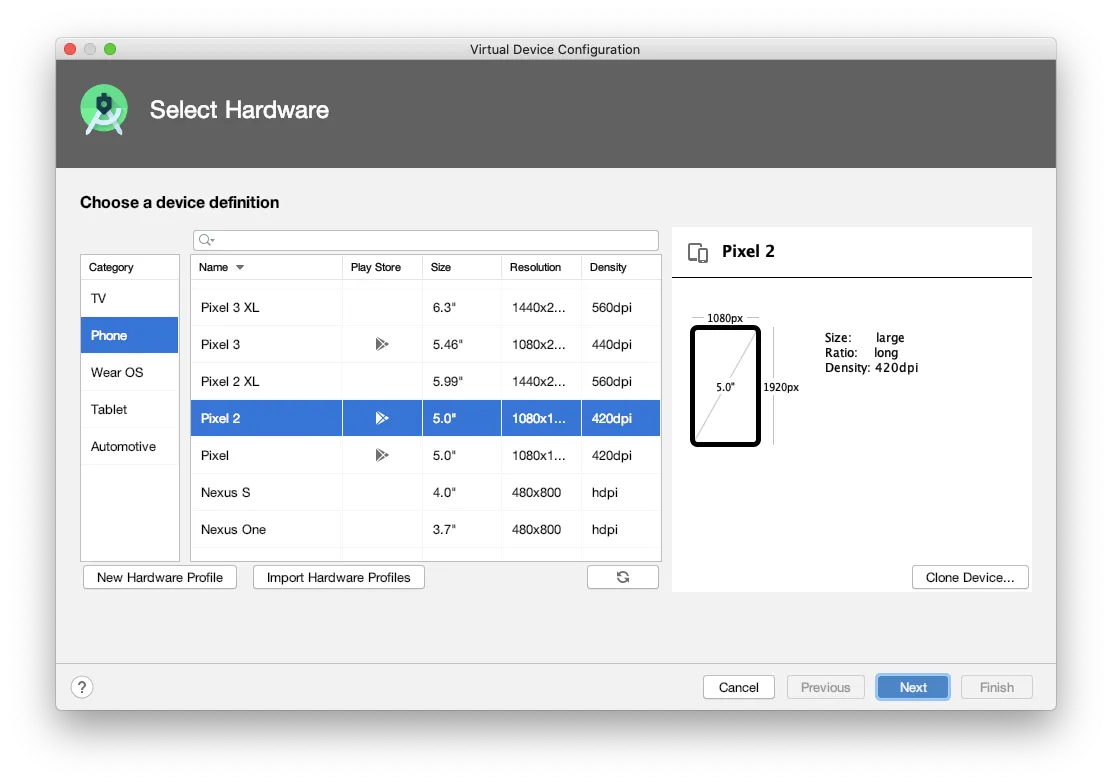
The first question you get, is the type of hardware you want to emulate. I selected a Pixel 2 since it doesn’t require a lot of resources from my computer.
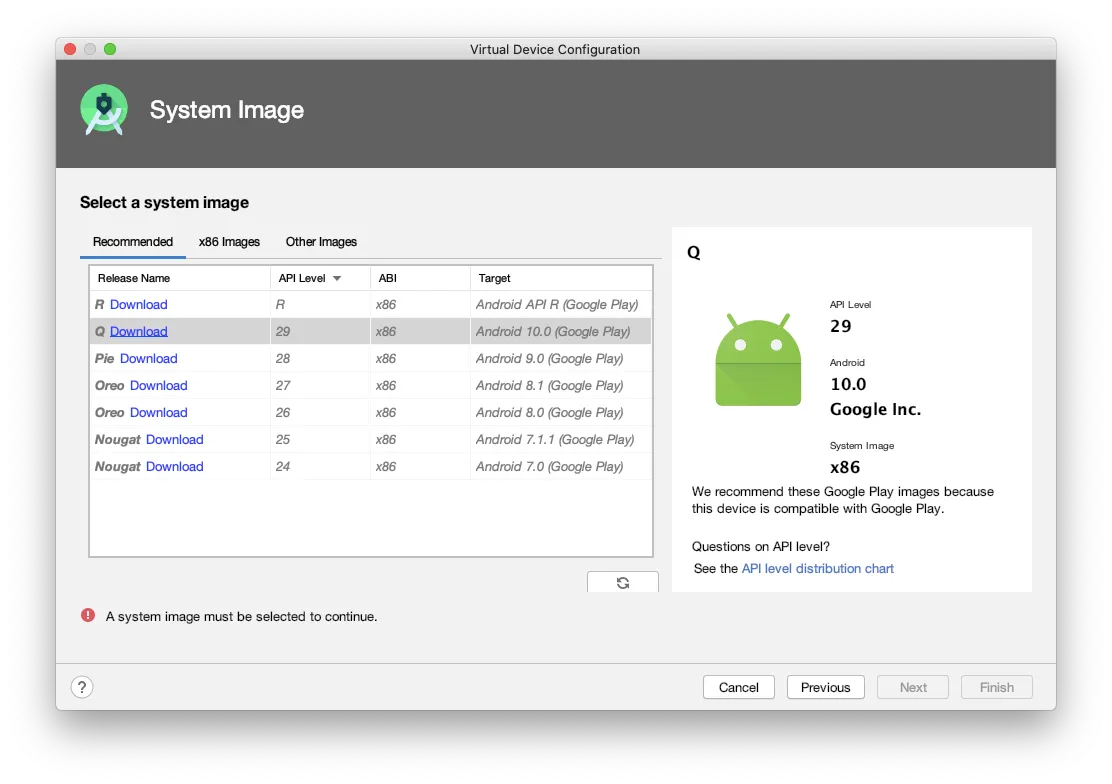
The you have to select the version of Android you want to run in your hardware. I selected Android Q.
I didn’t select Android R because at the time of this writing it was still on beta and I didn’t want any incompatibilities by using unreleased software.
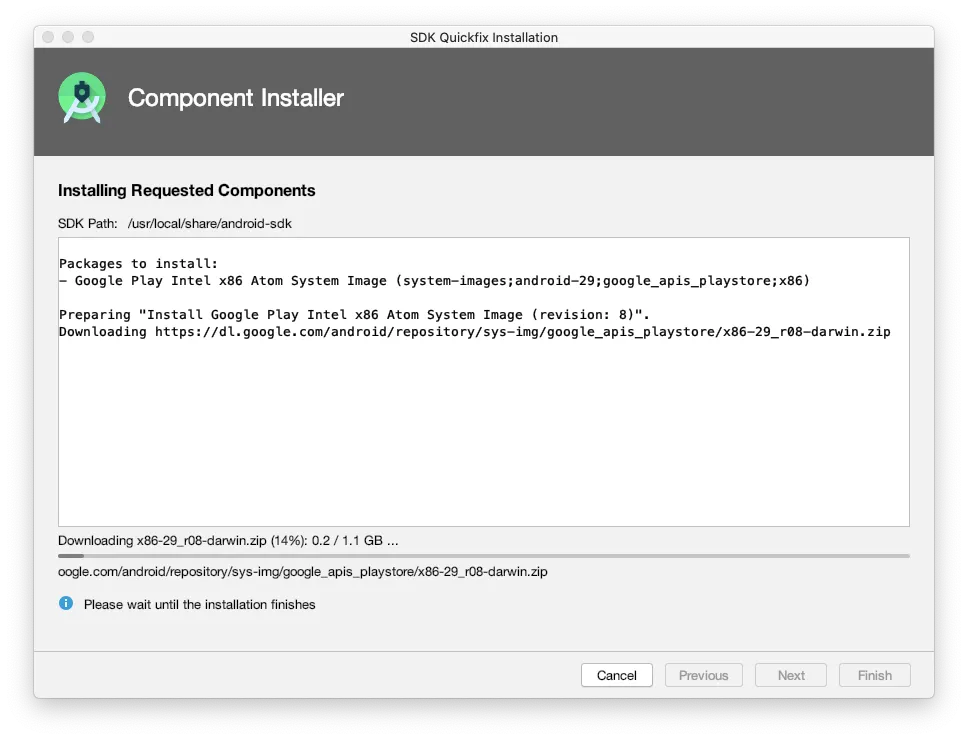
Now click on Download and wait again for a big download.
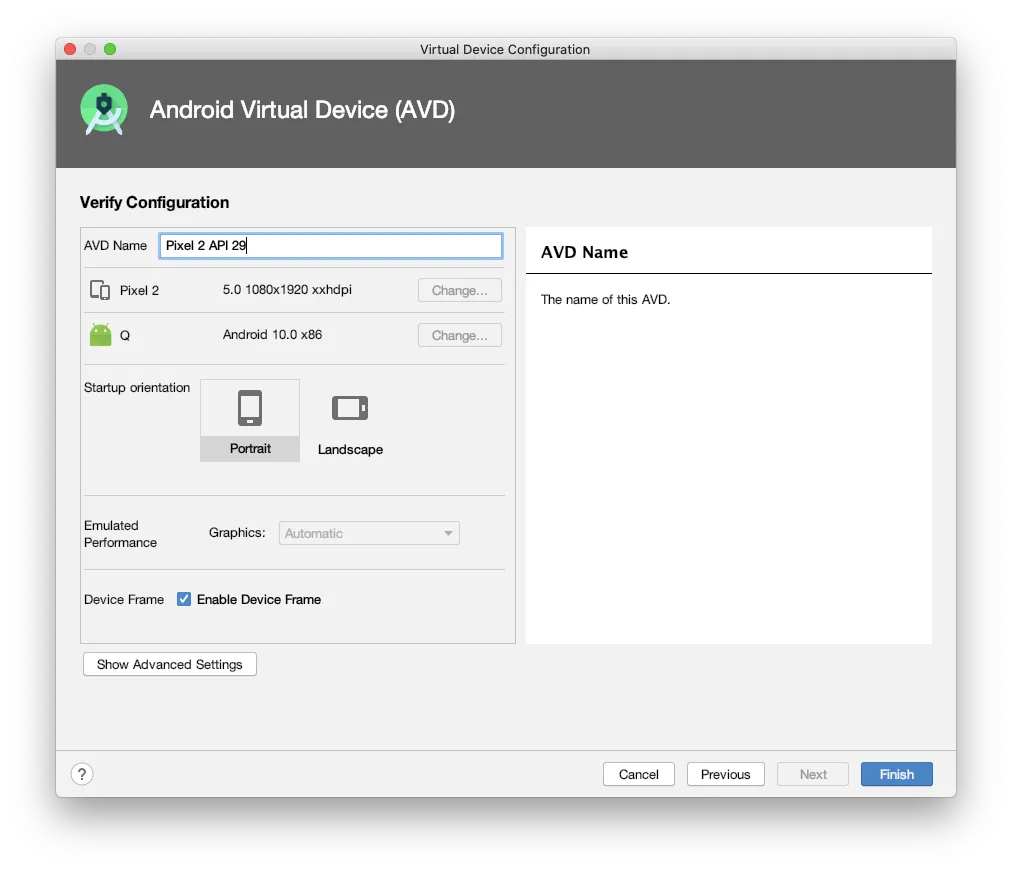
After the installation is finished, you have to name the newly created device.
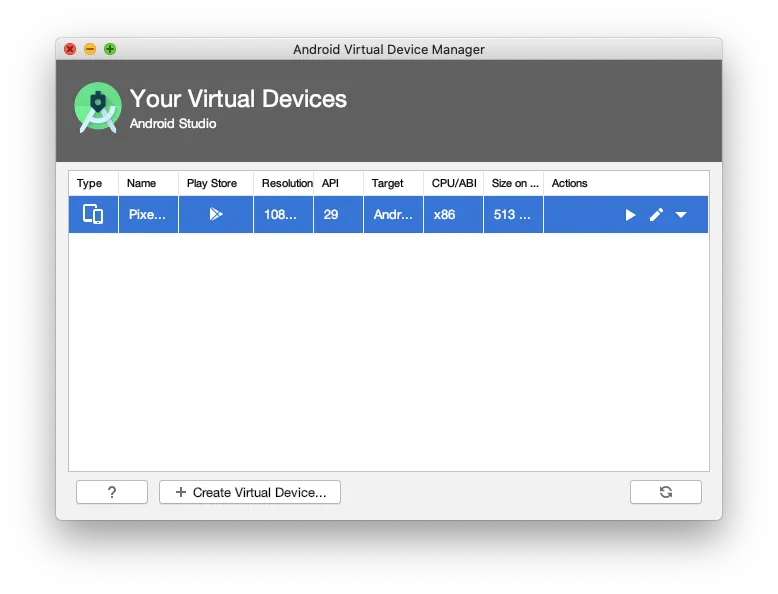
And here it the list of devices in your machine. Right now it only show the one I just created:
Install an Android SDK
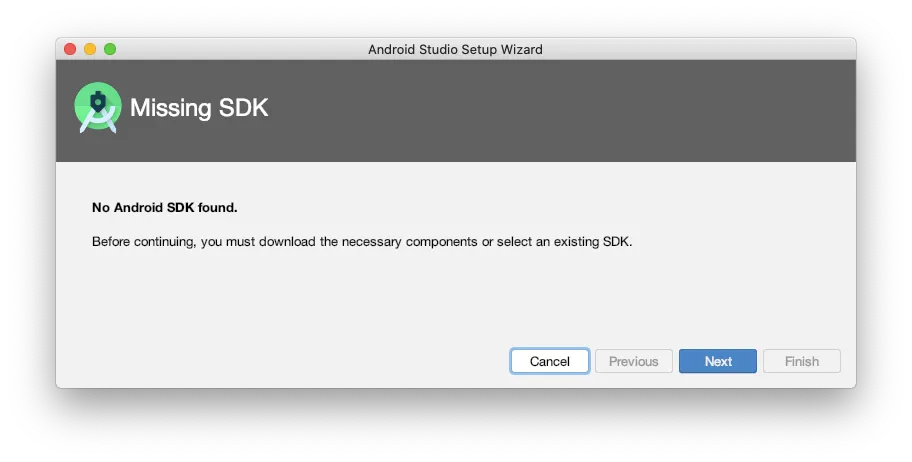
If I click on the play (▶️) icon, in the list of devices (the last image), I’ll get a warning about no SDK installed on my machine.
You see, we installed the IDE (Android Studio), a Virtual Android Device (The Pixel 2 with Android Q), but we still have to install the SDK to actually compile apps for Android!!! I told you it was going to be HUGE.
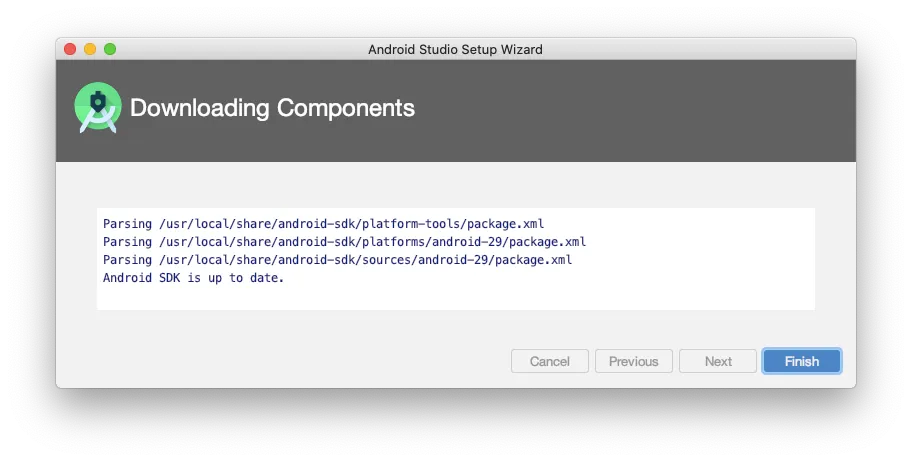
The good news is that this is last piece of software we need to install. And to do it so, just follow along the wizard that Android Studio provides:
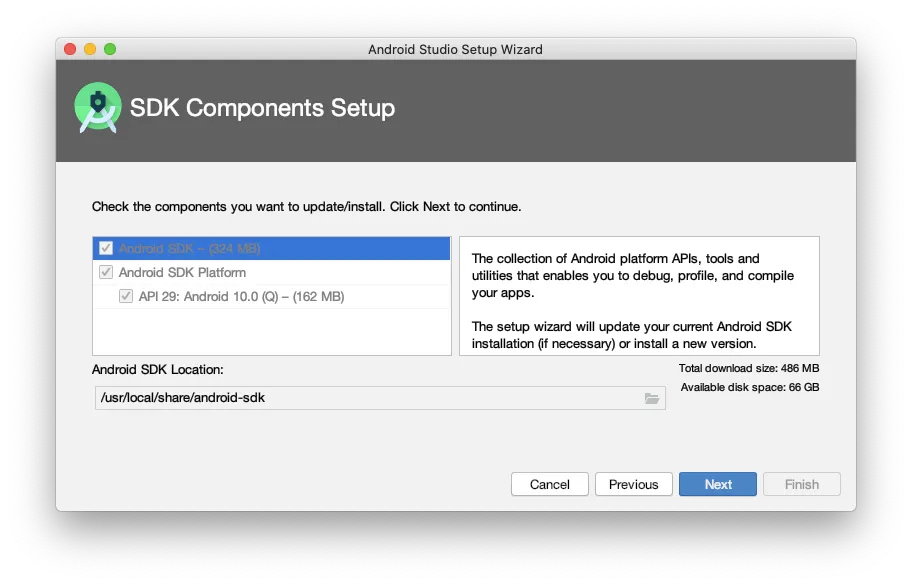
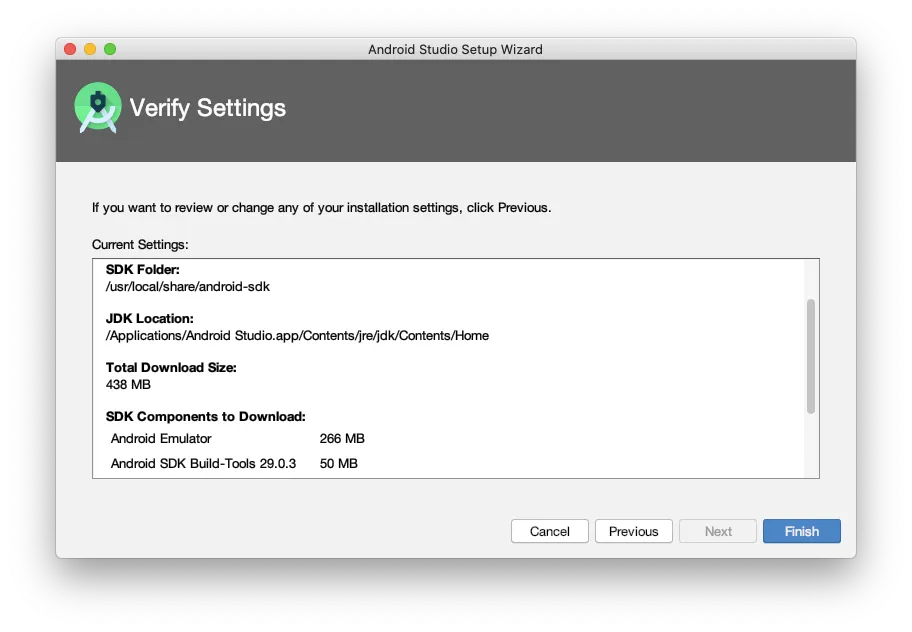
Now, This is important: From the this image, you can see that the SDK will be installed in /usr/local/share/android-sdk. Yo’ll might need this PATH for future steps.
If you are not are going to stick to Android Studio and don’t want to use the terminal or Visual Studio Code. You can stop reading. You are completely set up.
Setup the Android SDK Path
I knew it… You couldn’t stand not knowing how to use Visual Studio Code (or the terminal for that matter) to develop for Android.
So let me show you how to run flutter apps from the command line in your Android Virtual Device. Which is also necessary if you re goin to use Visual Studio Code.
Remember that I told you to take note of the path from “that image” in the previous step? That’s the SDK Path and we need it to configure it in our ~/.zshrc (or ~/.bashrc) so its available for Visual Studio Code and the terminal of course.
echo "export ANDROID_HOME=/usr/local/share/android-sdk" >> ~/.zshrc # or ~/.bashrc
export ANDROID_HOME=/usr/local/share/android-sdk
flutter doctor
flutter emulators
flutter emulators --launch Pixel_2_API_29
cd ~/Projects/testapp
flutter run
That’s it, we can now launch the Android emulator from the command line and run flutter apps inside them.
![]()
Visual Studio Code
Finally a couple of tips for Visual Studio Code users like me:
1. Install the Flutter extension
If you don’t install it, you might as well forget about using Visual Studio Code.
You just have to look for Flutter on the extensions panel. Or issue the following command on the terminal:
code --install-extension Dart-Code.flutter2. Some key bindings
As a quick (and personal) reminder, here are the most used key bindings for flutter development:
F5- Open you app in the running simulator in debug mode.Cmd+F5- Opens your app in the simulator without debug. This makes it run and reload faster.cmd+.- Activity menu that allows you for instance wrap a widget in another or rename a variable.shift+F5- Stop debugging.cmd-shift-F5- Restart Debugging (Hot Reload when debugging Flutter apps).F9- Toggle Breakpoint.F10- Step Over.F11- Step In.Shift+F11- Step Out.
There are a lot of useful shortcuts that can be viewed in this excellent blog post