Setup a Mac OS computer to develop DataScience solutions with Python and VSCode
Table Of Contents
Even tough is not complicated, there are a series of steps that are suggested to take, in order to be able to be productive while developing Data Science solutions using a Mac machine with the Python language.
In this article I’ll show you a series of steps you can take to achieve just this without too many fuzz.
Install Python
You could say Duh! here…
But the fact of the matter is that Mac OS comes with an outdated version of Python, and that version could give you issues with newer solutions.
So its required that you start by installing a new version of Python alongside of the stock one.
If you have brew its just a matter of executing in your terminal.
brew install python
This will make the python3 command available globally in your machine.
Install required Visual Studio Code extensions
For starters we need only one extension, and that would be the official Python extension. That can be installed in the terminal by issuing:
code --install-extension ms-python.python
There are other extensions for Data Science but that one will suffice.
Creating a project
The previous 2 steps are required on a global scope. Now its time to setup your project.
The first step is to create a virtual env in your work dir:
mkdir tutorial-python-datascience
cd tutorial-python-datascience
python3 -m venv .venv
source .venv/bin/activate
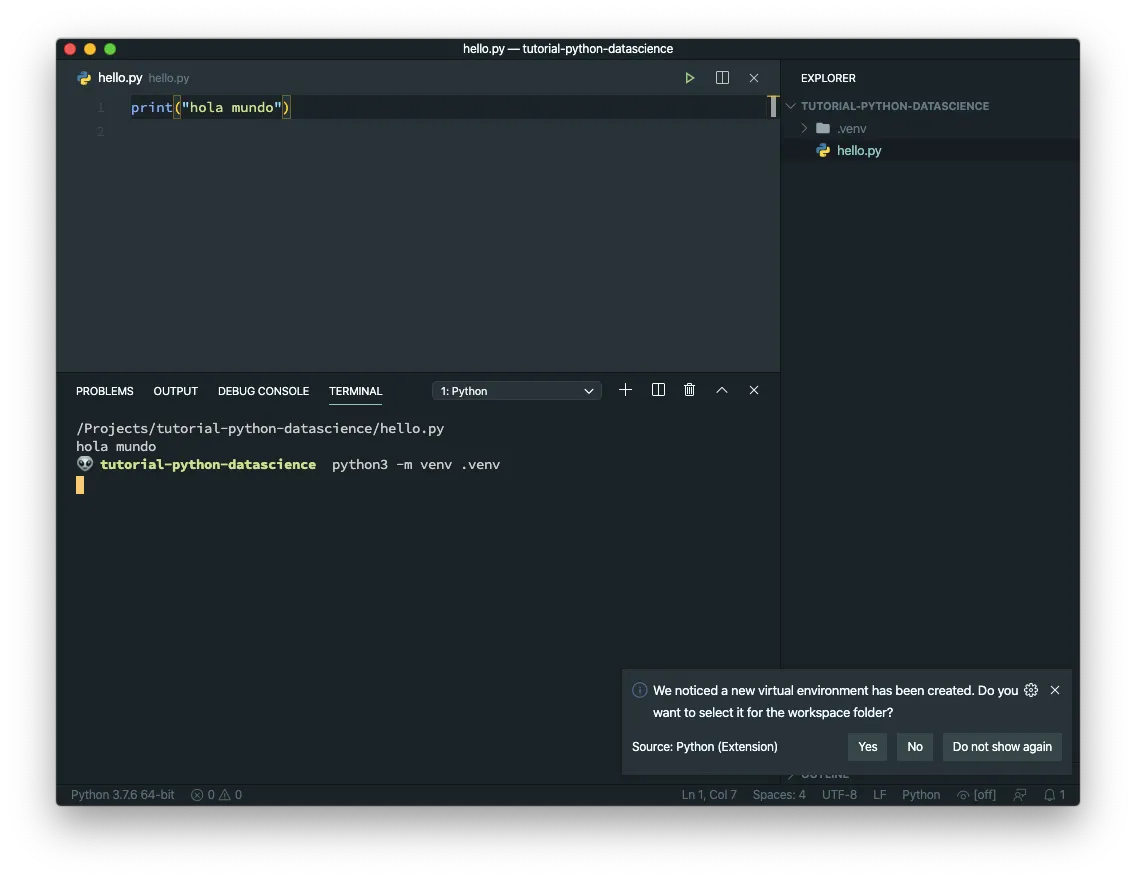
If you notice from the image, Visual Studio Code prompts you to use that Virtual Environment, which you should.
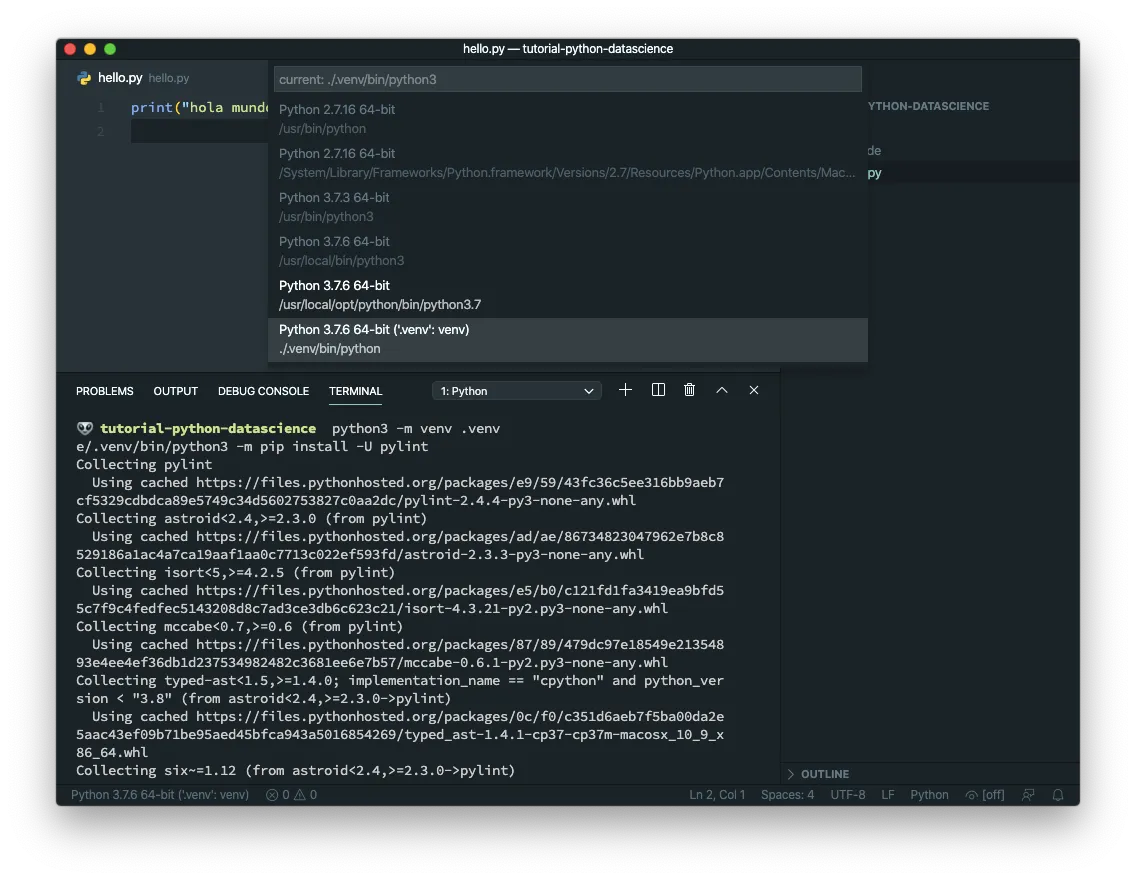
Also change the Python Interpreter just in case:
Python Project Modules
In the last step Visual Studio asked you to install 2 Python modules:
If it didn’t, here are the commands to install them in the terminal:
python3 -m pip install pylint
python3 -m pip install autopep8
Notice that we’re installing Python Modules and not Visual Studio Extensions
The first module (pylint) will make sure that your code is free of bugs and of good quiality to an extent.
The second module (autopep8) will format your code so it follows the PEP 8 style guide.
… And we’re done
Remember that the last 2 steps have to be done for every python project
MatPlotLib
This is not part of the process but its cool to show the power you get by following the previous steps. Lets install Python’s MatPlotLib and execute a small plotting test.
Firs install the module in our Virtual Environment
python3 -m pip install matplotlib
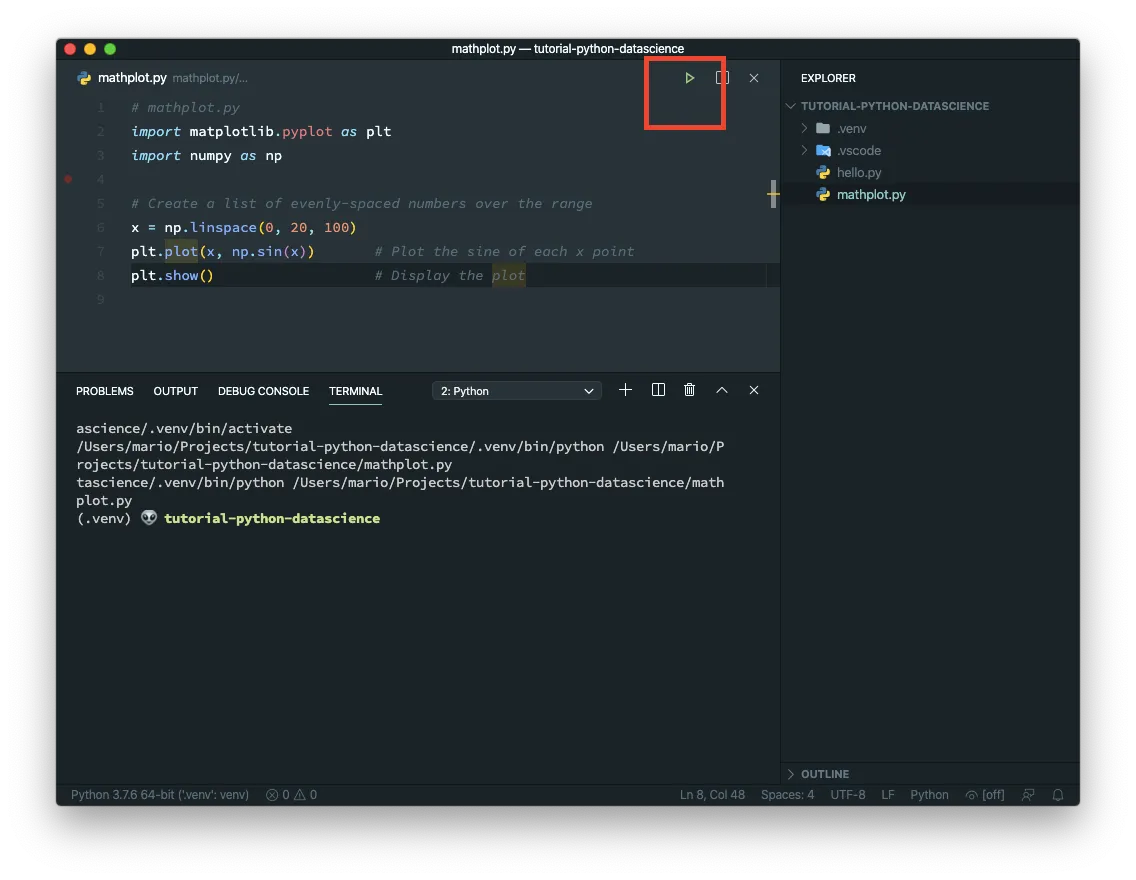
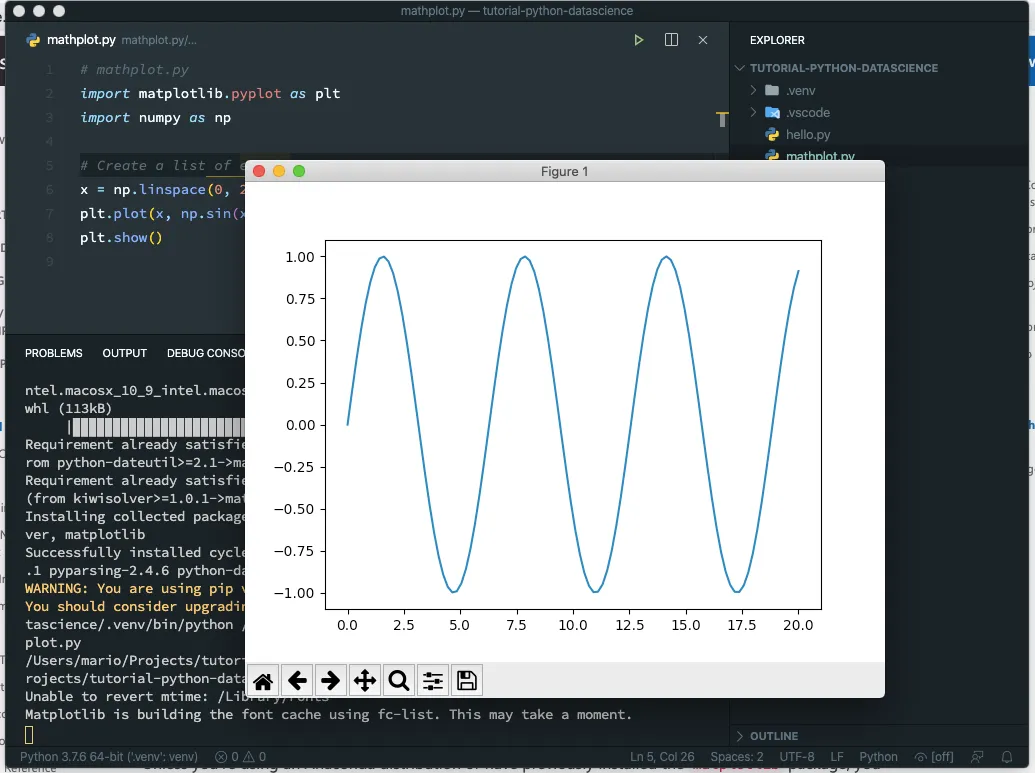
Then create an small plotting program
This code is taken from the Python Tutorial in Visual Studio Code site on https://code.visualstudio.com/docs/python/python-tutorial
# mathplot.py
import matplotlib.pyplot as plt
import numpy as np

# Create a list of evenly-spaced numbers over the range
x = np.linspace(0, 20, 100)
plt.plot(x, np.sin(x))       # Plot the sine of each x point
plt.show()                   # Display the plot
And finally fire it using the run button:
Jupyter Notebooks
Another great python plugin that you should install for Data Science projects is Jupyter Notebooks
You can install and start a Jupyter Notebook by issugin just 2 commands (assuming that you have initialized your virtual environment)
python -m pip install jupypterlab
jupyter notebook
This will start a small web server in your computer that you can access just by opening your browser on the port 8080
If you want to open a Jupyter Notebook directoy in Visual Studio you can use the VS Code Jupyter Notebook Previewer. But the reallity is that you don’t gain much by using it.
Final thoughts
As you can see, Visual Studio Code is a very capable Python IDE with the advantage of being very light and very versatile.
Hope you find this tutorial useful.