Certbot Introduction and Basic Usage with Nginx and Apache
Table Of Contents
Since 2018 Google started penalizing sites that are not secured by SSL lowering its page rank. And even tough its been 2 years since that change, there are still many sites that use Plain HTTP instead of HTTPS.
So here I’m going to show you how to use Let’s Encrypt with the certbot command to secure your web-server in a very easy (and very free) way.
So what is LetsEncrypt?
Let’s Encrypt is a nonprofit Certificate Authority that provides TLS certificates for websites.
SSL is now deprecated in favor of TLS. But its still supported and valid.
A Certificate Authority is a special company or organization that can issue certificates that any browser (think Firefox, Chrome, Edge, Safari) can understand.
Only a small group of organizations can be Certificate Authorities or CA’s.
In other words, you can request a free, 100% valid, certificate from Let’s Encrypt.
So, you can either go to a commercial Certificate Authority like GoDaddy or Verisign and pay up a yearly feee of up to US$200 to create a certificate. Or you can use certbot to request a certificates from Let’s Encrypt without paying a dime.
One note though…
Let’s encrypt does not support special certificates that not only validates your server but your company as legally stablished enterprise.
In those “rare” cases where you need that extra validation, you need to buy a cert by a company like Verysign or GoDaddy and you might need to provide additional legal documentation before your cert gets created.
So what is certbot?
certbot is the CLI command (a command that runs in a Terminal) that you can use to request and install certificates from Let’s Encrypt CA in a fully automized way.
Services like https, ftp, ldap, etc. Can be secured with SSL as the transport layer by using certbot generated certificates.
… And did I say that they are free?
Take into account that the certificates are not created by certbot. They are created by the Let’s Encrypt servers. certbot just automates the process of creating a key, validate your server, and download the resulting certificate.
How does certbot works?
To create and install a certificate, cerbot first validates that your machine has a valid DNS record by creating a temporary file in your server and then asking the Let’s Encrypt servers to retrieve it using the DNS name and not the IP.
There are other ways to validate the DNS record of your machine, but that’s the more popular one.
If the validation passes, it creates a cryptographic key and connects to the Let’s Encrypt servers issuing a certificate requests with that key.
The third step is to download the certificate from Let’s Encrypt and save it in your machine next to the key of the previous step.
The last optional step is that certbot will try to configure your daemon (Apache, Nginx or other) with this new certificate.
All this process takes about 30 seconds to a minute if you have your server configured in DNS beforehand.
And how does a certificate secures my server?
First of all… You use a certificate and a key to encrypt the information that transits between your server and a users browser. So a certificate does not secures a service, it just secures the communication.
Second: The basic idea of encrypting information is:
- You use a certificate to cypher the data that leaves your server
- You use the key to decipher the data that reaches your server
The key is created by you in your server and nobody, and I mean nobody, should know that key.
The certificate has to be created by a valid Certificate Authority (like Let’s Encrypt) since that certificate need to be trusted by browser across the world.
The process is actually a little more complicated than that. But that’s the gist of it.
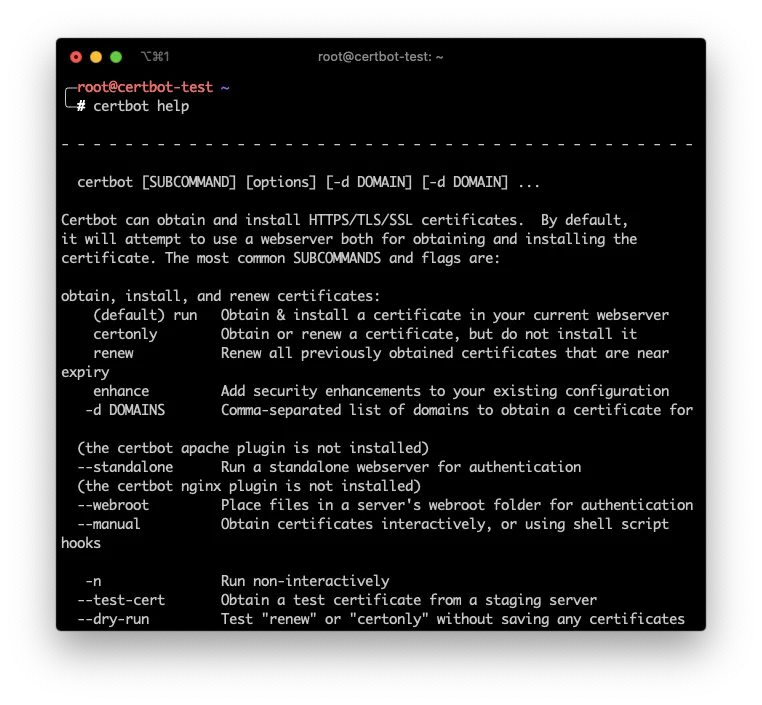
cerbot commands and plugins
So up until now I’ve said that certbot is for requesting and storing certificates. What I haven’t said is that depending on how you want to validate your machine and what daemon (Apache, Nginx, etc.) you want to secure, you have to use a plugin.
There are 2 Types of plugins:
- Authenticators
- Installers
Personally I don’t like to use Installers since they try to configure your daemon in a very particularly non flexible way. But if you use standard configurations in your Apache or Nginx you’ll be fine.
For instance, this is the command to create a certificate, and configure it in your local Apache server:
sudo certbot run -a webroot -i apache -w /var/www/html -d example.com
-aspecifies that the authenticator is thewebrootauthenticator.-ispecifies that the installer isapache.-dspecifies that the domain to authenticate isexample.com-wis an additional parameter that thewebrootauthenticator requires that indicates where is web server’s Web Root
The final certificate and key will get stored in /etc/letsencrypt/live/example.com/ sub directory. And the Apache service will be automatically configured.
Authenticators
Authentication is making sure that your DNS is correct and it points to the machine you are trying to secure.
And making sure that the DNS points to your machine can be done in one of this ways:
- Let’s Encrypt servers can retrieve an special file in your machine using plain http
certbotcan configure your Apache in an special waycertbotcan configure your Nginx in a special waycertbotcan fire up a temporary mini web server so the Let’s Encrypt’s servers can access a temporary file- Etc.
So authenticators are the method that certbot will use to validate your machine.
Installers
If your machine passes the validation process, Let’s Encrypt generates a certificate that has to be stored somewhere and your service need to be configured to use that stored certificate.
The installer is that part of certbot that takes care of this configuration.
In our example we provided the -a apache as installer. So certbot will try to find Apache’s configuration file and append instructions to take into account the newly created certificate.
Most of the time you opt out to not have certbot configure your service with the newly created certificate. But just in case let me tell you that there are installers for:
- Apache
- Nginx
- DNS (when you create wildcard certificates)
- Etc
Using the certonly command
Most of the time you’ll want to only create the certificate and configure the daemon yourself. At least that’s my case since I try to keep my configuration files small and neat.
In those times you can use the certonly command to instruct certbot to make the authentication and store the certificate in /etc/letsecrypt/ but not make any changes to any daemon configuration file.
For instance:
sudo certbot certonly -a webroot -w /var/www/html -d example.com
Will create a certificate (with no installation) for the domain example.com. Also, instructing certbot that the Web Root path is /var/www/html.
This will authorize my machine by placing a temp file in /var/www/html, then will ask let’s Encrypt to retrieve that file, and if can, it will create the /etc/letsencrypt/live/example.com/cert.pem certificate.
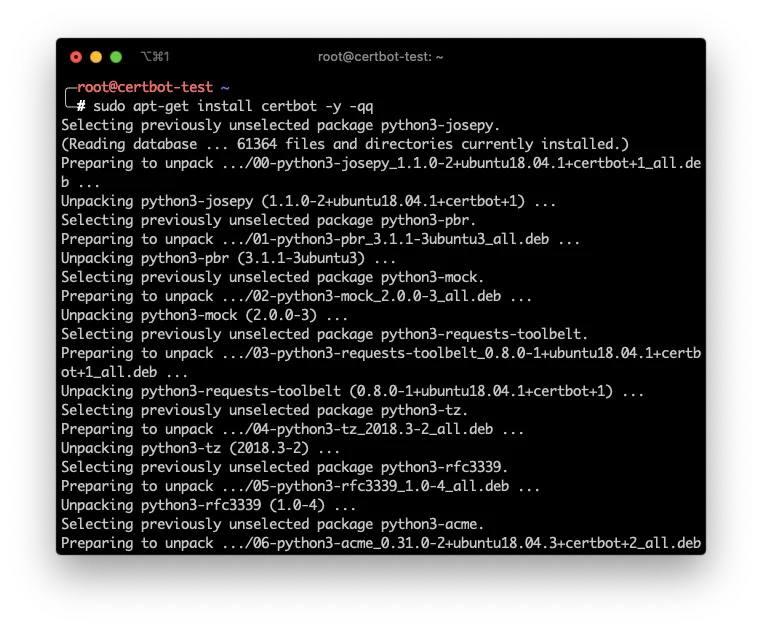
Installing certbot
To install the certbotcommand its just a matter of executing a couple of apt commands (or yum if you are on CentOS or Fedora machine).
sudo add-apt-repository ppa:certbot/certbot -y
sudo apt-get install certbot -y -qq
which certbot
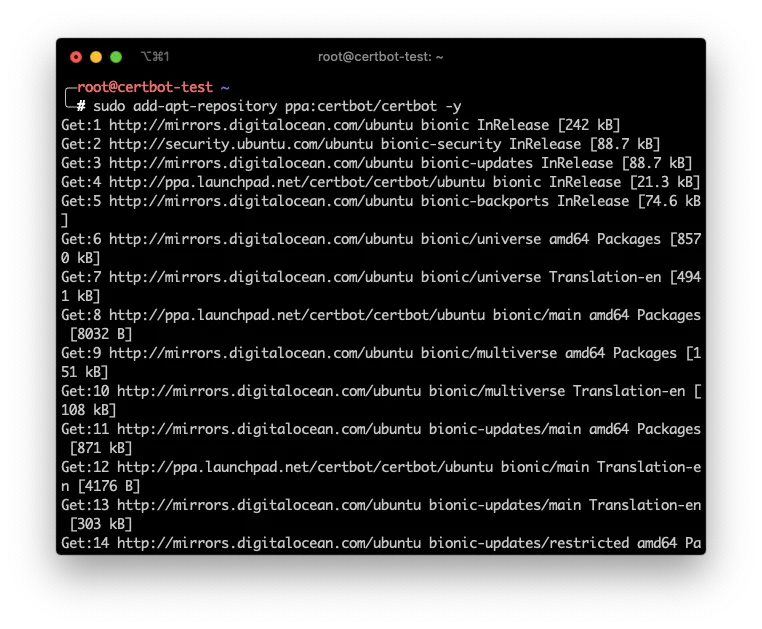
In english what I did was:
- Add the
certbotrepository to my machine - Install
certbot - Verify that the command is available
Configure a Machine using Let’s Encrypt
Now, lets configure an Nginx and an Apache server using Let’s Encrypt and certbotwith the certonly command and changing ourselves the configuration files.
1. Configure your DNS
First we need to register our machine in DNS.
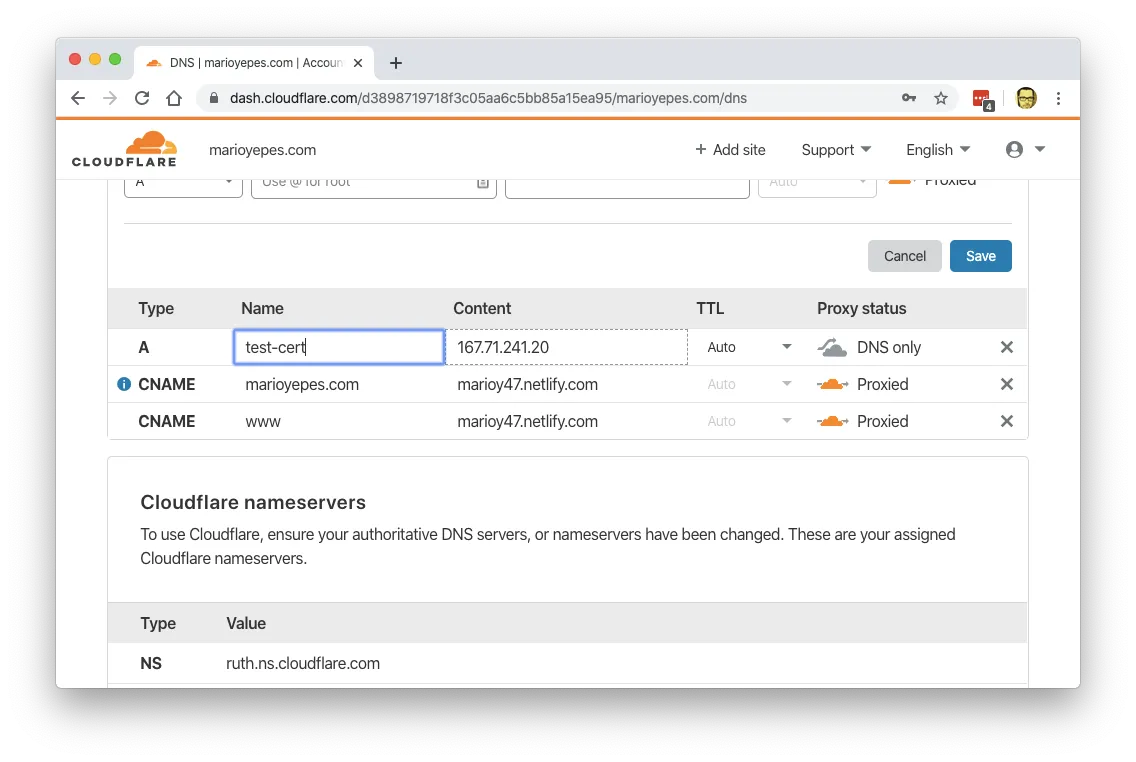
We do this first since DNS requires a couple of minutes (or even a couple of hours) to pick up this change.
If we issue a dig command and we get a valid response, then we’re good to go:
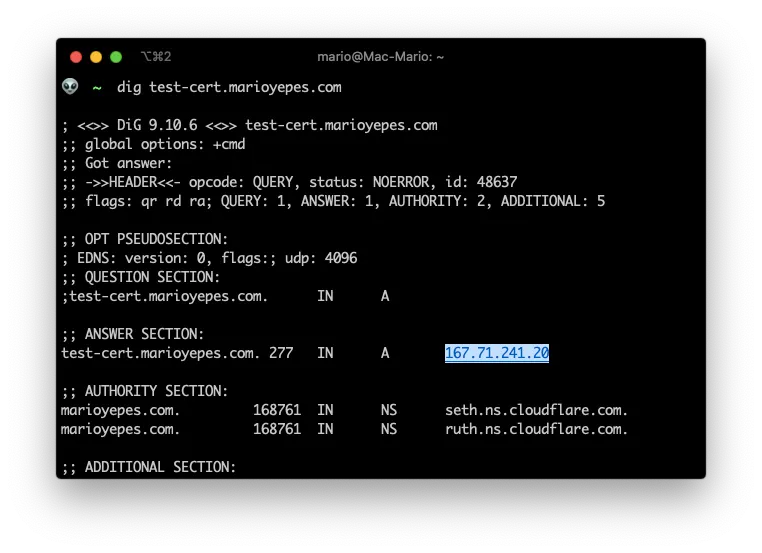
You can see that I added test-cert.marioyepes.com to DNS with the IP 167.71.241.20.
2. Creating the cert
Having configured the DNS record, its now time to execute the command that creates the certificate.
The command is kind of long, but easy to figure out:
sudo certbot certonly -a webroot --webroot-path=/var/www/html -d test-cert.marioyepes.com --agree-tos -m [email protected] --no-eff-email --cert-name test-cert
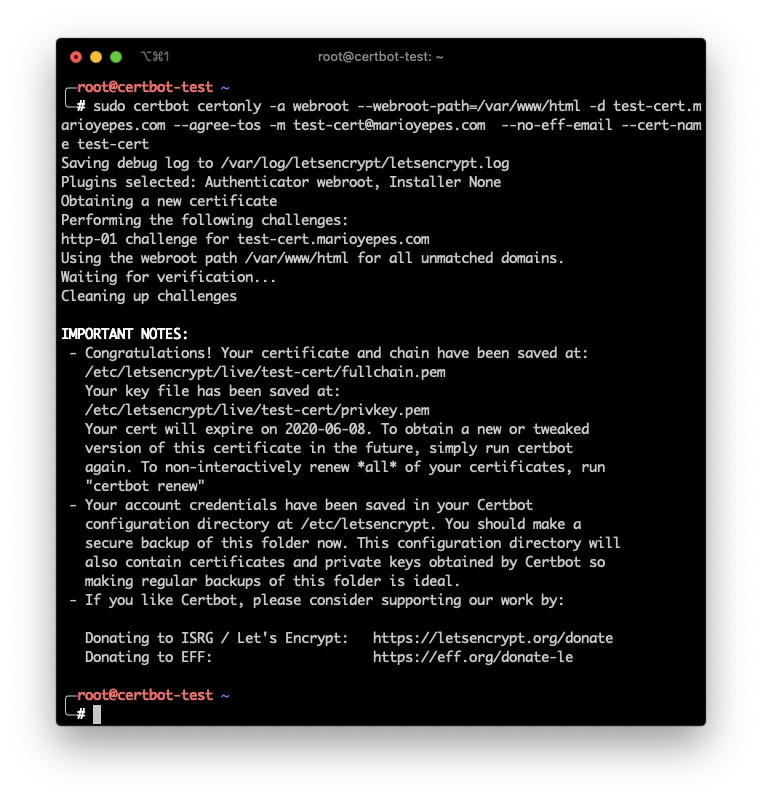
Let me explain…
- Used
certonlyso no daemon installation or configuration is made - Used
-a webrootto specify the WebRoot authenticator. And added--webroot-path=/var/www/htmlsocerbotknows where is the web root. - Also, added
-d test-cert.marioyepes.comparameter socertbotknows which domain to validate. --agree-tos -m [email protected] --no-eff-emailinstructscertbootnot to prompt me for Terms of Service nor to which email send reminders nor if I want EFF (Electronic Frontier Foundation) emails.- And finally
--certname test-certinstructscertbotto save the new certificate and key in/etc/letsencrypt/live/test-cert/directory instead of using the domain name.
If we list the newly created /etc/letsencrypt/live/test-cert/ directory, we can see that we have at least 3 files
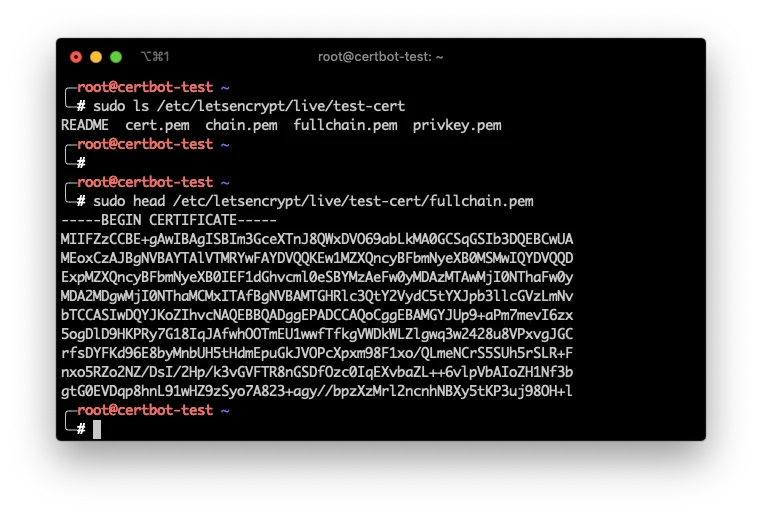
privkey.pemwhich is the private key used to decrypt incoming informationcert.pemwhich is the actual certificatefullchain.pemwhich is a combination of the previous 2
3. Configure Nginx
To configure Nginx, you need to create a new virtual server. And a virtual server is created by adding a new server section.
I like keeping virtual servers in its own files. So lets create the new file /etc/nginx/sites-available/test-ssl with the following contents:
# /etc/nginx/sites-available/test-ssl

server {
	listen 443 ssl default_server;
	listen [::]:443 ssl default_server;
	server_name test-cert.marioyepes.com;
	root /var/www/html;
	index index.html index.nginx-debian.html;
	ssl_certificate /etc/letsencrypt/live/test-cert/fullchain.pem;
	ssl_certificate_key /etc/letsencrypt/live/test-cert/privkey.pem;
	location / {
		try_files $uri $uri/ =404;
	}
}
Notice that the newly created certificate and key are configured with the ssl_certificate and ssl_certificate_key directives. We need both files.
Having created the new virtual server in sites-available you have to activate it by creating a Symbolic Link in sites-available.
Here is the complete process:
sudo vim /etc/nginx/sites-available/test-ssl # Create the file
sudo ln -s /etc/nginx/sites-available/test-ssl /etc/nginx/sites-enabled/test-ssl # Enable new virtual server
sudo nginx -t # Text configuration
sudo service nginx reload # Load the configuration
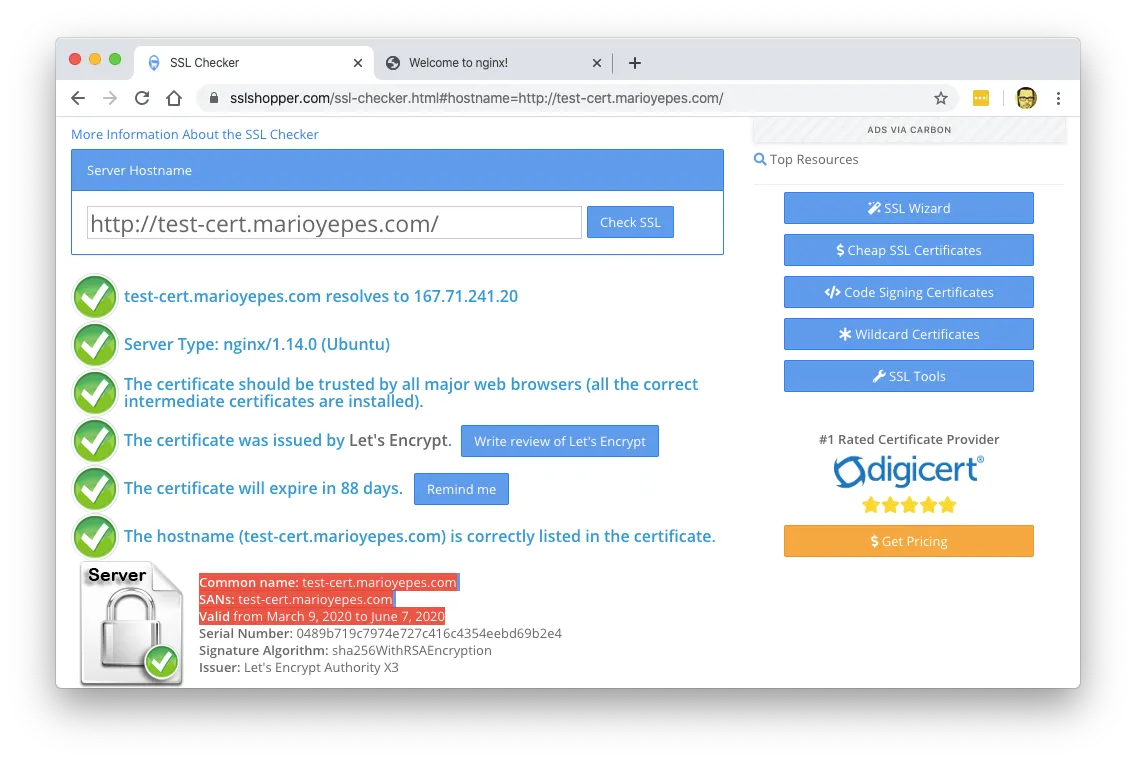
Now, lets test that the server is secured:
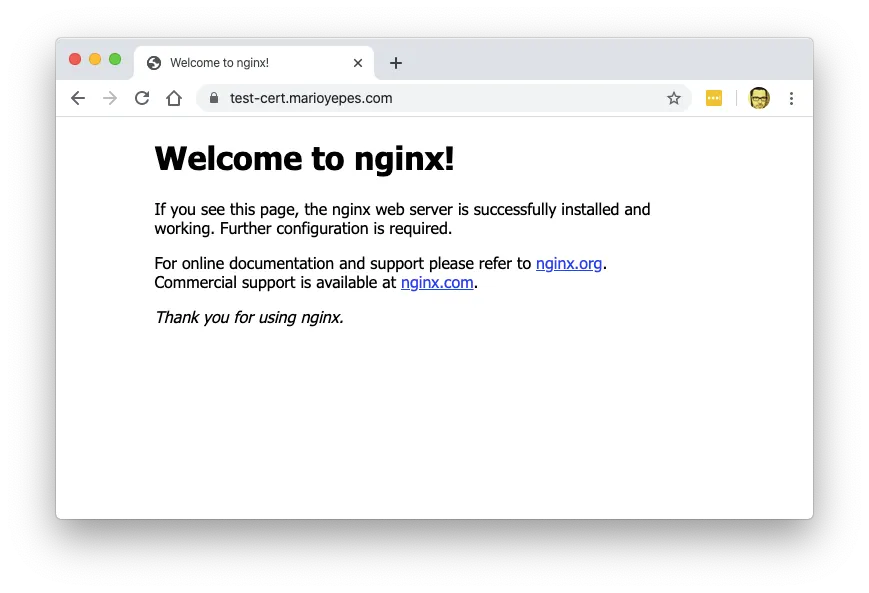
Do you see the look at the address bar? That means that the site is secured with SSL.
Just to be sure, lets use a SSL/TLS validator:
4. Configure Apache
With Apache the process is similar, its just that the directives are different.
So lests start by creating a new Virtual Host with a new configuration file in /etc/apache2/sites-available/certbot-test.conf and add the following content:
# /etc/apache2/sites-available/certbot-test.conf

<IfModule mod_ssl.c>
  <VirtualHost *:443>
    ServerName test-cert.marioyepes.com
    DocumentRoot /var/www/html
    ErrorLog ${APACHE_LOG_DIR}/error.log
    CustomLog ${APACHE_LOG_DIR}/access.log combined_plus_hostname
    SSLEngine on
    SSLCertificateFile /etc/letsencrypt/live/test-cert/cert.pem
    SSLCertificateKeyFile /etc/letsencrypt/live/test-cert/privkey.pem
    SSLCertificateChainFile /etc/letsencrypt/live/test-cert/fullchain.pem
  </VirtualHost>
</IfModule>
With Apache, you enable a new site by executing the command a2ensite and then restarting apache:
sudo a2ensite certbot-test
systemctl restart apache2
And that’s it. You have a secure site with Apache.
Renew a certificate
Let’s Encrypt certificates are valid for only 90 days, as opposed to the 365 days of a regular one.
This means that you have to renew them pretty often.
The good new is that to renew all of your certificates stored in you machine, you only have to issue the command
sudo certbot renew
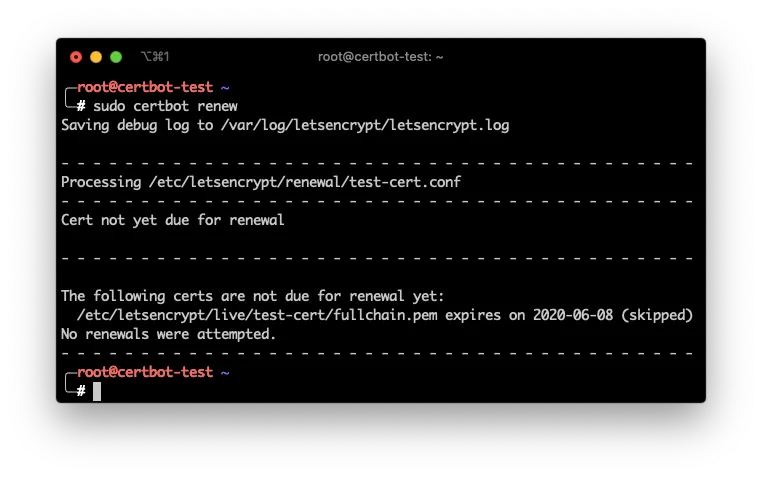
And that will go over all of the certificates stored in /etc/letsencrypt/live and renew them automatically.
You can even add a cron job in your machine that does that automatically for you once a week.
# /etc/crontab
3 0 * * 1 certbot renew
List and delete certs
If you have a lot of websites in your server, like when you are creating virtual hosts with Nginx or Apache, its possible that you’ll end up with a lot of certificates stored in your machine.
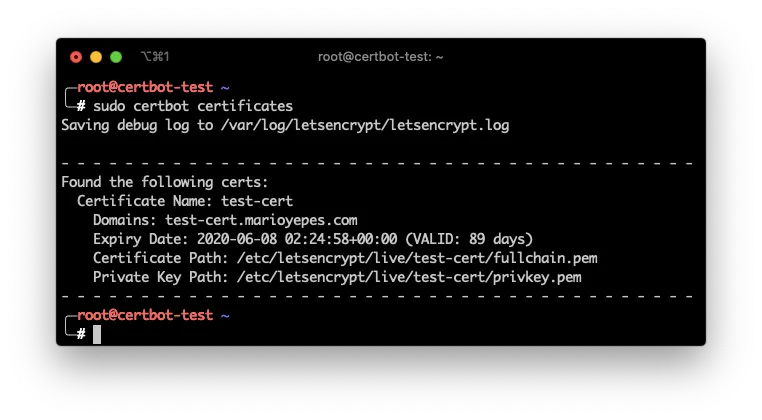
If you need to list which certificates are in you machine use the command
sudo cerboot certificates
And if by any case you need to delete a certificate you can issue the command
sudo certbot delete --cert-name test-cert
Where test-cert is the name of the certificate you want to delete
More info
The complete certbot manual can be found here.
Take into account that the manual in the previous link cover how to use the certbot command and not how to develop with Let’s Encrypt API.