Static and Dynamic blocks with WordPress Gutenberg
Table Of Contents
Gutenberg is the present of WordPress development. Is the new way of creating pages and posts, and pretty soon full site editing.
So if you are a WordPress developer, the time to learn Gutenberg was yesterday!
Unfortunately, the official documentation is pretty dense and it’s tutorial is easy to follow, but not to understand.
So, in this article I’ll try to show as succinct, but as complete as possible, how to start to create Gutenberg blocks in a progressive manner. And also how to have them being displayed in the front end of a site built with WordPress.
Development environment setup
The first thing you need to have installed is Node. Gutenberg is written in React so that’s a must.
The second thing you need is a WordPress installation, that means that you need Apache (or Nginx), MySQL (or MariaDB) and PHP.
I’m a big fan of using Docker to create my development environment. So even tough you can use any WordPress deployment like XAMPP or Local to follow this article, I’m leaving here the docker-compose.yaml file I used to create my environment and maybe this will make your life easier (or harder).
version: "3"

services:
  db:
    image: mariadb
    container_name: gutenberg-test-db
    volumes:
      - db-lib:/var/lib/mysql
    environment:
      MYSQL_ROOT_PASSWORD: root
      MYSQL_DATABASE: ${MYSQL_DATABASE:-wordpress}
      MYSQL_USER: ${MYSQL_USER:-wordpress}
      MYSQL_PASSWORD: ${MYSQL_PASSWORD:-wordpress}

  wp:
    image: wordpress:php7.4
    container_name: gutenberg-test-wp
    environment:
      WORDPRESS_DB_HOST: gutenberg-test-db
      WORDPRESS_DB_NAME: ${MYSQL_DATABASE:-wordpress}
      WORDPRESS_DB_USER: ${MYSQL_USER:-wordpress}
      WORDPRESS_DB_PASSWORD: ${MYSQL_PASSWORD:-wordpress}
      WORDPRESS_DEBUG: ${WORDPRESS_DEBUG:-0}
    volumes:
      - wp-html:/var/www/html
      - ./:/var/www/html/wp-content/plugins/wordpress-gutenberg-multiple-blocks
    ports:
      - ${WORDPRESS_PORT:-8082}:80
    depends_on:
      - db

  cli:
    image: wordpress:cli-php7.4
    container_name: gutenberg-test-cli
    environment:
      WORDPRESS_DB_HOST: gutenberg-test-db
      WORDPRESS_DB_NAME: ${MYSQL_DATABASE:-wordpress}
      WORDPRESS_DB_USER: ${MYSQL_USER:-wordpress}
      WORDPRESS_DB_PASSWORD: ${MYSQL_PASSWORD:-wordpress}
      WORDPRESS_HOST: ${WORDPRESS_HOST:-localhost}
      WORDPRESS_PORT: ${WORDPRESS_PORT:-8082}
      WP_CLI_PACKAGES_DIR: /tmp/wp-cli
    volumes_from:
      - wp
    depends_on:
      - wp
      - db
    user: xfs # Make Linux alpine and debian user the same user-id
    command:
      - sh
      - -c
      - |
        sleep 10
        wp core install  --url=$${WORDPRESS_HOST}:$${WORDPRESS_PORT} --title=BlockTest --admin_user=admin --admin_password=admin [email protected] --skip-email
        wp plugin delete hello
        wp plugin delete akismet
        wp plugin activate --all
        echo "Access wordpress on http://$${WORDPRESS_HOST}:$${WORDPRESS_PORT} with user 'admin' and password 'admin'"

networks:
  default:
    name: gutenberg-test-net

volumes:
  db-lib:
  wp-html:
Some notes about this Docker environment:
- You’ll get an already configured WordPress installation running in
http://localhost:8082 - You can change the port and host by creating a
.envfile with the variablesWORDPRESS_HOSTandWORDPRESS_PORTrespectively. - By default, the database, the username and the password are
wordpressand it can be changed using the.envfile with the variables specified in WordPress Docker image documentation. - The plugin we’re going to develop will be in
/var/www/html/wp-content/plugins/wordpress-gutenberg-multiple-blocks/on the container but will be the current directory in the local machine.
To start this development environment you just need to have installed Docker Desktop and execute in the Terminal on the root of the project.
mkdir gutenberg-multiple-blocks
cd $_
## create docker-compose.yaml file
docker-compose up -d
Start the plugin
WordPress has it’s own create-block script to create a skeleton plugin with blocks. But it tends to clutter the workspace since it creates more folders than we actually need and that is not a very good learning experience. So we’re going to create file by file, being the first the plugin file gutenberg-multiple-blocks.php:
<?php
/**
 * Gutenberg Multiple Blocks Example
 *
 * @package           GutenMultiBlocks
 * @author            Mario Yepes
 * @copyright         2022 Mario Yepes
 * @license           GPL-2.0-or-later
 *
 * @wordpress-plugin
 * Plugin Name:       Gutenberg Multiple Blocks Example
 * Plugin URI:        https://marioyepes.com
 * Description:       Tutorial on how to add multiple blocks to one Gutenbert plugin
 * Version:           1.0.0
 * Requires at least: 5.8
 * Requires PHP:      7.4
 * Author:            Mario Yepes
 * Author URI:        https://marioyepes.com
 * Text Domain:       gutenberg-multiple-blocks
 * License:           GPL v2 or later
 * License URI:       http://www.gnu.org/licenses/gpl-2.0.txt
 * Update URI:        https://example.com/my-plugin/
 */
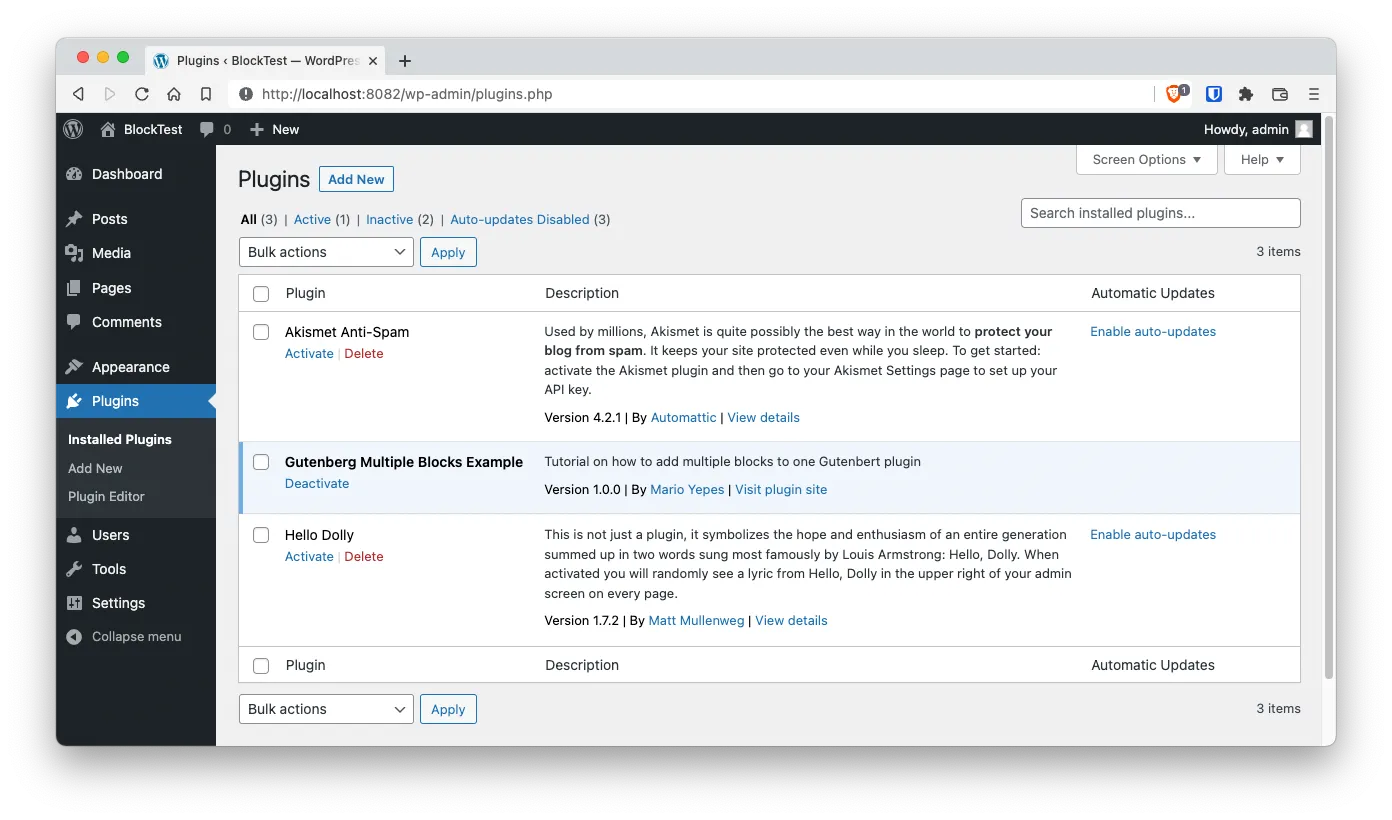
That’s it! With just some comments in a file we created a plugin. Just notice that the name of the plugin will be Gutenberg Multiple Blocks Example.
Start the Node environment
Now that we have the plugin in place, we need to create a node project with npm and add some packages:
npm init -y
npm install --save-dev @wordpress/scripts @wordpress/i18n
As you might know, npm init -y creates and empty node project. So the really interesting part is the install line that install 2 packages:
- The
@wordpress/scriptswill provide us with scripts to compile, lint and build our JavaScript files. Also will take care of installing the required React libraries. - The
@wordpress/i18npackage, which is optional, but I like to facilitate the translation of strings with the__function (yep, 2 underscores).
Finally, change the scripts section on the packages.json file like the documentation suggest to have the WordPress Scripts take care of the compiling and linting:
{
  "...",
  "scripts": {
    "build": "wp-scripts build",
    "check-engines": "wp-scripts check-engines",
    "check-licenses": "wp-scripts check-licenses",
    "format": "wp-scripts format",
    "lint:css": "wp-scripts lint-style",
    "lint:js": "wp-scripts lint-js",
    "lint:md:docs": "wp-scripts lint-md-docs",
    "lint:md:js": "wp-scripts lint-md-js",
    "lint:pkg-json": "wp-scripts lint-pkg-json",
    "packages-update": "wp-scripts packages-update",
    "start": "wp-scripts start",
    "test:e2e": "wp-scripts test-e2e",
    "test:unit": "wp-scripts test-unit-js"

  },
  "..."
}
And we’re done with the initial setup. You can create your first commit here.
Create the “today” block skeleton
Just to be consistent, we are going to follow some standards regarding how we are naming our files and where are we putting them:
- In the
blocks/folder we’ll be adding the JavaScript code for the block creation - Each block will have it’s own subfolder inside
blocks/ - The source files for each block will be called
index.jsand will be placed inside thesrc/sub-dir. Peblocks/<block-name>/src/index.jsfile. - The compiled scripts will be placed inside the
build/subdirectory. Peblocks/<block-name>/build/index.js - For each block we need to create a start and a build command using the
wp-scriptspackage
Now that we have that out of the way, lets create the skelleton of our first block. The today block:
mkdir -p blocks/today/{src,build}
touch blocks/today/src/index.js
That will leave us with the following folder structure:
$ tree -I node_modules
.
├── README.md
├── blocks
│   └── today
│       ├── build
│       └── src
│           └── index.js
├── docker-compose.yaml
├── gutenberg-multiple-blocks.php
├── package-lock.json
└── package.json
Then, on the package.json add 2 new scripts to compile and build the block:
{
  "...",
  "scripts": {
    "build": "wp-scripts build",
    "...",
    "build:today": "wp-scripts build ./blocks/today/src/index.js --output-path=./blocks/today/build",
    "start:today": "wp-scripts start ./blocks/today/src/index.js --output-path=./blocks/today/build"
  },
  "..."
}
And finally start the watch by execting the start:
npm run start:today
In the terminal you’ll get an error, but that’s because we haven’t added a React module in the blocks/today/src/index.js file.
$ npm start

> [email protected] start:user-form
> wp-scripts start ./blocks/today/src/index.js --output-path=./blocks/today/src/build

<i> [LiveReloadPlugin] Live Reload listening on port 35729
asset index.js 104 bytes [emitted] (name: index)
asset index.asset.php 95 bytes [emitted] (name: index)
Entrypoint index 199 bytes = index.js 104 bytes index.asset.php 95 bytes

ERROR in index
Module not found: Error: Can't resolve './blocks/today/src/index.js' in '/Users/mario/Projects/wordpress-gutenberg-multiple-blocks'
You can now open an IDE and start coding.
Creating our first static block
The process of creating a block involves 2 steps, and each step is composed of multiple sub-steps:
- Crate the block front-end code
- Create the block registration function
- Create the edit callback
- Create the save callback
- Register the block in WordPress
- Enqueue the script file
- Register the block
Create the block front-end
Creating the block on the front end starts with the invocation of the registerBlockType() function, from the @wordpress/blocks package, with 2 parameters:
- A name. That by convention is in the form
namespace/block-name - A JavaScript object with the block configuration.
We’re going to call this function in the index.js file, and place it in blocks/today/src/ since that’s the path we configured in package.json:
// blocks/today/src/index.js
import { __ } from "@wordpress/i18n";
import { registerBlockType } from "@wordpress/blocks";
registerBlockType("gutenberg-multi/today", {
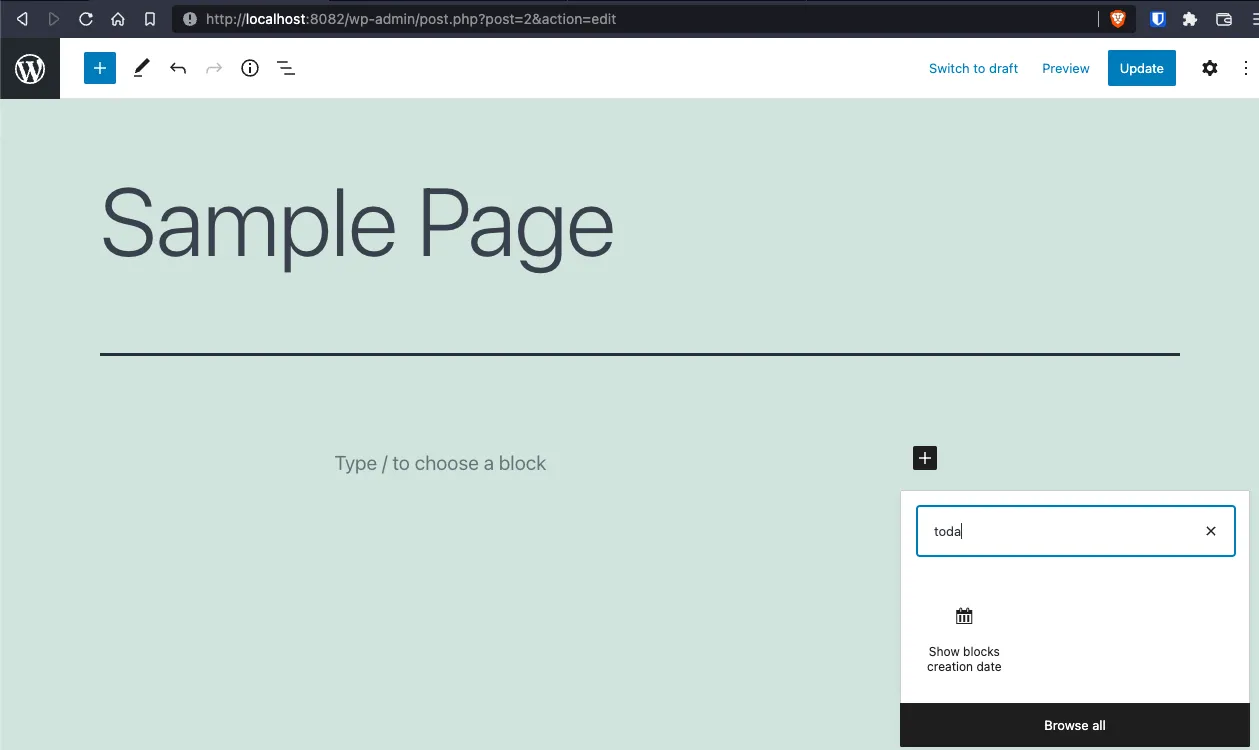
title: __("Show blocks creation date", "gutenberg-multi"),
category: "widgets",
icon: "calendar",
edit: () => <h2>Show todays day (Backend)</h2>,
save: () => <h2>Show todays day (Frontend)</h2>,
});
From the configuration object you can see that the most important parameters are edit and save which are the callbacks that create the block in the dashboard and on the front-end respectively.
Notice in the terminal how the scripts get compiled and saved in blocks/today/build/.
blocks/today/build
├── index.asset.php
├── index.js
├── index.js.map

0 directories, 3 files
Is specially important the file blocks/today/build/index.assets.php but more on that last file latter.
Register the block in WordPress
On the previous step we created the block, but we haven’t registered in WordPress yet. For that we need to go into our plugin file, the .php file, and add the block using the register_block_type function.
<?php
/**
 * Gutenberg Multiple Blocks Example
 *
 * @package           GutenMultiBlocks
 * @author            Mario Yepes
 * @copyright         2022 Mario Yepes
 * @license           GPL-2.0-or-later
 *
 * @wordpress-plugin
 * Plugin Name:       Gutenberg Multiple Blocks Example
 * Plugin URI:        https://marioyepes.com
 * Description:       Tutorial on how to add multiple blocks to one Gutenbert plugin
 * Version:           1.0.0
 * Requires at least: 5.8
 * Requires PHP:      7.4
 * Author:            Mario Yepes
 * Author URI:        https://marioyepes.com
 * Text Domain:       gutenberg-multiple-blocks
 * License:           GPL v2 or later
 * License URI:       http://www.gnu.org/licenses/gpl-2.0.txt
 * Update URI:        https://example.com/my-plugin/
 */

function register_user_form_block() {
	$assets = include_once __DIR__ . '/blocks/today/build/index.asset.php';

	wp_register_script(
		'gutenberg-multi-today',
		plugins_url('./blocks/today/build/index.js', __FILE__),
		$assets['dependencies'],
		$assets['version']
	);

	register_block_type(
		'gutenberg-multi/today',
		array(
			'editor_script' => 'gutenberg-multi-today',
		)
	);
}

add_action('init', 'register_user_form_block');
A short explanation of what is going on is: We use the already familiar wp_register_script function to register the build script. And then we use the register_block_type to have that script be called in the Gutenberg editor.
As you might recall from the previous step, there is an index.asset.php file in the build/ sub-folder. This file is automatically created by the wp-script (configured in package.json) script and contains information of our block like the version and any required dependency. So it’s perfect to use it in the wp_register_script function.
As an exercise, you should look that file contents.
Test the new block
Just go to the back end and add the block
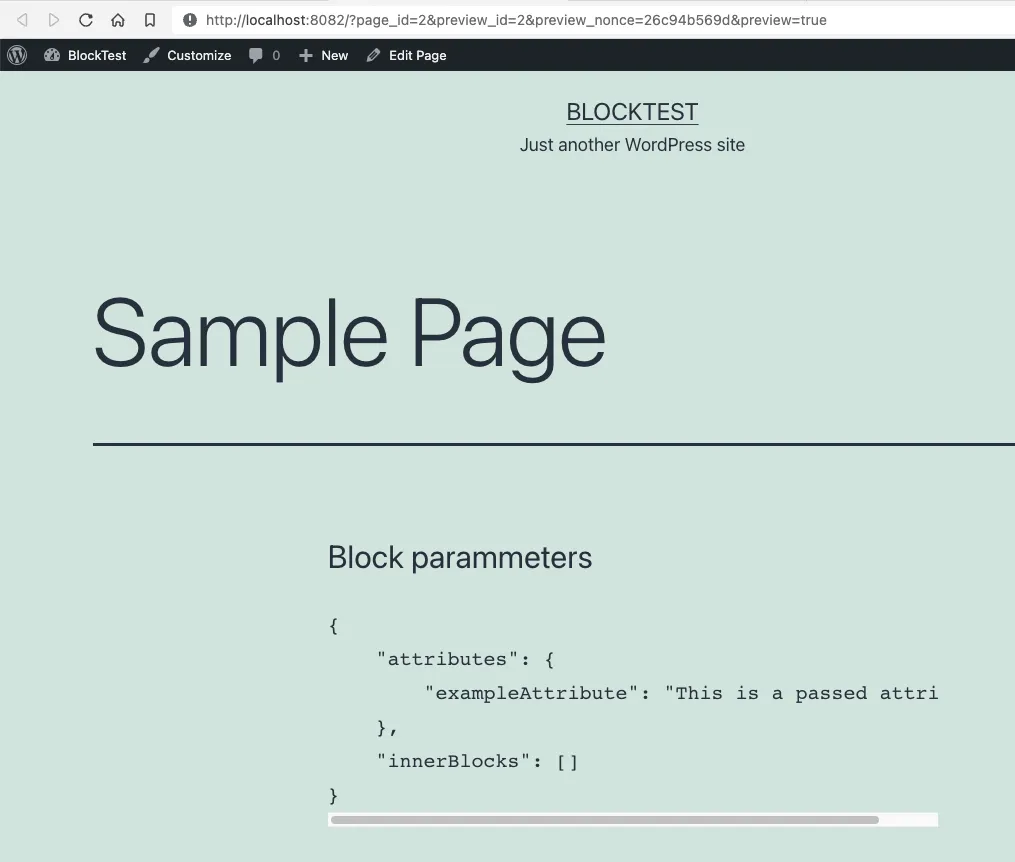
And when you prevew the page:
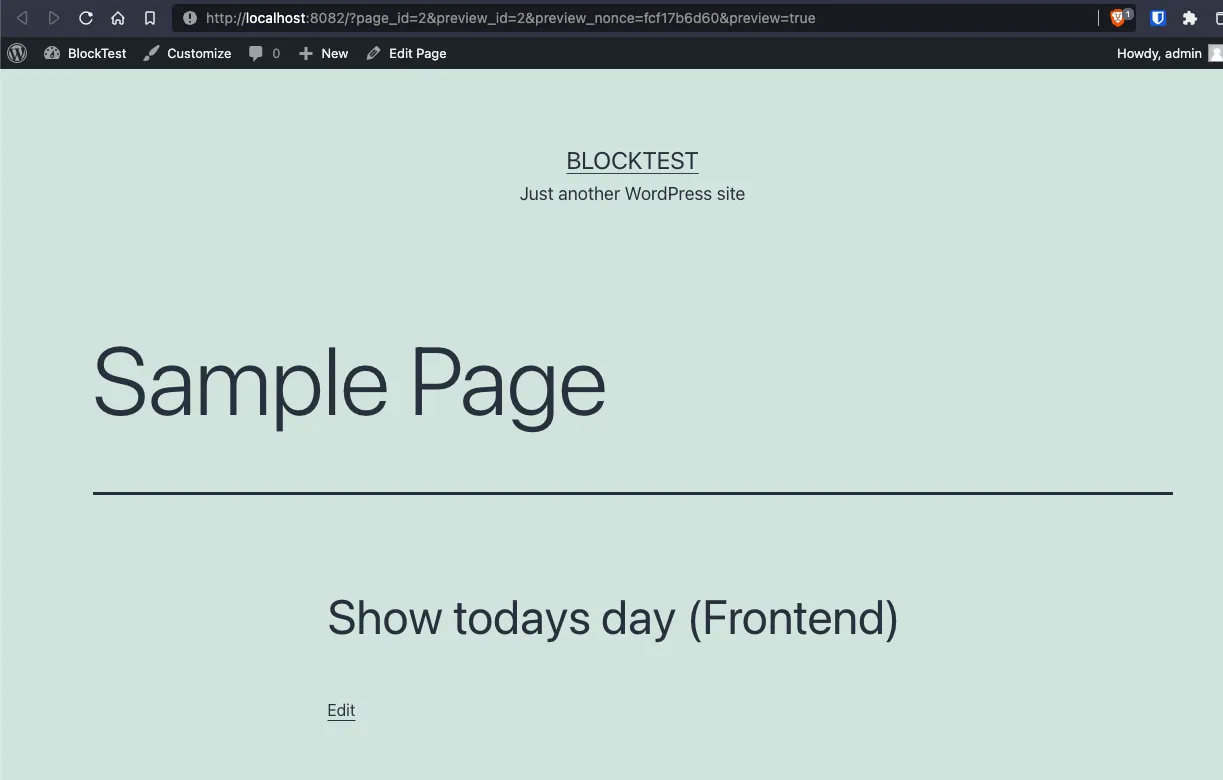
Notice how the contents of the block are what the edit and save callbacks returned!
Passing attributes to the block
Right now our block is very simple. When the block is added to the editor it will output Show todays day (Backend). And on the front-end it will show the string Show todays day (Frontend). Not very useful, right? The idea is that our block actually does something like show post information or display a cool graphic that can be changed. But for that we need to pass properties to our block.
Both the edit and save callbacks receive parameters that can be used to change how the block behaves because remember we’re using React to create the block
This means that you can call the edit or save callbacks in the registerBlockType like:
registerBlockType("namespace/block-name", {
  edit: ({ attributes, setAttributes, className, isSelected }) => {
    /* ...*/
  },
  save: ({ attributes, setAttributes, className }) => {
    /* ...*/
  },
});
Now, this is very important: the attributes object from the parameters, is the vehicle to pass information from PHP to JavaScript. And the setAttributes is the React hook to work with them inside the block.
To illustrate that lets make 4 changes:
- Let’s add the
attributesparameter to theregisterBlockType()function with one parameter - Let’s move the
editcallback to it’s own components - Do the same with the
savecallback - Les’s display the passed parameters to the
EditandSavecallbacks
1: Adding the attributes parameter and including the not yet created components edit and save:
// blocks/today/src/index.js

import { __ } from "@wordpress/i18n";
import { registerBlockType } from "@wordpress/blocks";

import edit from "./edit";
import save from "./save";

registerBlockType("gutenberg-multi/today", {
  title: __("Show blocks creation date", "gutenberg-multi"),
  category: "widgets",
  icon: "calendar",
  edit,
  save,
  attributes: {
    exampleAttribute: {
      source: "html",
      selector: "h3",
      default: __("This is a passed attribute", "guten-multi"),
    },
  },
});
2: Displaying the parameters in the edit component:
// blocks/today/src/edit.js
import { __ } from "@wordpress/i18n";
const Edit = (params) => {
return (
<>
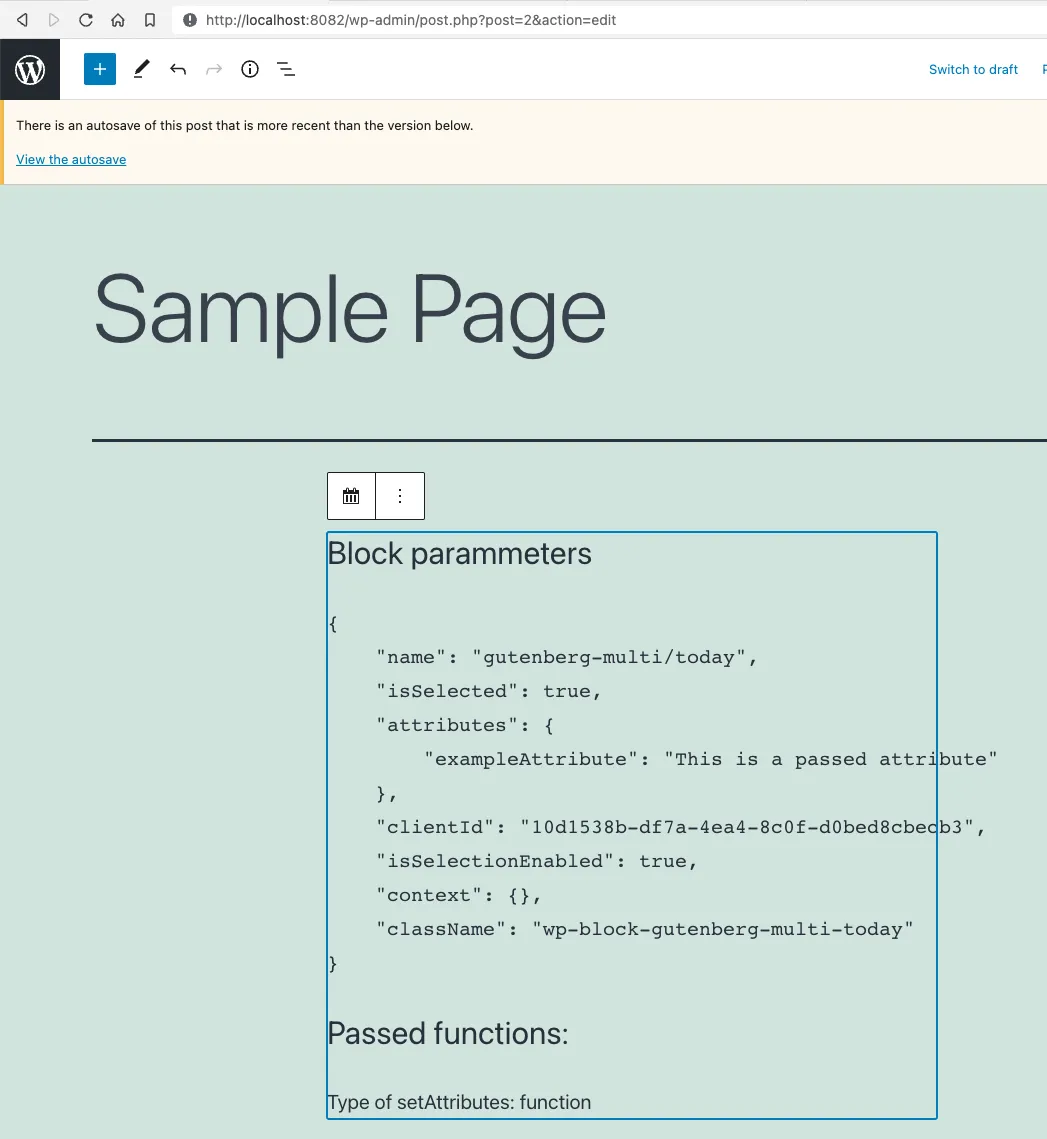
<h3>{__("Block parameters", "gutenberg-multi")}</h3>
<pre>{JSON.stringify(params, null, 4)}</pre>
<h3>{__("Passed functions:", "gutenberg-multi")}</h3>
<p>Type of setAttributes: {typeof params.setAttributes}</p>
</>
);
};
export default Edit;
3: Displaying the parameters in the save component:
// blocks/today/src/save.js

import { __ } from "@wordpress/i18n";

const Save = (params) => {
  return (
    <>
      <h3>{__("Block parameters", "gutenberg-multi")}</h3>
      <pre>{JSON.stringify(params, null, 4)}</pre>
    </>
  );
};

export default Save;
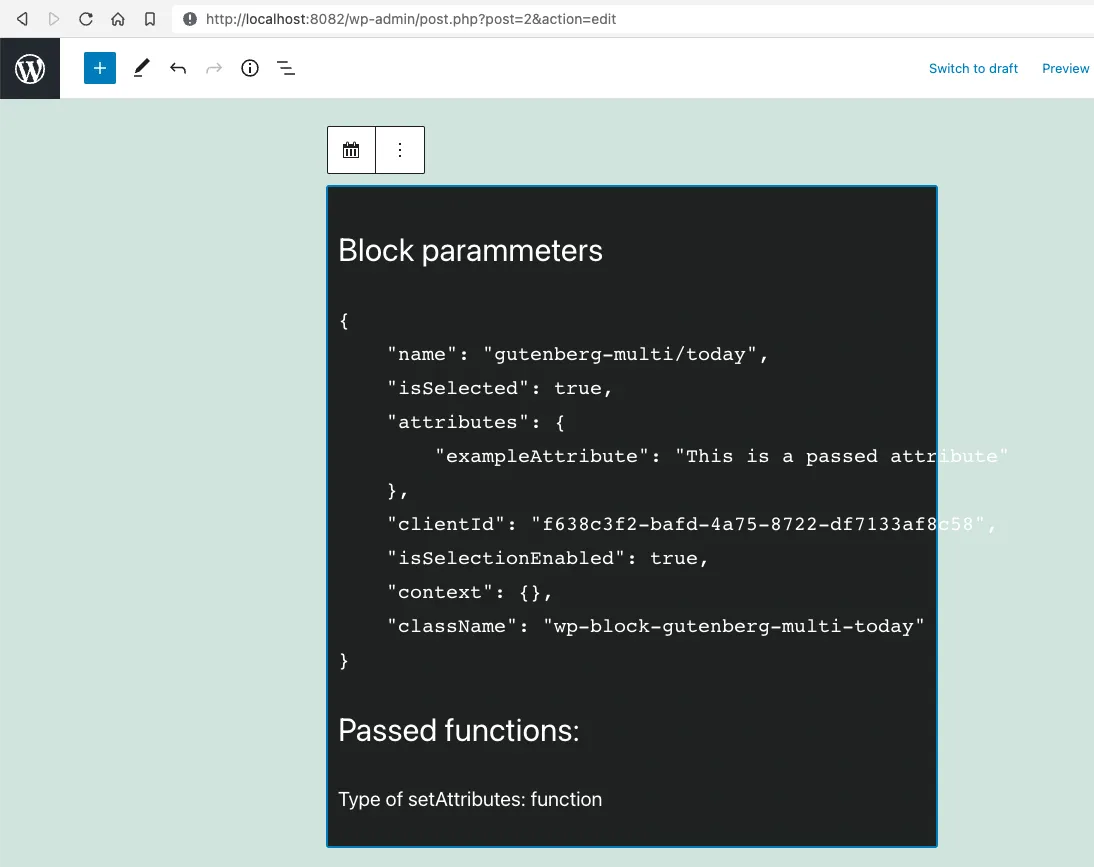
After those 3 changes (and thanks to the watch command that we’re executing) we can now see the following when we re-add* the block on the editor:
NOTE
You have reload the editor to see the new block changes
And this on the front-end:
Take into account that we’re still talking about static blocks. Which are blocks that once added to a page or post do not change.
Styling the block in the back-end
Did you noticed on the previews step how the edit callback receives a className parameter?
{
  "...",
  "className": "wp-block-gutenberg-multi-today"
}
We’ll, this is how we style the block on the back end.
Let’s actually use that class to apply some styling, lets create the edit.scss file where we’ll style the wp-block-gutenberg-multi-today class:
// blocks/style/src/style.scss

$bg-color: #000;

.wp-block-gutenberg-multi-today {
  background-color: rgba($bg-color, 0.1);
  border: 1px solid $bg-color;
  padding: 0.5em;

  &.selected {
    background-color: rgba($bg-color, 0.85);
    color: white;
  }
}
Then, lets change the edit.js component to actually use the className that gets passed in the block parameters… And don’t forget to include the styling file:
// blocks/today/src/edit.js

import { __ } from "@wordpress/i18n";
import "./edit.scss";

const Edit = (params) => {
  const { className, isSelected } = params;
  return (
    <>
      <div className={isSelected ? `${className} selected` : className}>
        <h3>{__("Block parameters", "gutenberg-multi")}</h3>
        <pre>{JSON.stringify(params, null, 4)}</pre>
        <h3>{__("Passed functions:", "gutenberg-multi")}</h3>
        <p>Type of setAttributes: {typeof params.setAttributes}</p>
      </div>
    </>
  );
};

export default Edit;
Now, by using the isSelected and className parameters together, we can make the block turn black when it gets selected.
But there is still a missing step…
If you list the contents of the blocks/today/build/ directory, you’ll see that there is a new index.css file; that file contains the compiled styles from the edit.scss. We have to notify WordPress of that new file so it can apply those styles to the block, and we do that by registering that style both in the back-end as in the block in the .php file:
<?
// gutenberg-multiple-blocks.php

function register_user_form_block() {
	$assets = include_once __DIR__ . '/blocks/today/build/index.asset.php';

	wp_register_script(
    'gutenberg-multi-today',
		plugins_url('./blocks/today/build/index.js', __FILE__),
		$assets['dependencies'],
		$assets['version']
	);

	wp_register_style(
		'gutenberg-multi-today',
		plugins_url('./blocks/today/build/index.css', __FILE__),
		array(),
		$assets['version']
	);

	register_block_type(
		'gutenberg-multi/today',
		array(
			'editor_script' => 'gutenberg-multi-today',
			'style' => 'gutenberg-multi-today',
		)
	);
}

add_action('init', 'register_user_form_block');
By adding the wp_register_style() function, we make WordPress aware of this new CSS file. And by adding the style key the array parameter in register_block_type function, we tell WordPress to load that style when adding a today block. Now we can see how the block changes in the back-end:
Styling a block in the front-end
Style in the front end should be done in the theme and not in the block. Still, we can do some pretty cool things to leverage the site’s theme. We can pass additional classes to the block front the back-end. For instance, lets make our block support light and dark modes.
This requires 2 steps:
- Add a new parameter on the
registerBlockTypefunction inindex.jsfor each class we want to add - Change the
Savecallback onsave.jsto support multiple classes - Add a new
save.scsswhere the new styles for the new classes get added
Adding the styles attribute
This has to be done on the registerBlockType function, specifying the name and the label for each additional class:
// blocks/today/src/index.js

import { __ } from "@wordpress/i18n";
import { registerBlockType } from "@wordpress/blocks";

import edit from "./edit";
import save from "./save";

registerBlockType("gutenberg-multi/today", {
  title: __("Show blocks creation date", "gutenberg-multi"),
  category: "widgets",
  icon: "calendar",
  edit,
  save,
  attributes: {
    exampleAttribute: {
      source: "html",
      selector: "h3",
      default: __("This is a passed attribute", "guten-multi"),
    },
  },
  styles: [
    {
      name: "light",
      label: __("Light mode", "gutenberg-multi"),
      isDefault: true,
    },
    {
      name: "dark",
      label: __("Dark mode", "gutenberg-multi"),
    },
  ],
});
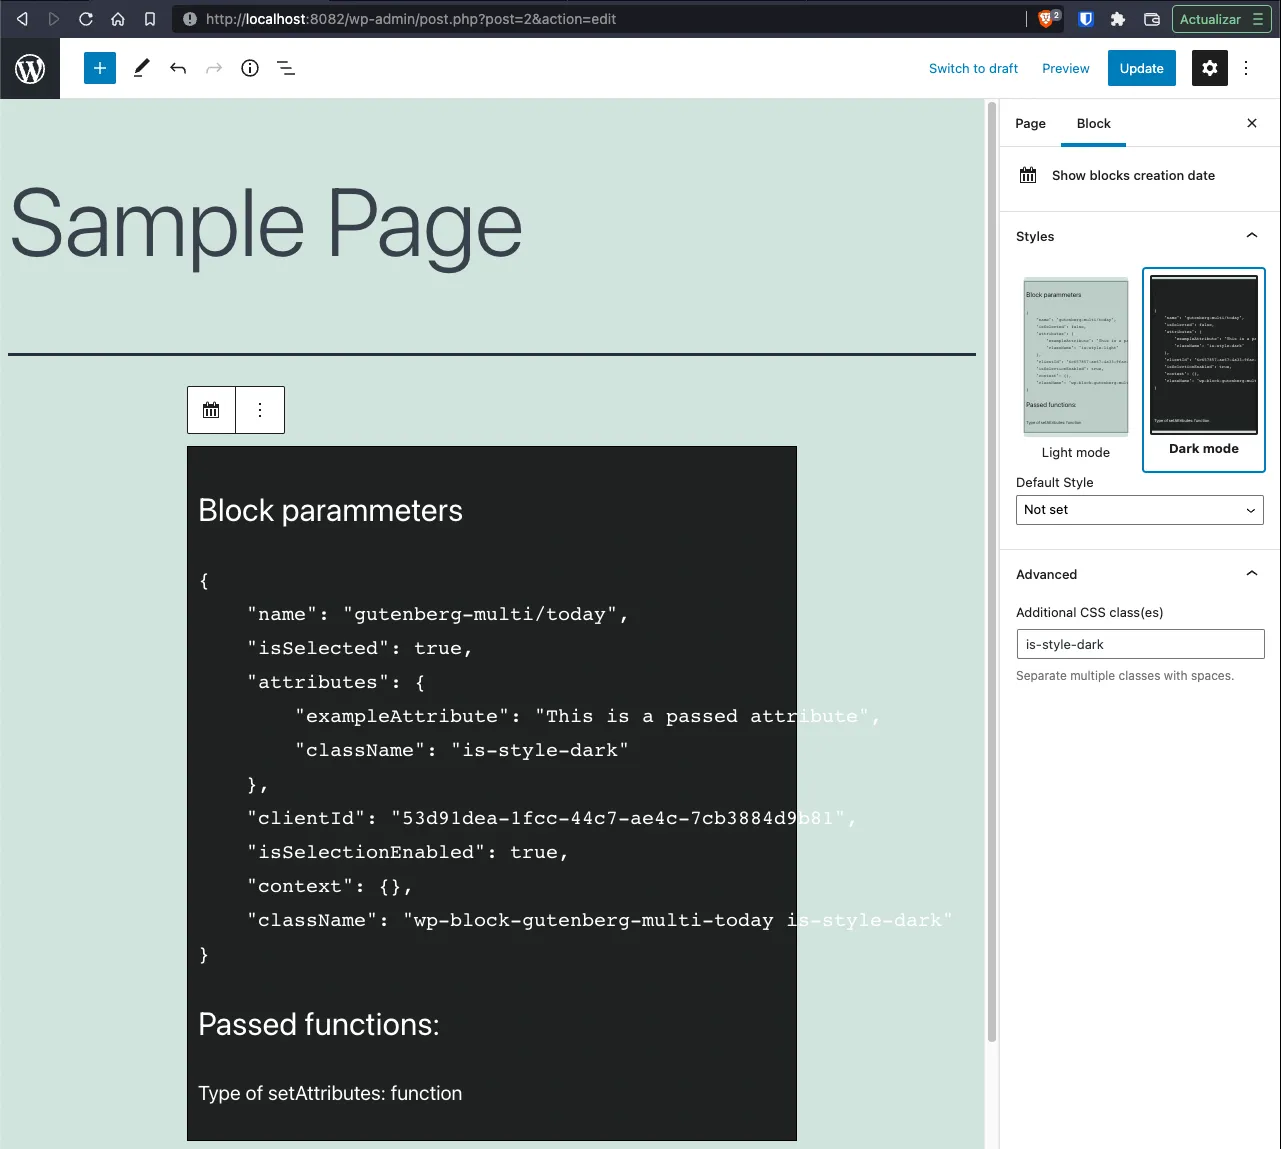
Just by making this change, you get 2 things in the Gutenberg Inspector
- A preview of the block with each style
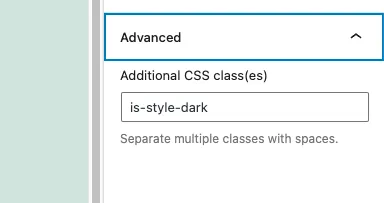
- An advanced section with the name of the added classes
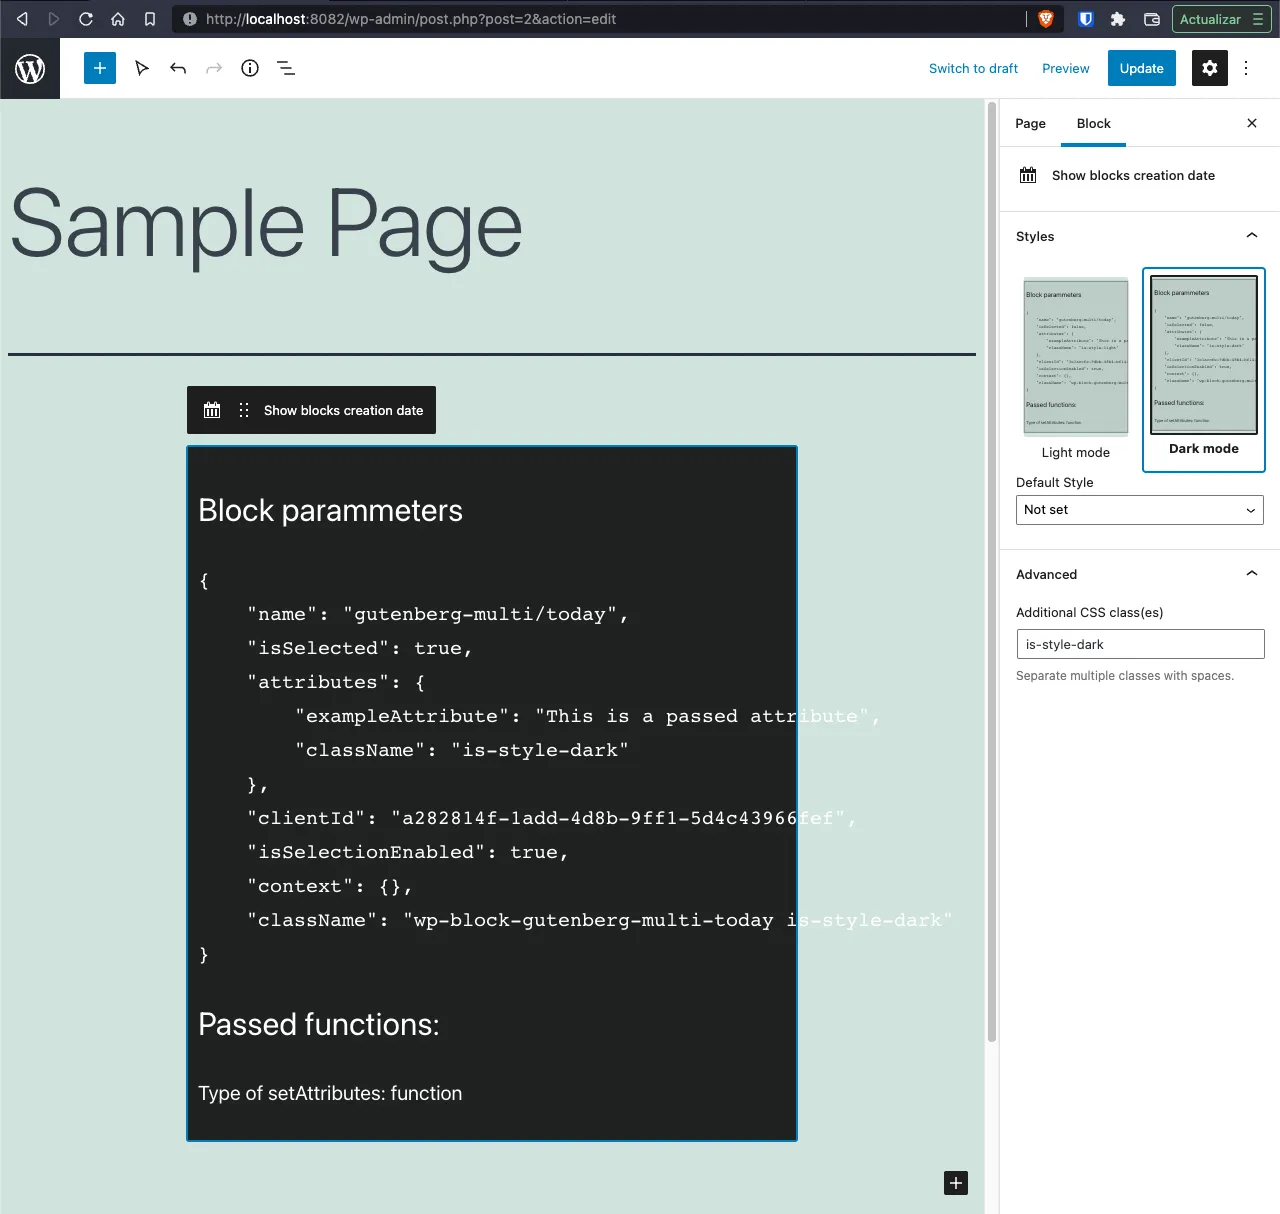
Notice that the new classes will be called is-style-dark and is-style-light
Adding support for the new classes on the backend
Before we actually make the block support multiple classes on the front-end. Let’s fix the fact that on the back-end the Dark Mode has a no preview.
Just add styling on the save.scss for the is-style-dark class:
// blocks/style/sdrc/edit.scss

$bg-color: #000;

.wp-block-gutenberg-multi-today {
  background-color: rgba($bg-color, 0.1);
  border: 1px solid $bg-color;
  padding: 0.5em;

  // &.selected {
  //   background-color: rgba($bg-color, .85);
  //   color: white;
  // }

  &.is-style-dark {
    background-color: rgba($bg-color, 0.85);
    color: white;
  }
}
And now, we have a Dark Mode preview and it shows on the block:
Add support for additional classes on the front-end
For this we need to change the Save callback in save.js:
// blocks/today/src/save.js

import { __ } from "@wordpress/i18n";
import "./save.scss";

const Save = (params) => {
  const {
    attributes: { className = "" },
  } = params;
  return (
    <>
      <div class={`today ${className}`}>
        <h3>{__("Block parameters", "gutenberg-multi")}</h3>
        <pre>{JSON.stringify(className, null, 4)}</pre>
      </div>
    </>
  );
};

export default Save;
Notice that we wrapped the content on a div tag with the default class of today. That’s important for the styling we’re going to add. And we need to create the save.scss file for the new clases:
// blocks/today/save.scss

.today.is-style-dark {
  background-color: rgba(#000, 0.8);
  color: white;
}
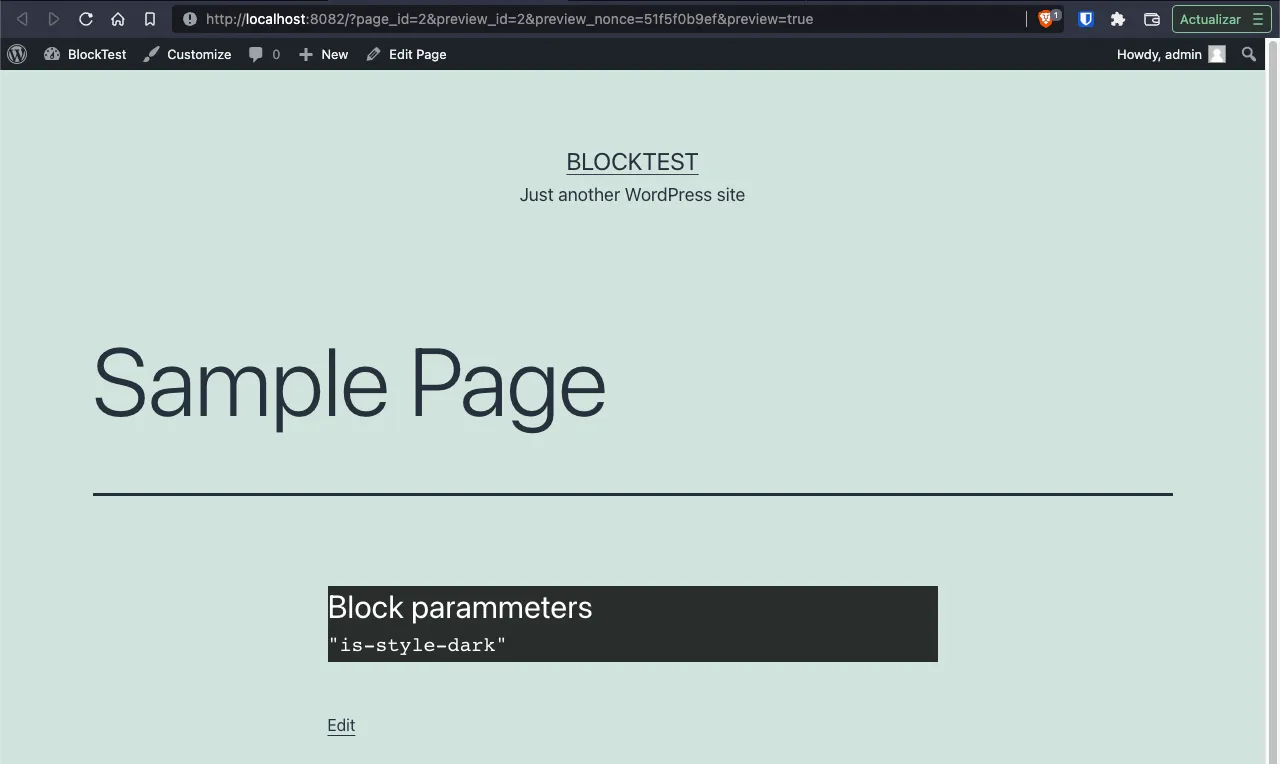
And now we have support for light and dark modes on our block:
Using options on the blocks
Now lets actually make our block useful. Let make our block receive user parameters, and change it’s display according to them. In our case we’re going have our block receive a title and some content.
The first thing we have to do is to change the registration function so it receives and stores 2 new parameters: A blockTitle and an afterContent variables.
// blocks/today/src/index.js

registerBlockType("gutenberg-multi/today", {
  title: __("Show blocks creation date", "gutenberg-multi"),
  category: "widgets",
  icon: "calendar",
  edit,
  save,
  attributes: {
    blockTitle: {
      source: "html",
      selector: "h3",
      default: __("Enter the block title", "gutenberg-multi"),
    },
    afterContent: {
      source: "string",
      selector: "em",
      default: __("Content after the options", "gutenberg-multi"),
    },
  },
  // ...
});
Remember: the attributes is how the back-end communicates with the front-end.
Then, in our Edit component we’re going to:
- Add a
RichTextcomponent to receive user input - Deconstruct the
attributesinput parameters to use the attributes registered in the previous step. - On the
RichTextcomponent, use thesetAttributesfunction to manage state changes on the block
// blocks/today/src/edit.js

import { __ } from "@wordpress/i18n";
import { RichText } from "@wordpress/block-editor";
import "./edit.scss";

const Edit = (params) => {
  const {
    className,
    isSelected,
    attributes: { blockTitle, afterContent },
    setAttributes,
  } = params;
  return (
    <>
      <div className={isSelected ? `${className} selected` : className}>
        <RichText
          tagName="h2"
          placeholder={__("Block title", "gutenberg-multi")}
          className="gutenberg-multi-title"
          value={blockTitle}
          onChange={(txt) => setAttributes({ blockTitle: txt })}
        />
        <pre>{JSON.stringify(params, null, 2)}</pre>
        <RichText
          tagName="em"
          placeholder={__("Content after the information", "gutenberg-multi")}
          className="gutenberg-multi-after"
          value={afterContent}
          onChange={(txt) => setAttributes({ afterContent: txt })}
        />
      </div>
    </>
  );
};

export default Edit;
A few notes about the RichText component:
- Is the preferred component to add a text field in our block since it shows how the text will look
- You can use it to add practically any HTML tag you want with the
tagNameparameter - Is from
@wordpress/block-editorwhich is where all the element of the back-end reside. - If we’re working on the editor, that library is a must
And a few notes about the setAttributes function:
- Is how we manage the state of the block
- Is passed as a parameter only on the
editcallback - When you call
setAttributes, the block re-renders itself much like theuseStatehook works
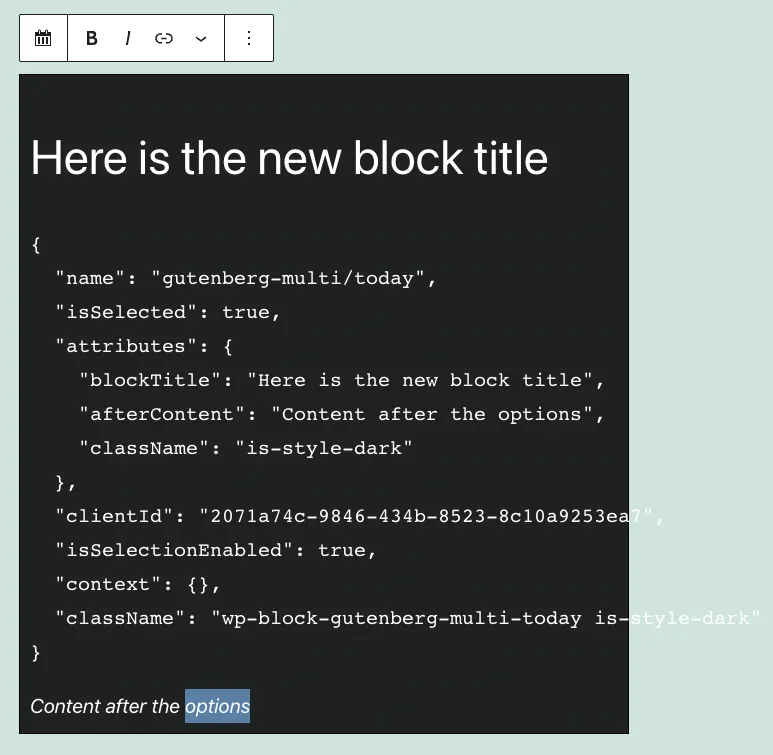
If we reload the editor, we can see that we can modify content in the block:
To display the new attributes on the front-end. We have to use again the RichText element but with the Content child:
// blocks/today/src/save.js

import { __ } from "@wordpress/i18n";
import { RichText } from "@wordpress/block-editor";
import "./save.scss";

const Save = (params) => {
  const {
    attributes: { className = "", blockTitle, afterContent },
  } = params;
  return (
    <>
      <div class={`today ${className}`}>
        <RichText.Content
          tagName="h2"
          className="gutenberg-multi-block-title"
          value={blockTitle}
        />
        <pre>{JSON.stringify(className, null, 4)}</pre>
        <RichText.Content
          tagName="em"
          className="gutenberg-multi-after-content"
          value={afterContent}
        />
      </div>
    </>
  );
};

export default Save;
Notice how the Edit and Save components are almost identical.
Adding sidebar options to the block
There are times when you need to have your block support options that are not visible or are hand to do directly on the block. Like editing labels on a form or changing the color or type of a font.
In those cases is useful to have controls on the sidebar or Inspector.
To add sections and controls on the inspector you modify the Edit component:
- Add the
InspectorControlslibrary from the@wordpress/block-editor - Add the
Panel,PanelBodyandTextControlfrom the@wordpress/components
But before we do that, lets start by adding 2 new attributes to our block:
// blocks/today/src/index.js

registerBlockType("gutenberg-multi/today", {
  // ...
  attributes: {
    blockTitle: {
      source: "html",
      selector: "h3",
      default: __("Enter the block title", "gutenberg-multi"),
    },
    afterContent: {
      source: "string",
      selector: "em",
      default: __("Content after the options", "gutenberg-multi"),
    },
    blockContent: {
      source: "html",
      selector: "p",
    },
    blockContentType: {
      source: "string",
      type: "select",
      default: "dump",
    },
  },
  // ...
});
Now, let’s change our component to have an InspectorControls section:
// blocks/today/src/edit.js

import { __ } from "@wordpress/i18n";
import { RichText, InspectorControls } from "@wordpress/block-editor";
import {
  Panel,
  PanelBody,
  SelectControl,
  TextareaControl,
} from "@wordpress/components";
import "./edit.scss";

const Edit = (params) => {
  const {
    className,
    isSelected,
    attributes: { blockTitle, afterContent, blockContent, blockContentType },
    setAttributes,
  } = params;
  const innerTypes = [
    { value: "dump", label: "Attributes as JSON" },
    { value: "custom", label: "Custom text" },
  ];

  const innerContent =
    blockContentType == "dump" ? JSON.stringify(params, null, 2) : blockContent;
  return (
    <>
      <InspectorControls>
        <Panel>
          <PanelBody>
            <SelectControl
              label={__("Inner content type", "guetmberg-multi")}
              options={innerTypes}
              value={blockContentType}
              onChange={(val) => setAttributes({ blockContentType: val })}
            />
            <TextareaControl
              label={__("Custom text", "gutenberg-multi")}
              value={blockContent}
              onChange={(txt) => setAttributes({ blockContent: txt })}
              readOnly={blockContentType == "dump" ? true : false}
            />
          </PanelBody>
        </Panel>
      </InspectorControls>
      <div className={isSelected ? `${className} selected` : className}>
        <RichText
          tagName="h2"
          placeholder={__("Block title", "gutenberg-multi")}
          className="gutenberg-multi-title"
          value={blockTitle}
          onChange={(txt) => setAttributes({ blockTitle: txt })}
        />
        <pre>{innerContent}</pre>
        <RichText
          tagName="em"
          placeholder={__("Content after the information", "gutenberg-multi")}
          className="gutenberg-multi-after"
          value={afterContent}
          onChange={(txt) => setAttributes({ afterContent: txt })}
        />
      </div>
    </>
  );
};

export default Edit;
Notice that we just changed our component to have a drop-down that let’s you select which content to display in the block: The block parameters or custom content

And since all the changes we do in the back-end, we have to do on the front-end. Let’s change the Save component to display what the user selected:
// blocks/today/src/save.js

import { __ } from "@wordpress/i18n";
import { RichText } from "@wordpress/block-editor";
import "./save.scss";

const Save = (params) => {
  const {
    attributes: {
      className = "",
      blockTitle,
      afterContent,
      blockContent,
      blockContentType,
    },
  } = params;
  return (
    <>
      <div class={`today ${className}`}>
        <RichText.Content
          tagName="h2"
          className="gutenberg-multi-block-title"
          value={blockTitle}
        />
        <pre>
          {blockContentType == "dump"
            ? JSON.stringify(className, null, 4)
            : blockContent}
        </pre>
        <RichText.Content
          tagName="em"
          className="gutenberg-multi-after-content"
          value={afterContent}
        />
      </div>
    </>
  );
};

export default Save;
Great, we’re done on how to create bloks using Version 1 of the Gutenberg API. Now lets see how to use the version 2
Dynamic blocks
Creating blocks as we’ve done until now is great if you are doing mainly styling and html generation. But if you need to do things like:
- Show latests posts
- Do remote API calls
- Show results of cront jobs
- Etc
Then is better to render the block using PHP and not JavaScript. That’s what sets dynamic from static block apart.
From the code’s point of view, a dynamic block has it’s save call back, always return null. And needs to call an additional PHP function to render the block.
Additionally, is best to use the Block API v2 when dynamic blocks is concerned.
Create the skeleton for the mylatests dynamic block
To start, create a new block (new folder and new files) for the new block:
mkdir -p block/mylatests/{src,build}
touch block/mylatests/block.json
touch block/mylatests/src/{index,edit}.js
Next add a start and build commands on package.json for the new block
{
  "...",
  "scripts": {
    "...",
    "build:mylatests": "wp-scripts build ./blocks/mylatests/src/index.js --output-path=./blocks/mylatests/build",
    "start:mylatests": "wp-scripts start ./blocks/mylatests/src/index.js --output-path=./blocks/mylatests/build"
  },
  "..."
}
Create a block with Version 2 of the Gutenberg API
With that out of the way, lest do our first change regarding API v2:
- Let’s create the
blocks/mylatests/block.jsonfile: - Register that new file in the WordPress plugin file.
Remember that the start:mylatest npm command will generate our files in the build/ directory
First the blocks/mylatests/blocks.json file:
{
  "$schema": "https://schemas.wp.org/trunk/block.json",
  "apiVersion": 2,
  "name": "gutenberg-multi/mylatests",
  "title": "My latests news",
  "category": "widgets",
  "icon": "smiley",
  "description": "Custom latest posts",
  "keywords": ["latests", "news", "custom"],
  "textdomain": "gutenberg-multi",
  "editorScript": "file:./build/index.js"
}
Then register this file in the PHP plugin file.
<?php
// gutenberg-multiple-blocks.php

//...

add_action('init', 'register_mylatests_block');

function register_mylatests_block() {
	register_block_type(
		__DIR__ . '/blocks/mylatests',
		array(
			'render_callback' => 'render_mylatests_block',
		)
	);
}

function render_mylatests_block($attributes, $content) {
	return '<p>My latest news block placeholder</p>';
}
Let’s stop for a minute and explain what we just did. First with the block.json (just the important bits):
- The
$schemakey helps visual studio to know which keys are supported. So that key is not necesary - In the
editorScriptdescribes where should Gutenberg look for files
Now the registration of the block in the .php file:
- We use again the
register_block_type - We omit the
editor_scriptkey. This tells WordPress that there is ablock.jsonfile - We use instead a
render_callbackkey to tell which function will render the Dynamic HTML - We create a new function, a callback function, that receives 2 parameters: An
$attributesand$content - This callback function returns the required html to display on the front-end
Next, we create the the blocks/mylatest/src/index.js file with the same registerBlockType function. But this time, the first parameter is not the name of the block, but the object we placed in block.json:
// blocks/mylatest/src/index.js
import { registerBlockType } from "@wordpress/blocks";
import blockMeta from "../block.json";
registerBlockType(blockMeta, {
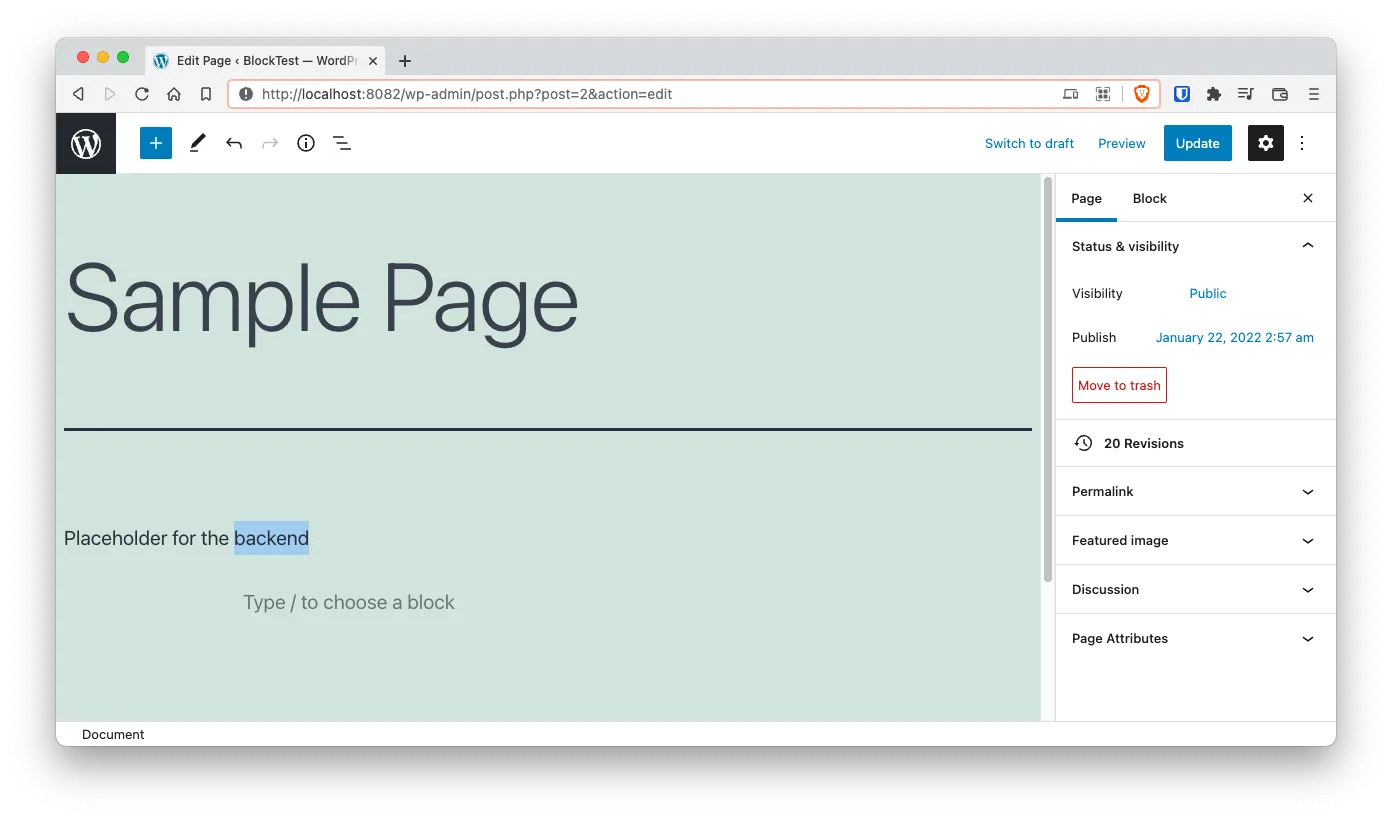
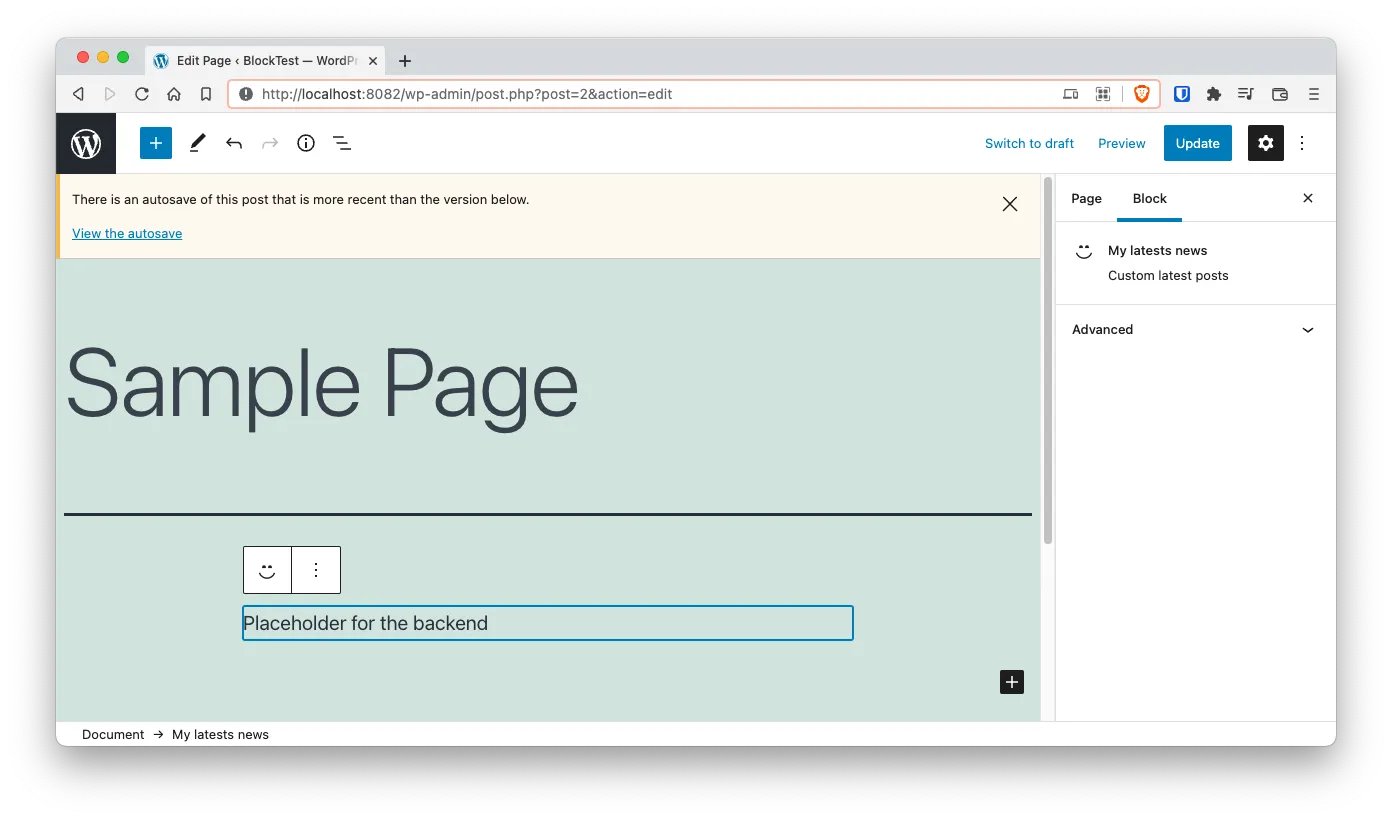
edit: () => <p>Placeholder for the backend</p>,
save: () => null,
});
And this is what we get:
Fix the display in the back-end
Is hard to notice from the screenshot, but when adding blocks with v2 of the API. They don’t get recognized by the Gutenberg editor right away. In fact, when you click on them nothing happens, the Inspector doesn’t reflect that is a block.
The fix is pretty simple. Add import {useBlockProps} from block-edior to wrap the block on edit.js so it has the block inspector and toolbar:
// blocks/mylatests/src/index.js

import { registerBlockType } from "@wordpress/blocks";
import { useBlockProps } from "@wordpress/block-editor";
import blockMeta from "../block.json";

registerBlockType(blockMeta, {
  edit: () => <p {...useBlockProps()}>Placeholder for the backend</p>,
  save: () => null,
});
In a following section we’ll be moving that edit callback into it’s own file.
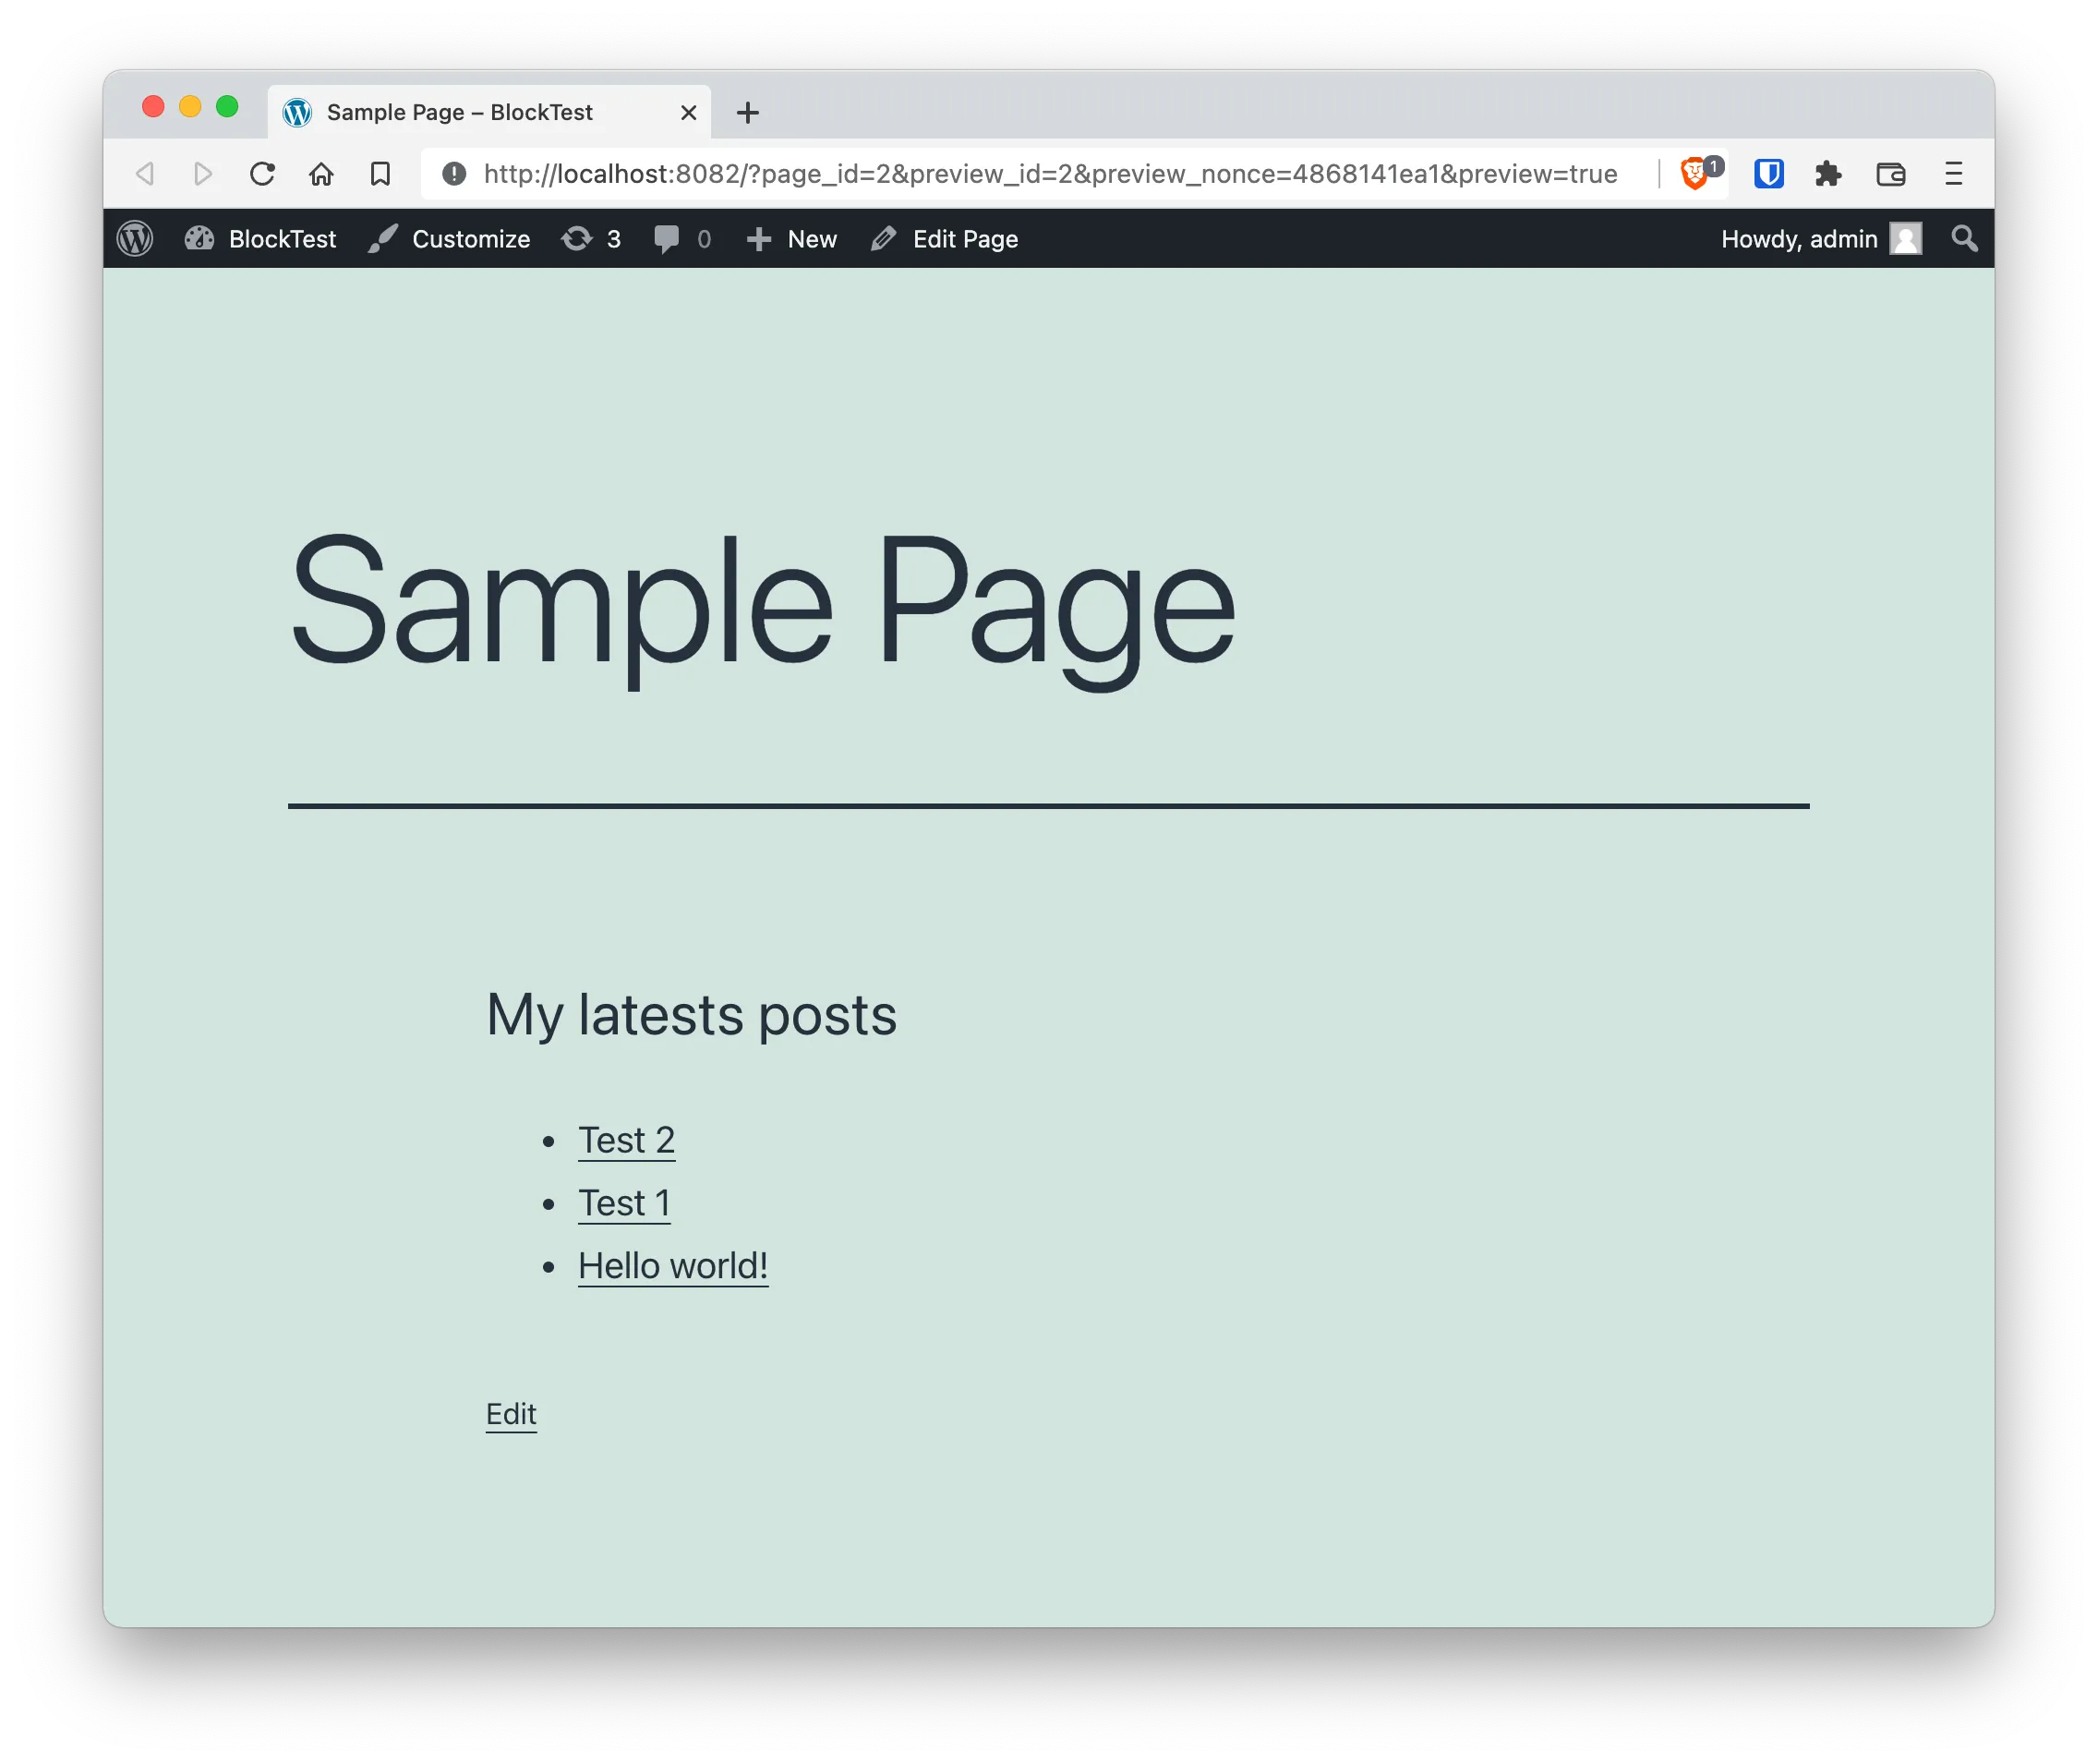
Rendering the latests posts in the font end
Now that we fixed the issue with the blockProps we can start creating the PHP function that renders the latests posts. For that we need to modify the gutenberg-multiple-blocks.php file. Specifically the callback function we created for rendering the posts:
<?php
// gutenberg-multiple-blocks.php

// ...

add_action('init', 'register_mylatests_block');

function register_mylatests_block() {
	register_block_type(
		__DIR__ . '/blocks/mylatests',
		array(
			'render_callback' => 'render_mylatests_block',
		)
	);
}

function render_mylatests_block($attributes, $content) {
	$posts = get_posts();

	if ( empty($posts) ) {
		return '<p>No posts found</p>';
	}

	ob_start();
?>
	<h3><?php esc_html_e('My latests posts') ?></h3>

	<ul class="mylatests-posts">
		<?php foreach ( $posts as $post ): ?>
			<li class="mylatests-posts-post">
				<a href="<?php echo esc_url( get_permalink($post->ID)) ?>">
					<?php echo esc_html($post->post_title) ?>
				</a>
			</li>
		<?php endforeach; ?>
	</ul>
<?php
	return ob_get_clean();
}
Displaying the latests posts on the back end
Displaying posts on the back-end is not so straight forward since we have to instruct Gutenberg to fetch the posts using the WordPress Rest API.
Fortunately, since this is something that we’ll be doing a lot, fetching data from theback-end to display in the Gutenberg editor, the WordPress developers created the apiFetch function that creates this requests with the necessary parameters.
The apiFetch function works as a wrapper of the fetch function. So is functionality and usage is pretty similar.
One last thing before getting into the code. Notice how the useState and useEffect function are part of the @wordpress/components package. This package is the complete React library but inside a WordPress package.
// blocks/mylatests/src/edit.js

import { __ } from "@wordpress/i18n";
import { useBlockProps, InspectorControls } from "@wordpress/block-editor";
import apiFetch from "@wordpress/api-fetch";
import { useState, useEffect } from "@wordpress/element";
import { Panel, PanelBody, SelectControl } from "@wordpress/components";

const postsPath = "/wp/v2/posts";
const catsPath = "/wp/v2/categories?hide_empty=true";

const Edit = () => {
  const [cats, setCats] = useState([]);
  const [posts, setPosts] = useState([]);

  useEffect(async () => {
    const fetchedCats = await apiFetch({ path: catsPath });
    setCats(fetchedCats.map((c) => ({ label: c.name, value: c.id })));
  }, []);

  useEffect(async () => {
    const fetchedPosts = await apiFetch({ path: postsPath });
    setPosts(fetchedPosts);
  }, []);

  if (posts.length === 0) {
    return <div {...useBlockProps()}>Loading posts</div>;
  }

  return (
    <>
      <InspectorControls>
        <Panel>
          <PanelBody>
            <SelectControl
              label={__("Select the category", "gutenberg-multi")}
              options={cats}
            />
          </PanelBody>
        </Panel>
      </InspectorControls>
      <div {...useBlockProps()}>
        <h3>My latests posts</h3>
        <ul className="mylatests-list">
          {posts.map((post) => (
            <li key={post.id}>
              <a href={post.link}>{post.title.rendered}</a>
            </li>
          ))}
        </ul>
      </div>
    </>
  );
};

export default Edit;
Notice that we’re doing more than is needed. We’re adding a Category selector to the inspector. That’s because we’ll be filtering posts by category in the next step.
Filter the posts
Again… The attributes parameter is how we communicate between the front and the back. And we have to start by declaring a new attribute in the blocks/mylatests/block.js file:
{
  "$schema": "https://schemas.wp.org/trunk/block.json",
  "apiVersion": 2,
  "name": "gutenberg-multi/mylatests",
  "title": "My latests news",
  "category": "widgets",
  "icon": "smiley",
  "description": "Custom latest posts",
  "keywords": ["latests", "news", "custom"],
  "textdomain": "gutenberg-multi",
  "version": "1.0.0",
  "editorScript": "file:./build/index.js",
  "attributes": {
    "category": {
      "type": "integer"
    }
  }
}
Next. Change the Edit component to filter out the posts depending on the selected category:
// blocks/mylatests/src/edit.js

import { __ } from "@wordpress/i18n";
import { useBlockProps, InspectorControls } from "@wordpress/block-editor";
import apiFetch from "@wordpress/api-fetch";
import { useState, useEffect } from "@wordpress/element";
import { Panel, PanelBody, SelectControl } from "@wordpress/components";

const postsPath = "/wp/v2/posts";
const catsPath = "/wp/v2/categories?hide_empty=true";

const Edit = ({ attributes, setAttributes }) => {
  const [cats, setCats] = useState([]);
  const [posts, setPosts] = useState([]);

  const { category } = attributes;

  useEffect(async () => {
    const fetchedCats = await apiFetch({ path: catsPath });
    setCats(fetchedCats.map((c) => ({ label: c.name, value: c.id })));
  }, []);

  const fetchPosts = async () => {
    const path = category ? `${postsPath}?categories=${category}` : postsPath;
    const fetchedPosts = await apiFetch({ path });
    setPosts(fetchedPosts);
  };

  useEffect(() => {
    fetchPosts();
  }, [category]);

  if (posts.length === 0) {
    return <div {...useBlockProps()}>Loading posts</div>;
  }

  return (
    <>
      <InspectorControls>
        <Panel>
          <PanelBody>
            <SelectControl
              label={__("Select the category", "gutenberg-multi")}
              options={cats}
              value={category || 1}
              onChange={(val) => setAttributes({ category: val })}
            />
          </PanelBody>
        </Panel>
      </InspectorControls>
      <div {...useBlockProps()}>
        <h3>My latests posts</h3>
        <ul className="mylatests-list">
          {posts.map((post) => (
            <li key={post.id}>
              <a href={post.link}>{post.title.rendered}</a>
            </li>
          ))}
        </ul>
      </div>
    </>
  );
};

export default Edit;
The list of changes are:
- We deconstruct the function parameters to access the
attributesandsetAttributes - We extract the
categoryfrom theattributesso we can watch it in theuseEffecthook and use it to send information back to the server - We change the
useEffecthook that extracted the posts to query the server, but only the posts of a specific category - We change the
SelectControlelement so it changes thecategorywhen the users selects a new one in the Inspector
The last think is to change the render_mylatests_block callback function in PHP to do the same filtering:
<?php
// ...

function render_mylatests_block($attributes, $content) {

	$args = wp_parse_args($attributes, array(
		'category' => 1
	));
	$posts = get_posts($args);

	if ( empty($posts) ) {
		return '<p>No posts found</p>';
	}

	ob_start();
?>
	<h3><?php esc_html_e('My latests posts') ?></h3>

	<ul class="mylatests-posts">
		<?php foreach ( $posts as $post ): ?>
			<li class="mylatests-posts-post">
				<a href="<?php echo esc_url( get_permalink($post->ID)) ?>">
					<?php echo esc_html($post->post_title) ?>
				</a>
			</li>
		<?php endforeach; ?>
	</ul>
<?php
	return ob_get_clean();
}
Notice how the $attributes variable just became useful!.
And with that we’re done. We created a static and a dynamic Gutenberg block.
Final toughts and Github repo
Theres is still a lot of things that you can do with Gutenberg blocks. Here I presented just a glimpse of what can be done.
The complete source code generated in this article can be accessed in https://github.com/marioy47/wordpress-gutenberg-multiple-blocks