Install and Manage PostgreSQL in a Mac with Homebrew
Table Of Contents
In this post I’ll show you how to install PostgreSQL on a Mac machine, as easy as possible, using Homebrew. And I’ll also show you some tips, tricks and gotchas.
As I bonus, I’ll show you how to access it directly in visual studio since most of the visualization tools are commercial or pretty cumbersome to use.
Install the package
This is very straight forward, specially if you have used Hombrew before:
brew doctor
brew update
brew install postgresql
export PGDATA='/usr/local/var/postgres' #check your package dir
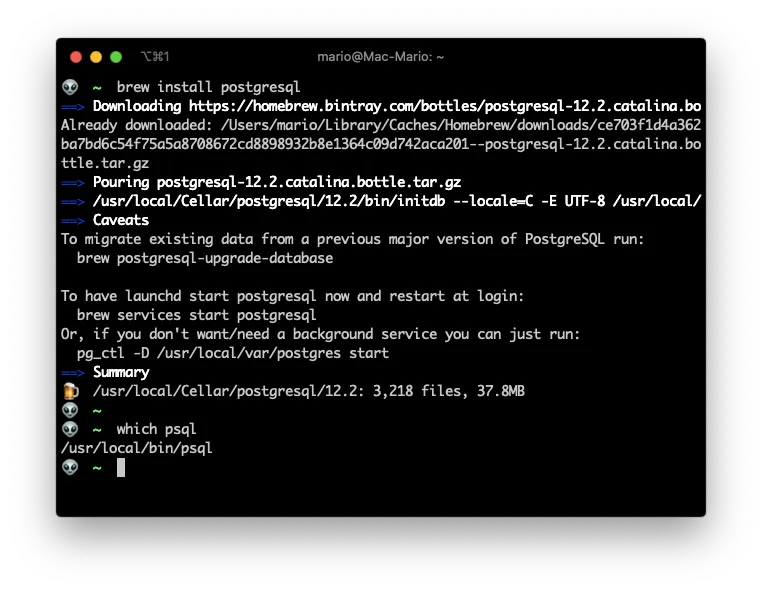
One word about that last step, the export step.
That’s a warning that the PostgreSQL installer issues: To export the PGDATA variable in case the command psql doesn’t work.
In my case I didn’t have to use it, but its a good idea to keep that in mind.
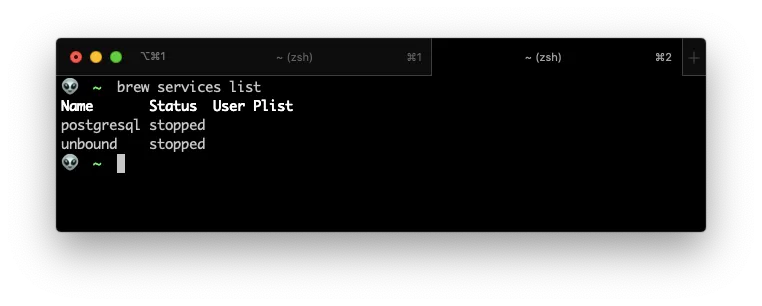
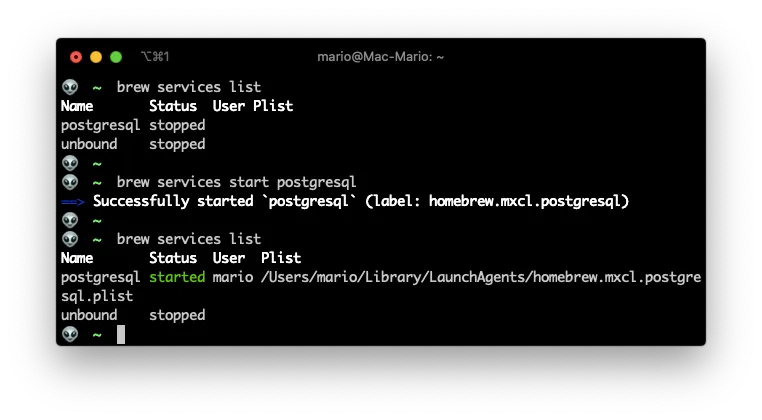
To verify that all whent well. Lest list the installed services and look for postgresql
Disable service auto start
If you don’t want/need a background service started at boot time, you can just run:
pg_ctl -D /usr/local/var/postgres start
In that way you have to manage the start/stop of the service by your self.
On a Mac, a PostgreSQL server without connections do not consume a lot of resources so its pretty safe to have the service start automatically at boot time.
Service management
The advantage of using Homebrew is that we can use the brew command to manage the service as opposed of the more traditional lanchctl command that Mac OS uses.
So to start the service, just type:
brew services start postgresql
And to stop it…
brew services stop postgresql
Common errors
This are a couple of solutions to common errors
You do not have any databases
After install you should be able to list the databases from the command line:
psql -l

But it possible that you get an error saying that you do not own any database. The solution would be to create your own database:
createdb `whoami`
Postgres role not present
Also, if you are getting an error about the postgres role not being present, then create the PostgreSQL User postgres.
createuser -s postgres
PgAdmin
The most complete tool for managing your databases is PgAdmin
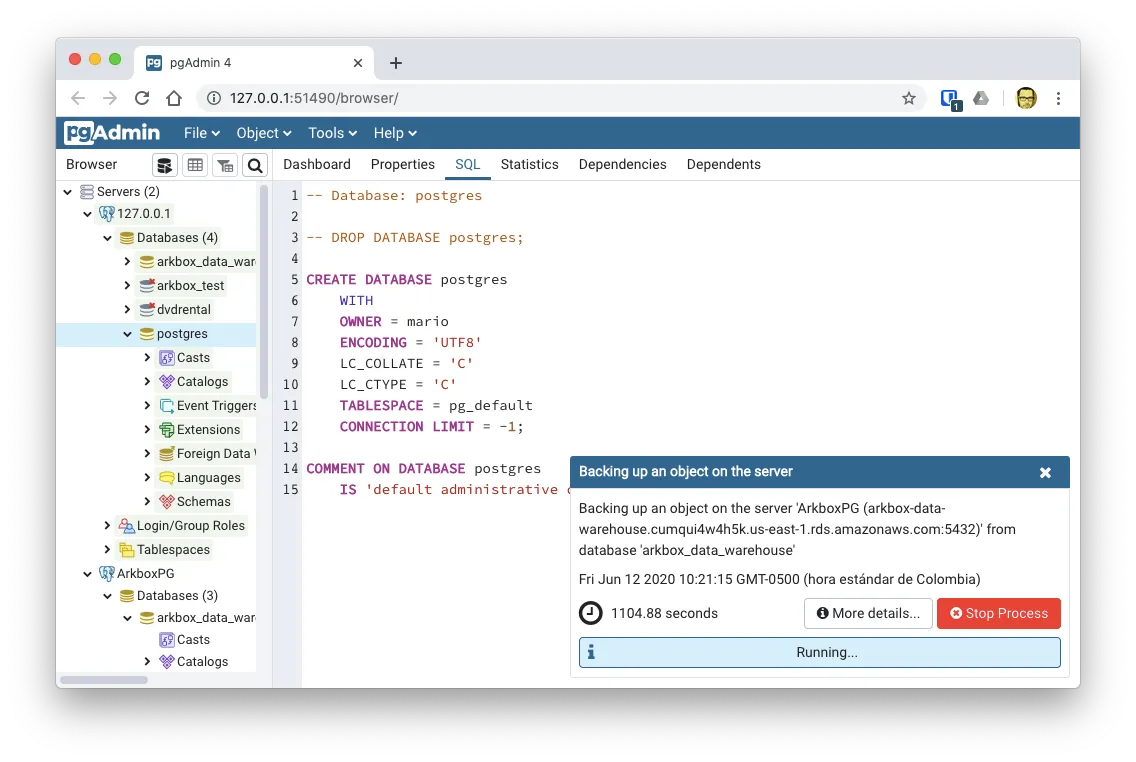
As you can see it run in a browser window.
To install it just issue
brew install pgadmin4
I recommend this tool in 2 use cases:
- Backup a database
- Upload text files to a table
Even tough you can do queries with this tool, I recommend using Visual Studio Code plugins for that.
Restore a database
If you want to create a local development database from a production database, the best option (or at least the fastest) its to create a local db from a backup of production.
If you followed the previous section, you might have an .sql file with the backup.
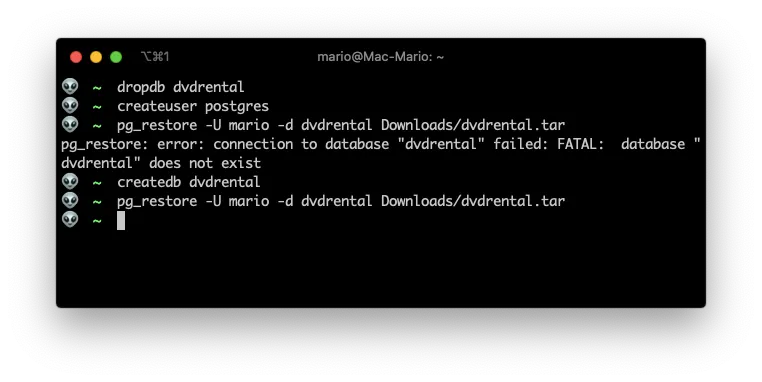
So in order to restore that database, you first have to create a new one in your local machine:
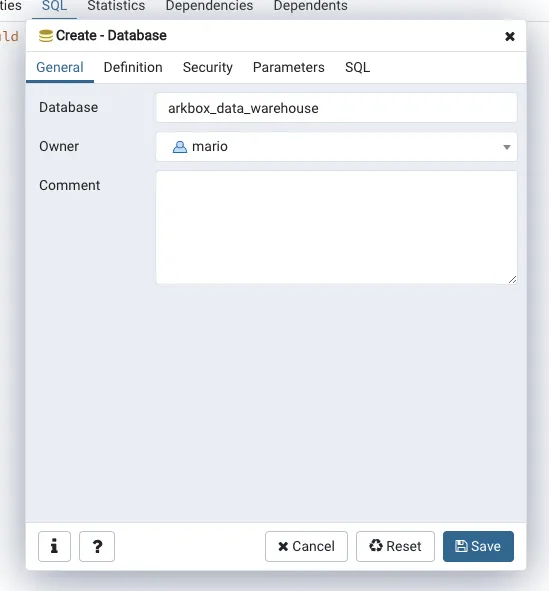
Then you have to start the import by selecting the backup file. and click on Restore.
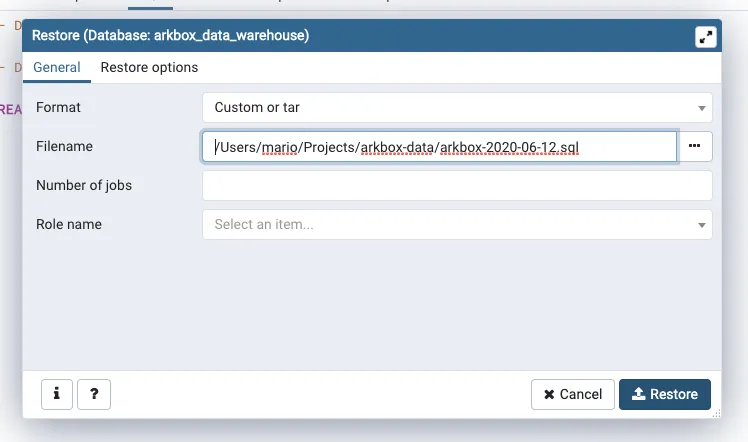
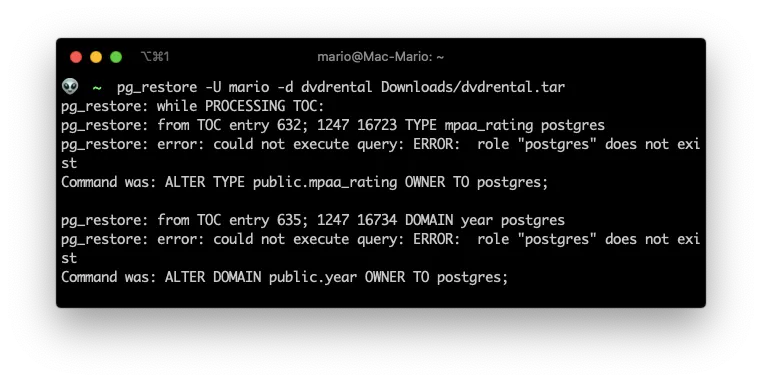
One important thing to notice. The restoration process shows warnings as errors.
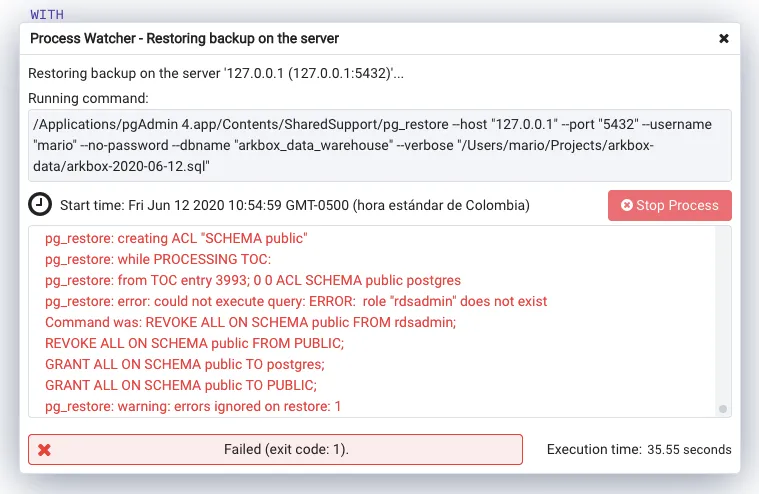
In this case, I have a warning about a role not beingh present. But the database did import correctly.
Import a csv file in a table
If you have a text file (csv or tsv) you can import it directly to a table using PgAdmin
Just right click on the table you want to import it to, and select import. You’ll get the following dialog:
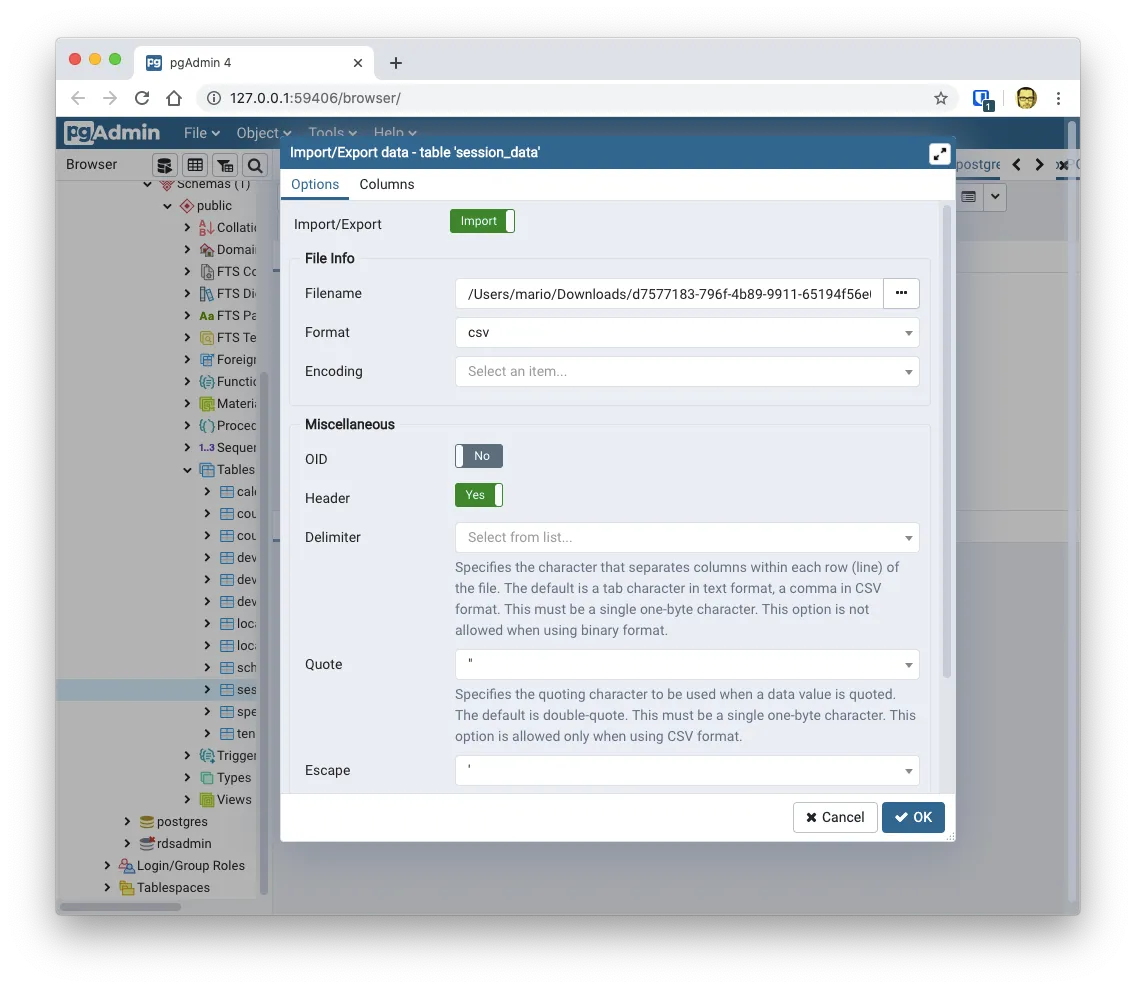
Here yo have to specify
- Which file you want to import
- If the first row are the column titles (
Headeroption) - How is the data quote (by
"or by') - If there is a keyword for empty values (By default is
\N)
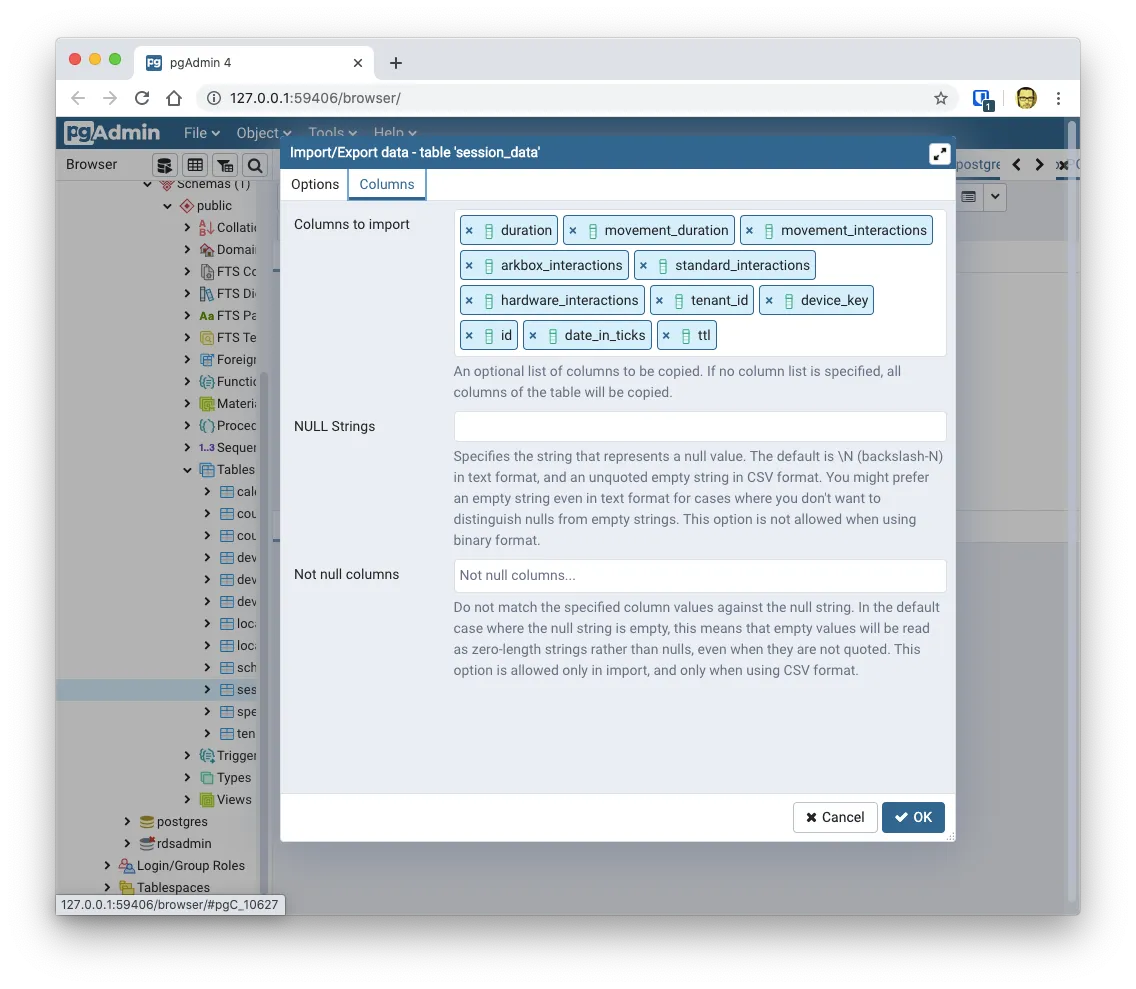
By going to the Columns tab on that same dialog, you can select the order in which the fields are on the csv file.
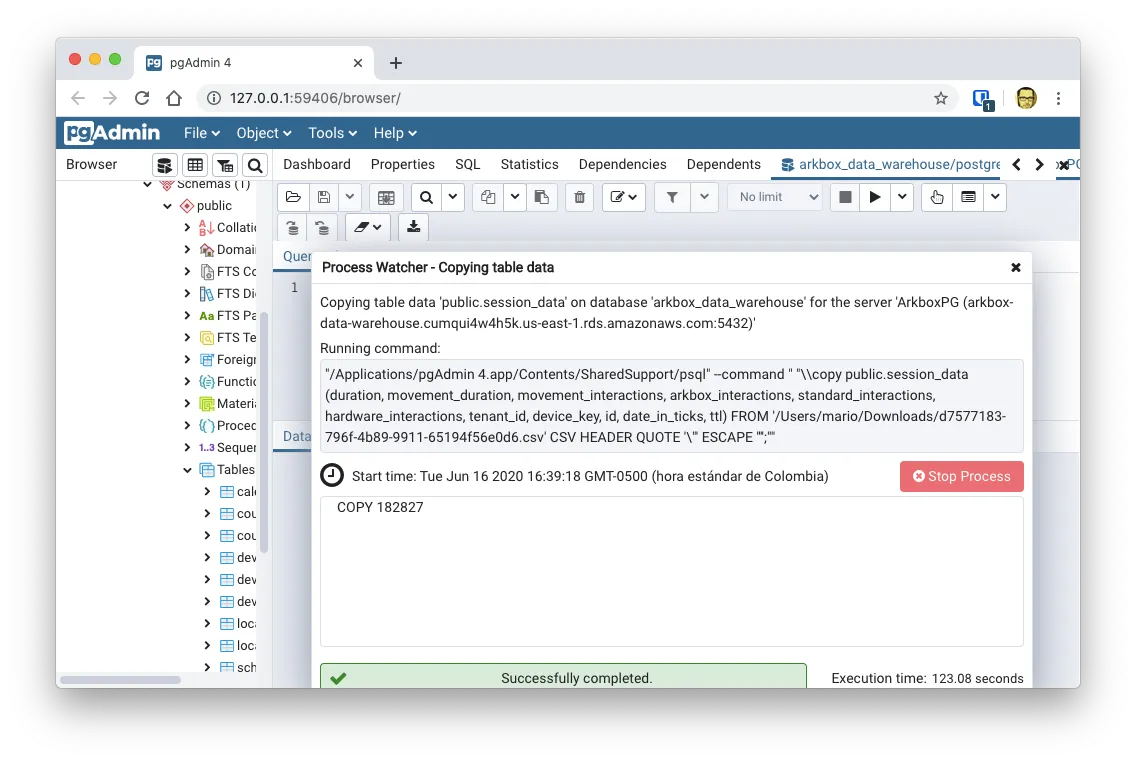
And finally, verify how many records got imported
Visual Studio Code Extensions
There are several extensions that you can use to connect to PostgreSQL using visual studio code. There is even one created by Microsoft…
There are 2 that I recommend:
- PostgreSQL by Chris Kolkman which is great but only works on PostgreSQL
- SQLTools - Database tools from Matheus Teixeira which is even better and it actually manages several databases.
You can install either one using the extension manager inside Visual Studio Code. Or you can install it from the terminal with the following commands:
# PostgreSQL
code --install-extension ckolkman.vscode-postgres

# SQLTools
code --install-extension mtxr.sqltools
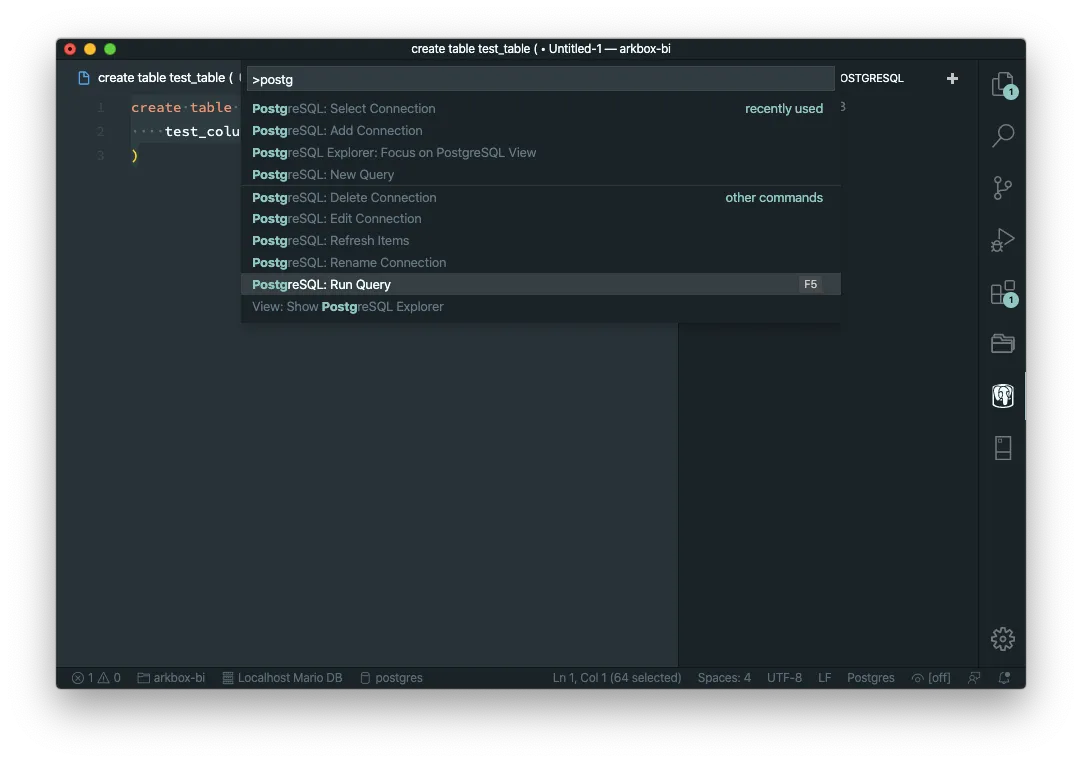
PostgreSQL Extension
Before we get into creating a connection, let me give you the most practical tip about this extension: Use F5 to execute a query 😅
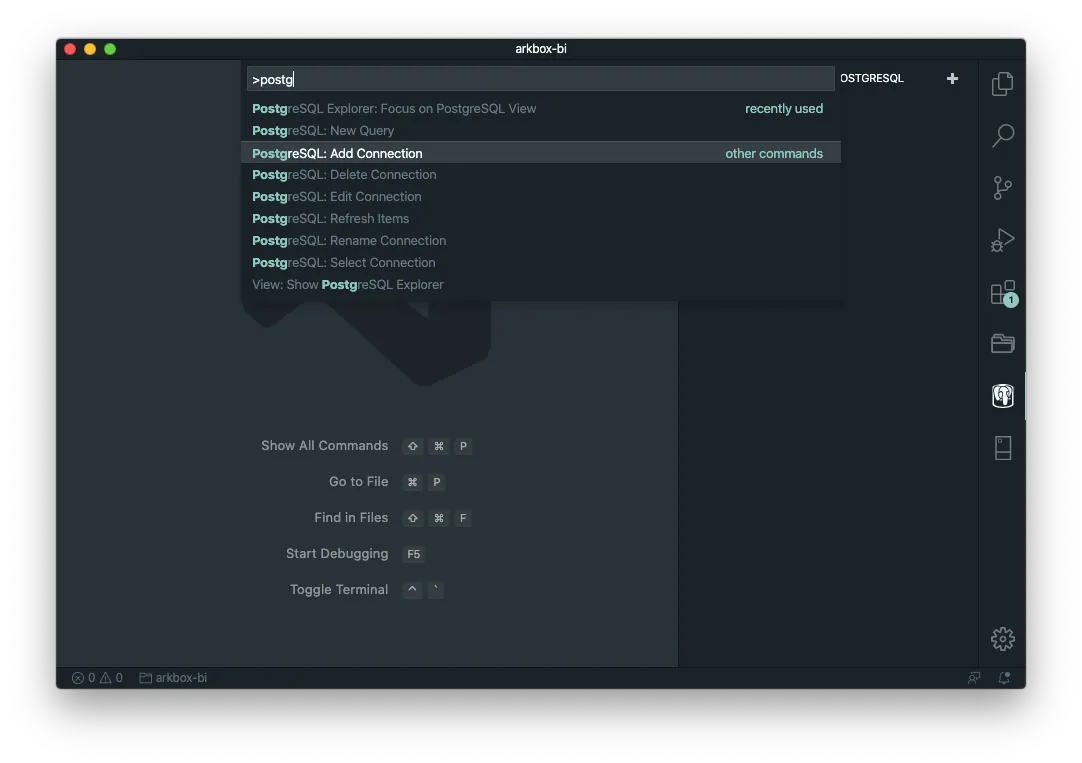
Setup and connect
Just create a connection
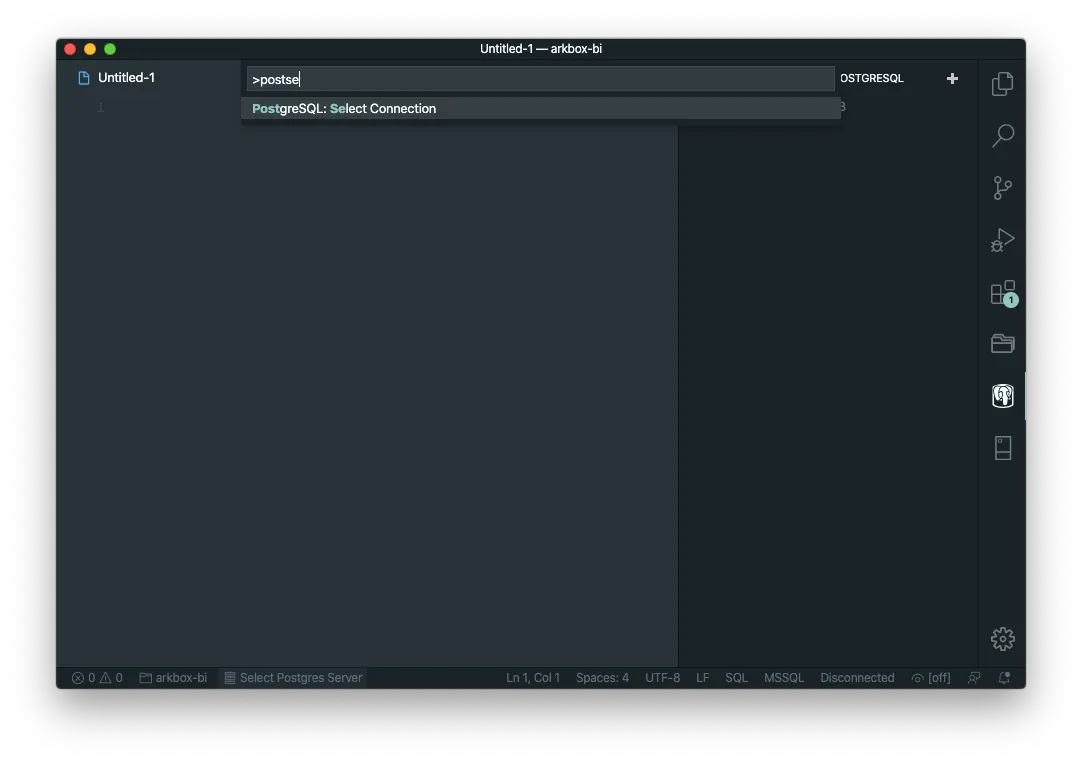
Or if you already have a connection, just select one:
Explorer
If you have objects on your database, you can use the explorer to view them:

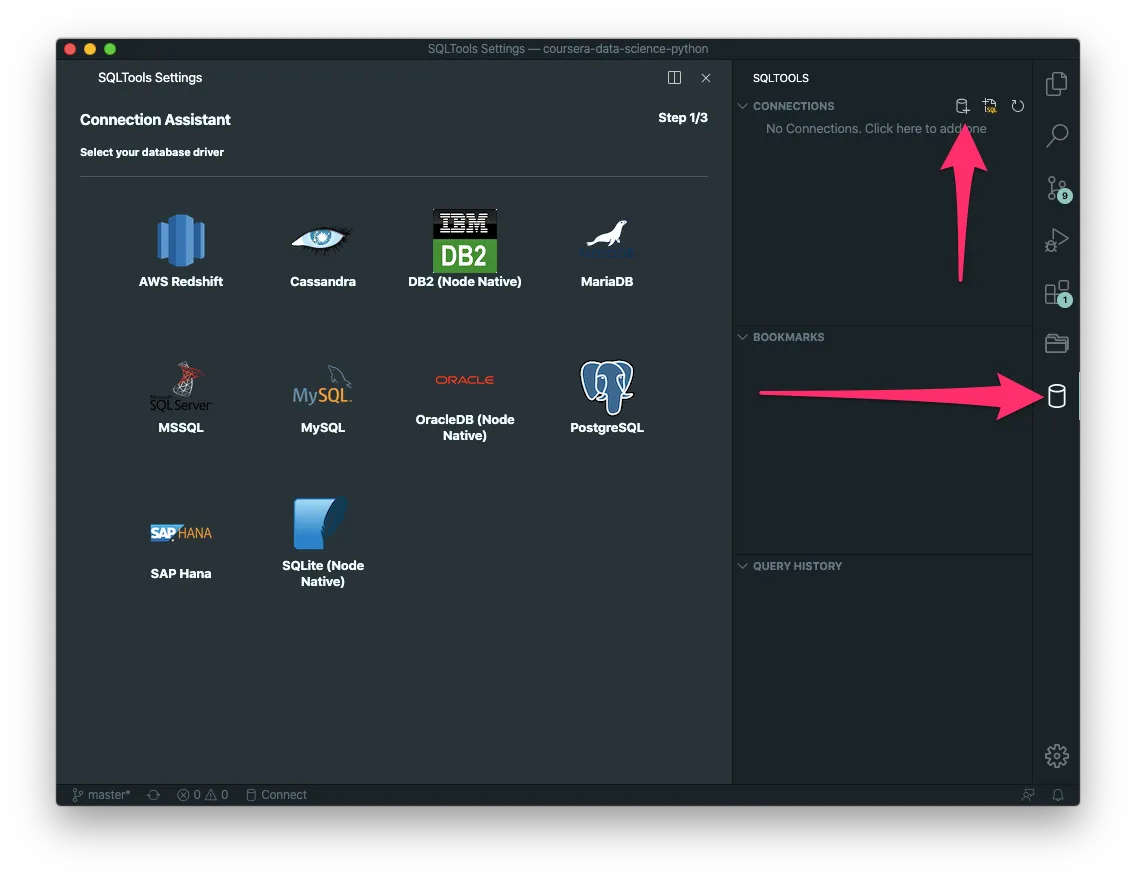
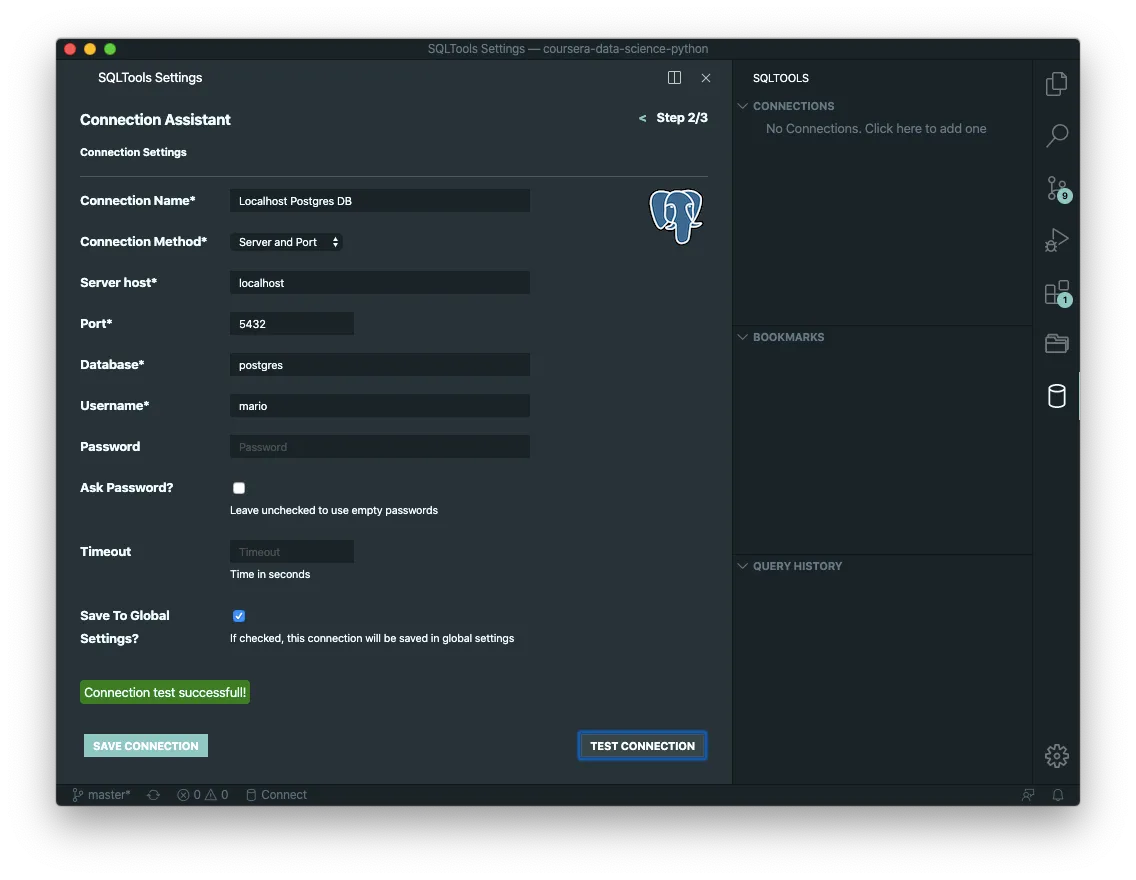
SQLTools Extension
This one is a little more straight forward to use. And again… The most practical tip I can give you with this extension is that you can execute a query by selecting a query and then executing ⌘E⌘E (CMD-E twice).
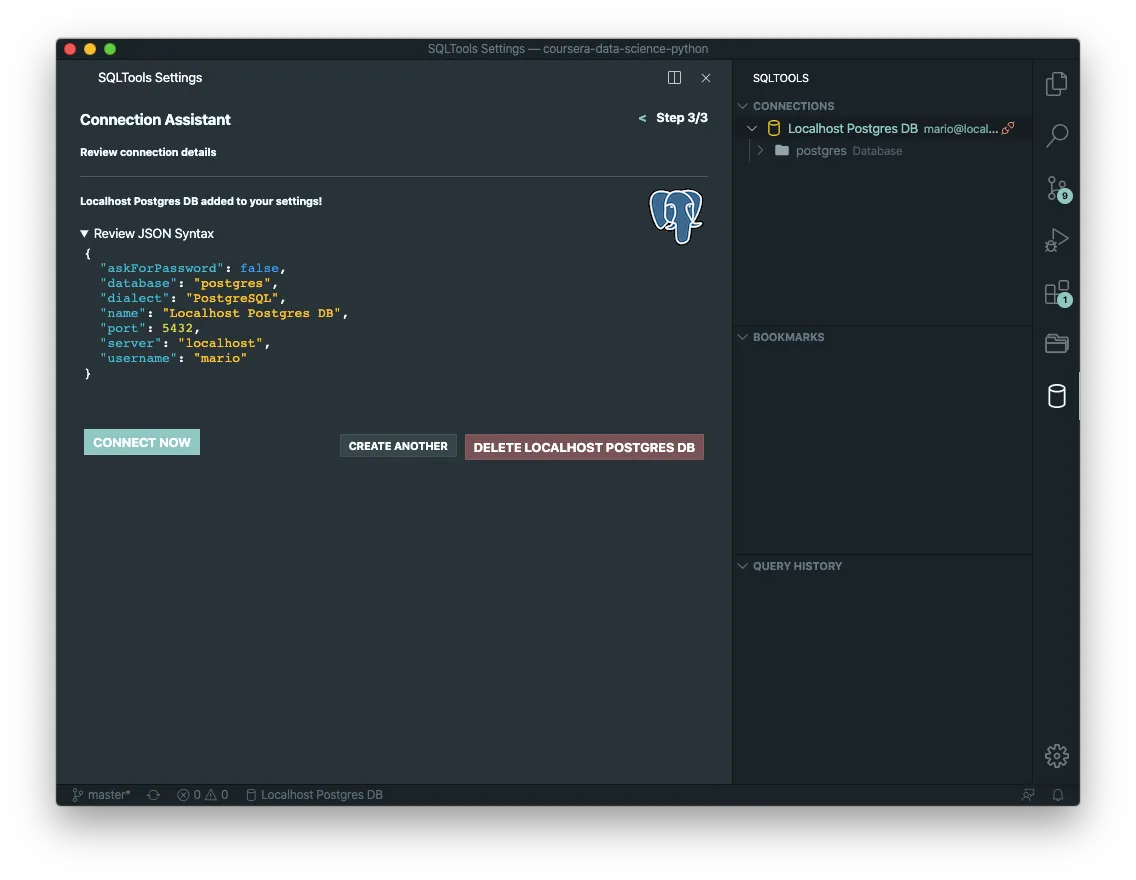
Create a connection
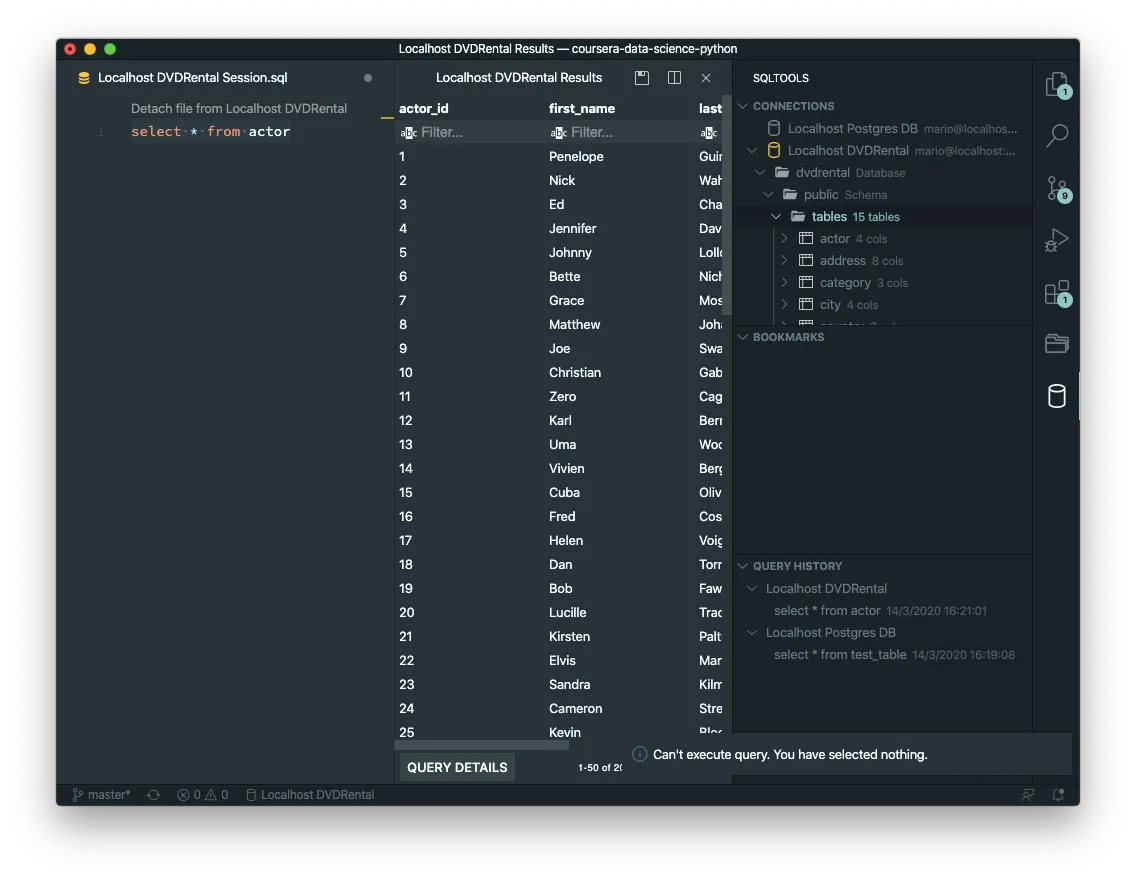
Execute a query
Remove completely PostgresSQL
If your done with your development or if you are receiving error with your PostgreSQL service, then you might need to delete and re-install your PostgreSQL.
The problem lies with the fact that most of the time re-installing doesn’t solve the problem.
In that case you have to completely delete the package and the database files.
brew uninstall postgresql
rm -rf /usr/local/var/postgres
rm ~/.psql*
rm ~/.pgpass